How to
Change a flyer's colours and fonts with themes
One click recolours the whole flyer. 21 themes over 88 palettes, plus 27 fonts you can swap independently, and every element restyles together instead of one box at a time.
Flyers3 min readUpdated
This guide shows you how to change the look of a whole flyer in one click, and how to swap its font separately.
Recolouring a design by hand means finding every heading, every panel, every badge. A theme does all of it at once, and keeps the result readable.
Open the Theme panel
In the flyer builder, click Theme in the top bar. The panel opens with two tabs, Themes and Fonts.
Themes are grouped into Top picks first and More palettes below. Each row shows a colour strip, the theme name, and its id underneath, so you can choose on the colours rather than the name. There are 21 named themes drawn from 88 palettes.
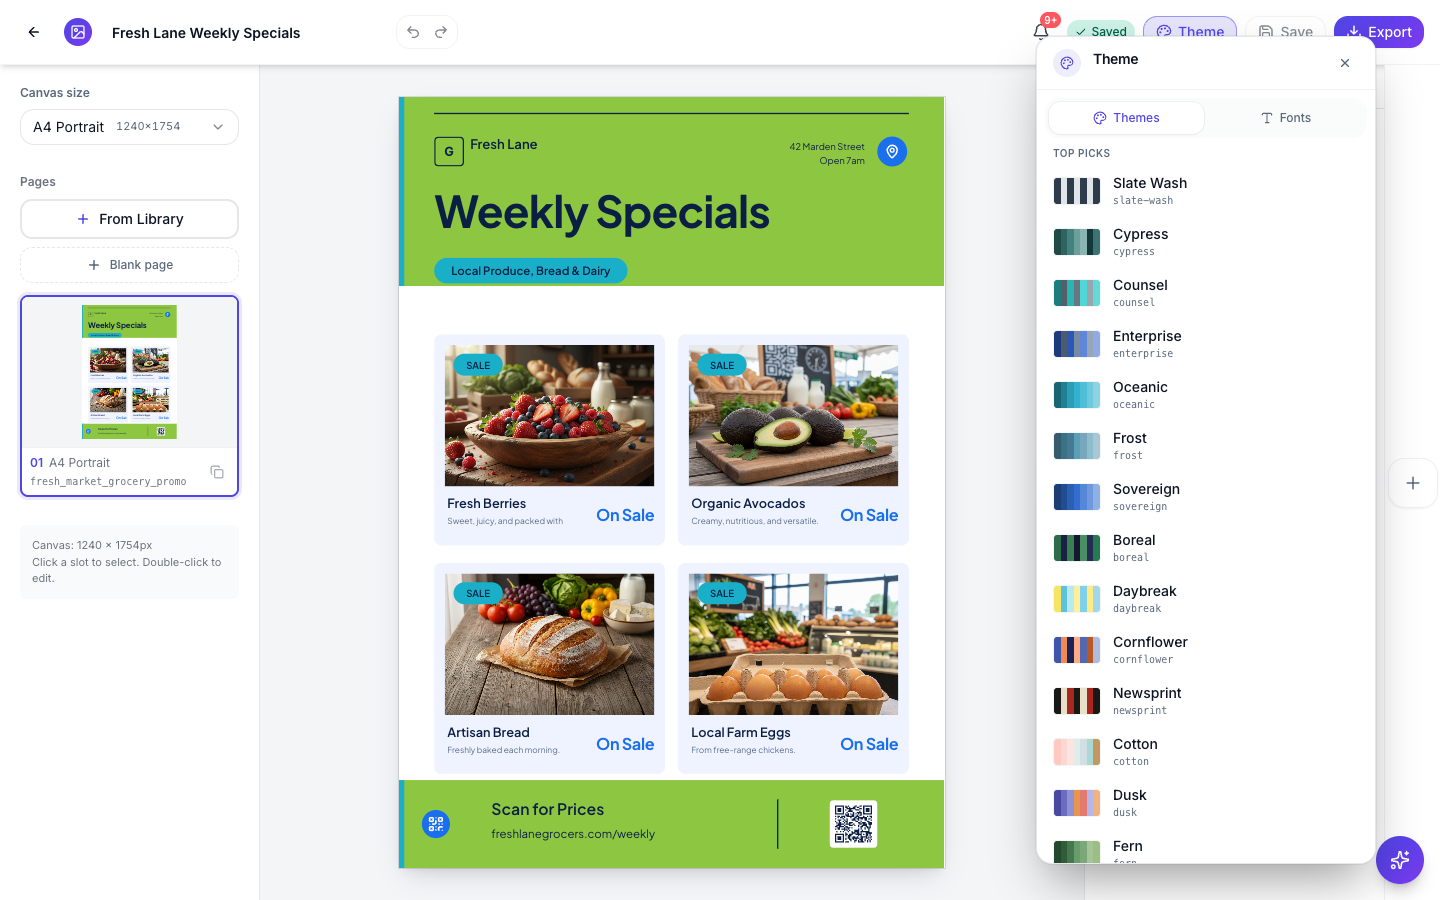 Each row is a real palette. The strip on the left is what your flyer will wear.
Pick a theme and watch the whole flyer change
Click a row and everything restyles at once: backgrounds, headings, badges, card fills, the icons, even the QR tile. Nothing is left behind on an old colour, because no element carries a fixed colour of its own. Each one asks the palette for its role, so a new palette answers differently.
That is also why the result stays readable. Text colours are paired with the backgrounds they sit on, so a light theme and a dark theme both come out legible rather than leaving grey text on a grey panel.
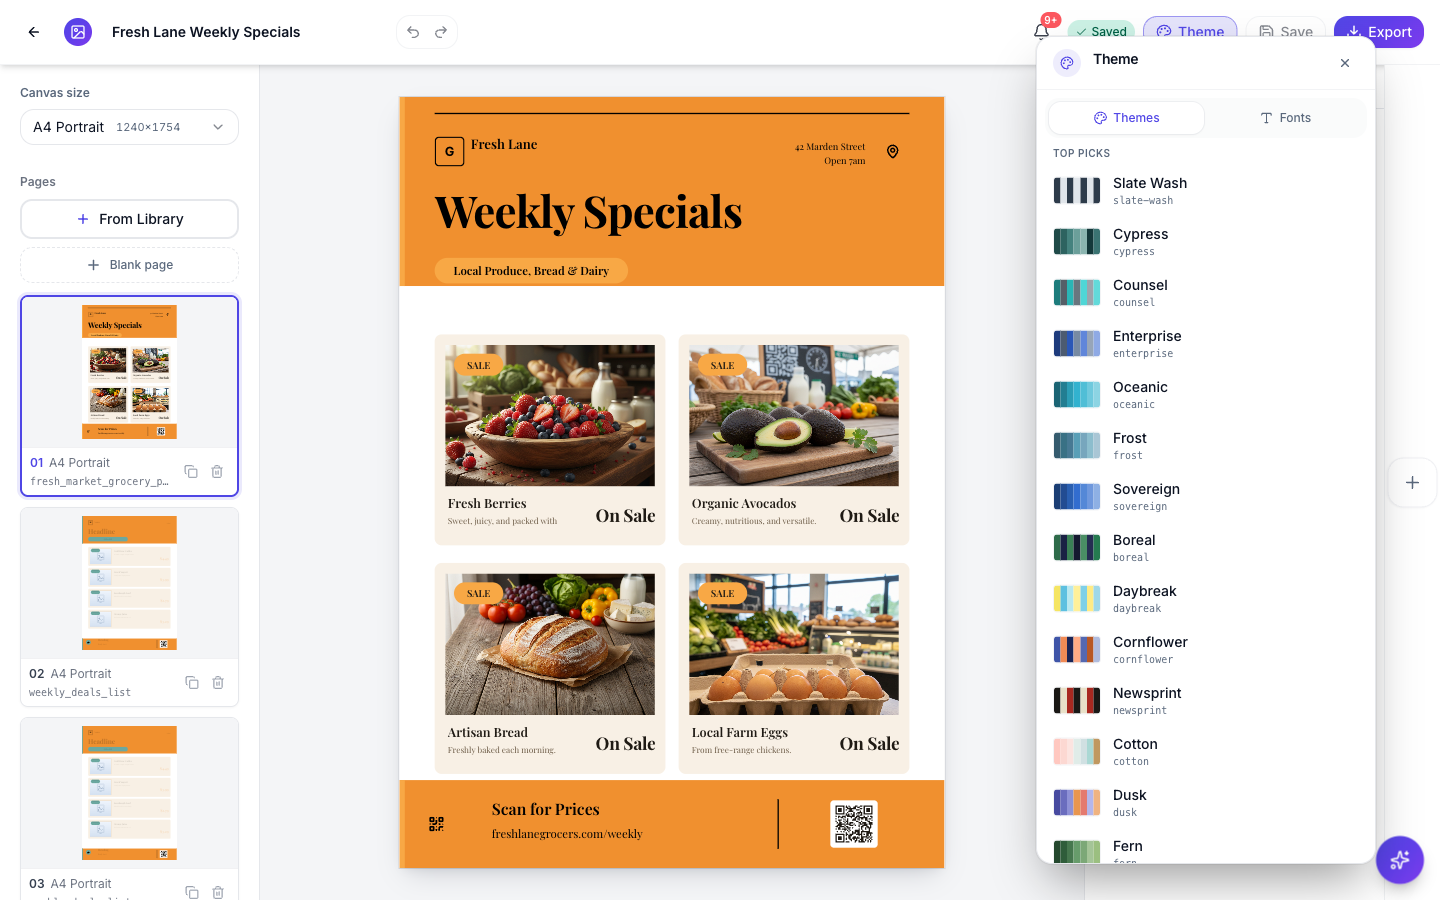 Same flyer, same content, one click. Even the typeface changed, because it belongs to the theme too.
The theme belongs to the whole flyer, not to one page, so a multi-page flyer restyles together and any page you add later comes in wearing the same theme.
Swap the font on its own
Each theme comes with its own typeface, but you are not stuck with it. Open the Fonts tab and the first row is Theme default with the name of the font the theme chose. Under it are 27 fonts, each row drawn in its own typeface so you are reading the real thing rather than a name.
Pick one and only the type changes. The palette stays exactly as it was. Go back to Theme default to hand the choice back to the theme.
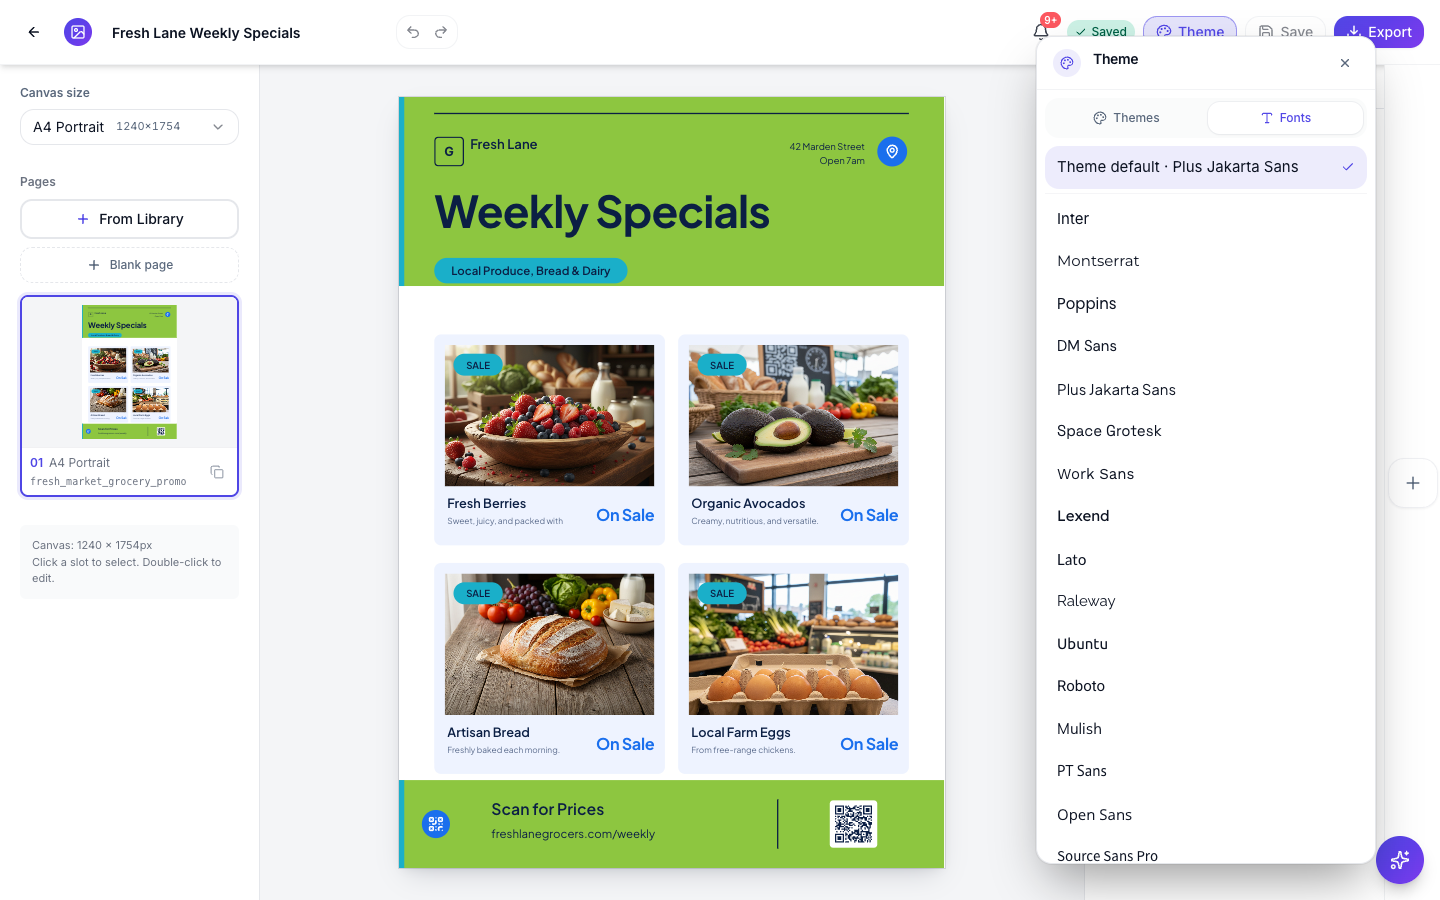 Every row is set in the font it names, so the list is the preview.
Try a few before you settle
Theme switching is cheap, so it is worth clicking through four or five. A grocery promo reads differently in Cypress than in Terracotta, and the one that suits your business is usually obvious the moment you see it on your own content.
When it looks right, click Save in the top bar. Undo does not cover theme changes, so if you preferred an earlier look, open the panel and click that theme again.
Ready to try it yourself?
Start free. Describe what you need and let OneCraft do the first draft.
Get startedSee it in the product
More flyers tutorials
- Add charts and diagrams to a flyerPut real data on a flyer. Ten chart types, SWOT and 2x2 matrices, funnels, Venn diagrams, org charts, Gantt timelines and world maps, all editable and styled by your theme.
- Add or replace the images in a flyerDescribe the photo you want and OneCraft generates it at the right shape for the slot, or upload your own. Every image you make stays in the flyer to reuse.
- Choose the template, theme and size for your flyerThe flyer generator has four choices above the Generate button: language, theme, format and an optional template. Here is what each one changes, and what you get back.