How to
Add or replace the images in a flyer
Describe the photo you want and OneCraft generates it at the right shape for the slot, or upload your own. Every image you make stays in the flyer to reuse.
Flyers3 min readUpdated
This guide shows you how to change the pictures in a flyer, either by describing the one you want or by uploading your own.
The pictures decide whether a flyer looks like a real business or a template someone forgot to finish. They are also the part people give up on, because finding the right photo is slow.
Click the image, get the image panel
Click any photo on the canvas. The inspector on the right switches to Image and shows what that slot is for, which is worth reading, because it tells you what the design expects to see there.
Underneath are three ways to fill it: Upload, Generate with AI, and Your images.
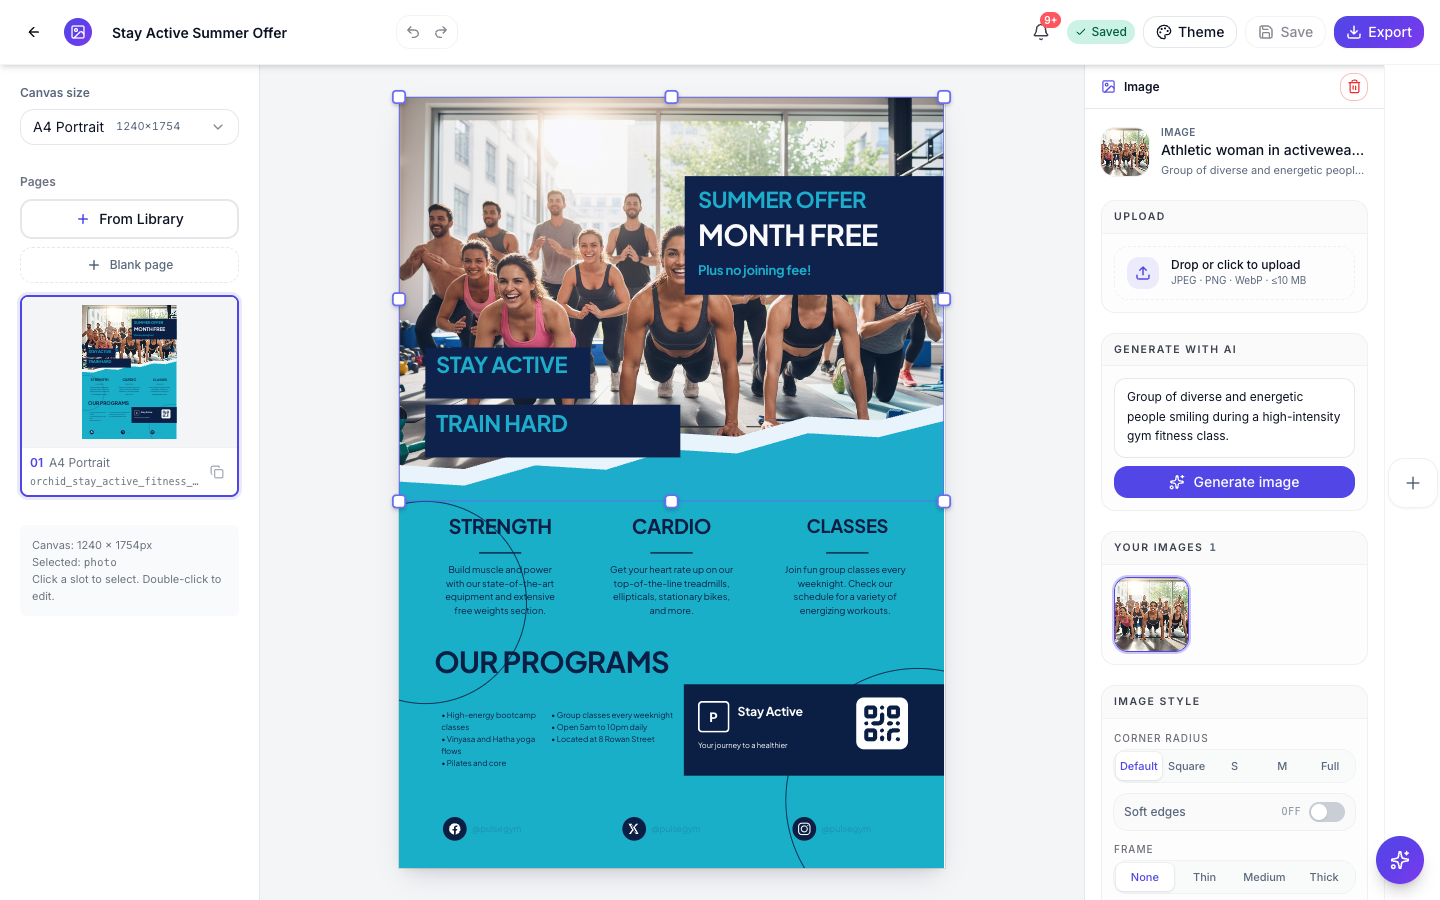 The prompt box already holds the description OneCraft used, so you can edit it rather than start over.
If the panel is greyed out with a padlock, the flyer has not been saved yet. Images are stored against the flyer, so click Save once and the panel comes alive.
Describe the picture you want
Type into Generate with AI and click Generate image. The generated picture arrives at the shape of the slot, so a tall slot gets a tall image rather than a square one squeezed in.
Say what is in frame, then how it should feel. “Two people lifting dumbbells in a bright modern gym, tall windows, warm morning light, candid moment” gives a usable picture. “Gym photo” does not. Prompts can run to 2,000 characters, so there is room to describe the setting, the light and the mood.
If the first result is not right, edit the prompt and generate again. Each run replaces the picture on the canvas and keeps the previous one in Your images, so nothing you liked is lost.
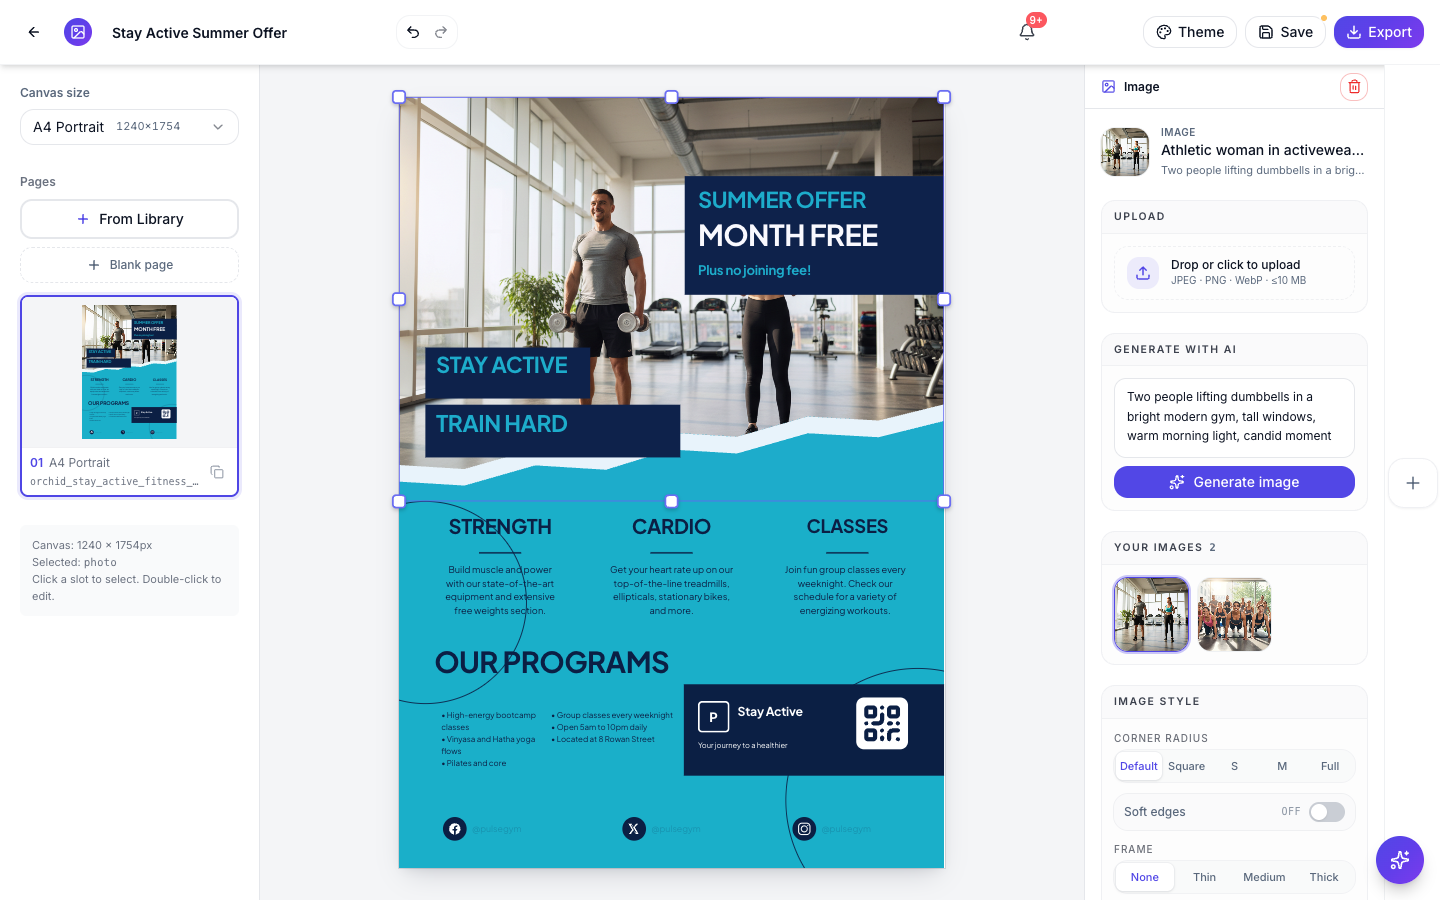 The new photo dropped straight into the hero slot, and the old one is still there to go back to.
Or upload your own
Drop a file into Upload, or click to browse. It takes JPEG, PNG and WebP up to 10 MB. This is the one to use for real photos of your shop, your team or your product, which is almost always better than a generated stand-in when you have them.
Reuse what you already made
Your images holds every picture uploaded or generated in this flyer, with a count. Select another slot, click a thumbnail, and that picture goes in. It is the quickest way to run the same photo across a multi-page flyer.
Hovering a thumbnail shows a delete button. Deleting removes the picture everywhere it was used, so those slots fall back to their placeholder.
Style the image
The same panel has Image style: a corner radius from square to fully round, soft edges to fade the picture into the background, and a frame in thin, medium or thick. Reset to original at the bottom puts back the picture the design shipped with.
One limit worth knowing: this panel is for images that stand on their own. Photos that sit inside a card grid, like the product tiles on a price list, belong to that list and cannot be swapped from here.
Once your pictures are right, create a flyer for Instagram and print covers exporting the finished flyer.
Ready to try it yourself?
Start free. Describe what you need and let OneCraft do the first draft.
Get startedSee it in the product
More flyers tutorials
- Add charts and diagrams to a flyerPut real data on a flyer. Ten chart types, SWOT and 2x2 matrices, funnels, Venn diagrams, org charts, Gantt timelines and world maps, all editable and styled by your theme.
- Change a flyer's colours and fonts with themesOne click recolours the whole flyer. 21 themes over 88 palettes, plus 27 fonts you can swap independently, and every element restyles together instead of one box at a time.
- Choose the template, theme and size for your flyerThe flyer generator has four choices above the Generate button: language, theme, format and an optional template. Here is what each one changes, and what you get back.