How to
Make a promo video with AI voiceover
Describe your idea, let OneCraft build a styled video with scenes and a voiceover, then add scenes, tune the narration, and export a finished clip.
Promo Videos3 min readUpdated
This guide shows you how to make a promo video with AI: describe your idea, let OneCraft build the scenes and the voiceover, then edit everything and export an MP4.
A short promo video is one of the best ways to get attention, and one of the most tedious things to edit from scratch. Here you start with a cut that already plays, then make it yours.
Describe your promo video
Tell the video generator what you’re promoting, who should care, and what you want people to do at the end. A clear brief is what turns the output into one coherent story instead of a pile of disconnected clips.
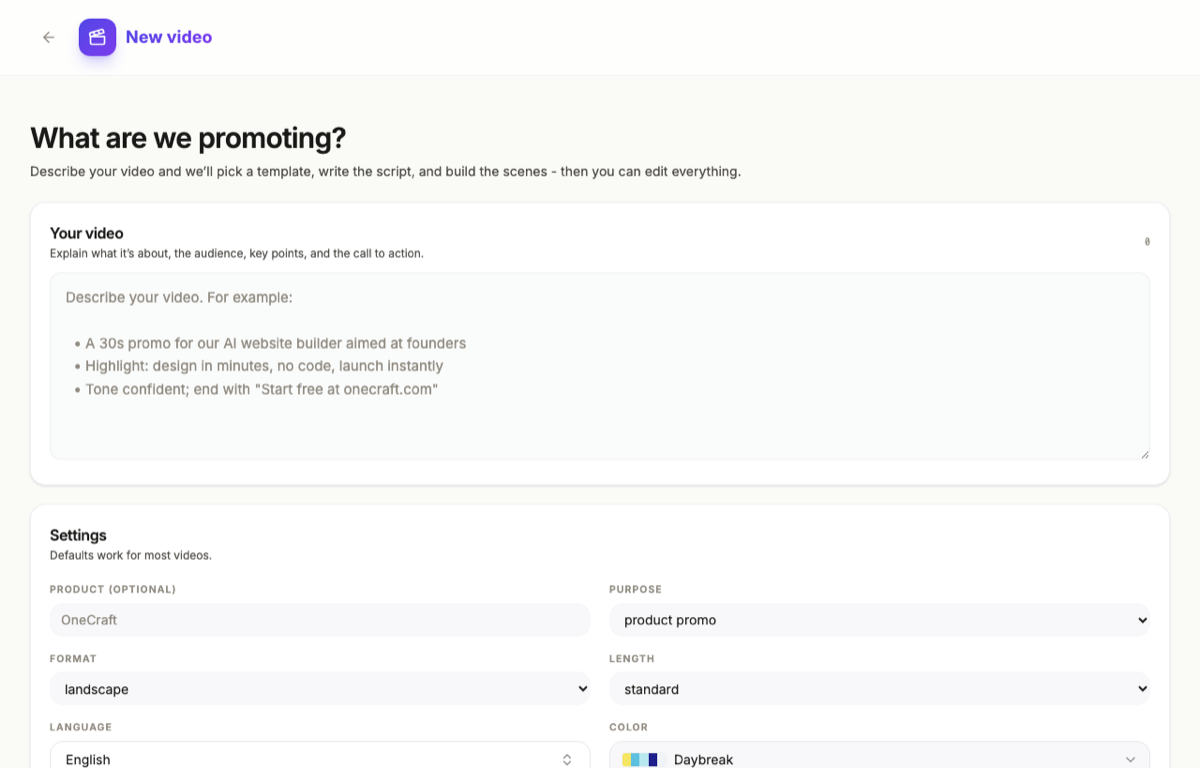 Describe the video, pick promotional or tutorial, and set the format, length and colour.
Let OneCraft build the scenes
OneCraft drafts the whole sequence for you: a hook, the problem, your solution, features, proof, and a call to action, each as its own scene with on-screen text. Press play in the preview and the first cut already runs end to end.
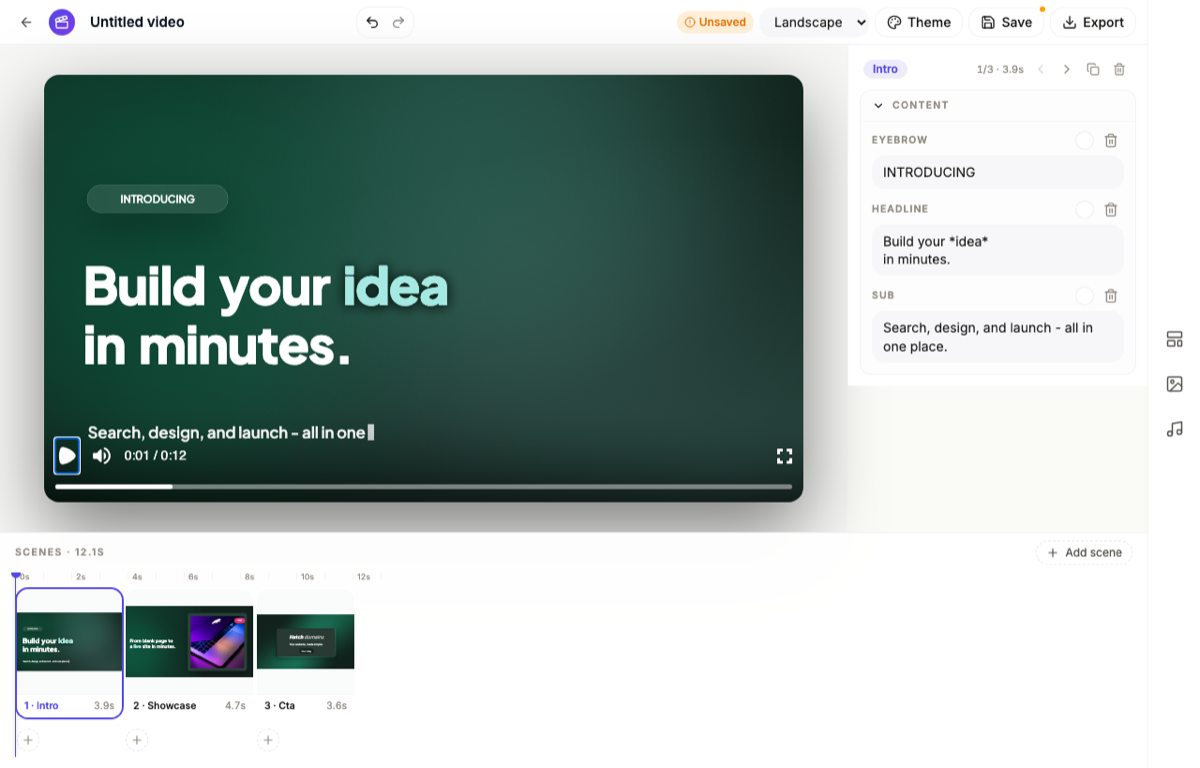 Your first cut on the timeline. Every scene, every line and the voiceover are editable.
Add and arrange scenes
The timeline along the bottom is where the video takes shape. Click Add scene and pick from hundreds of designed scene templates: intros, feature grids, stats, testimonials, calls to action. Filter by role to find the right kind fast.
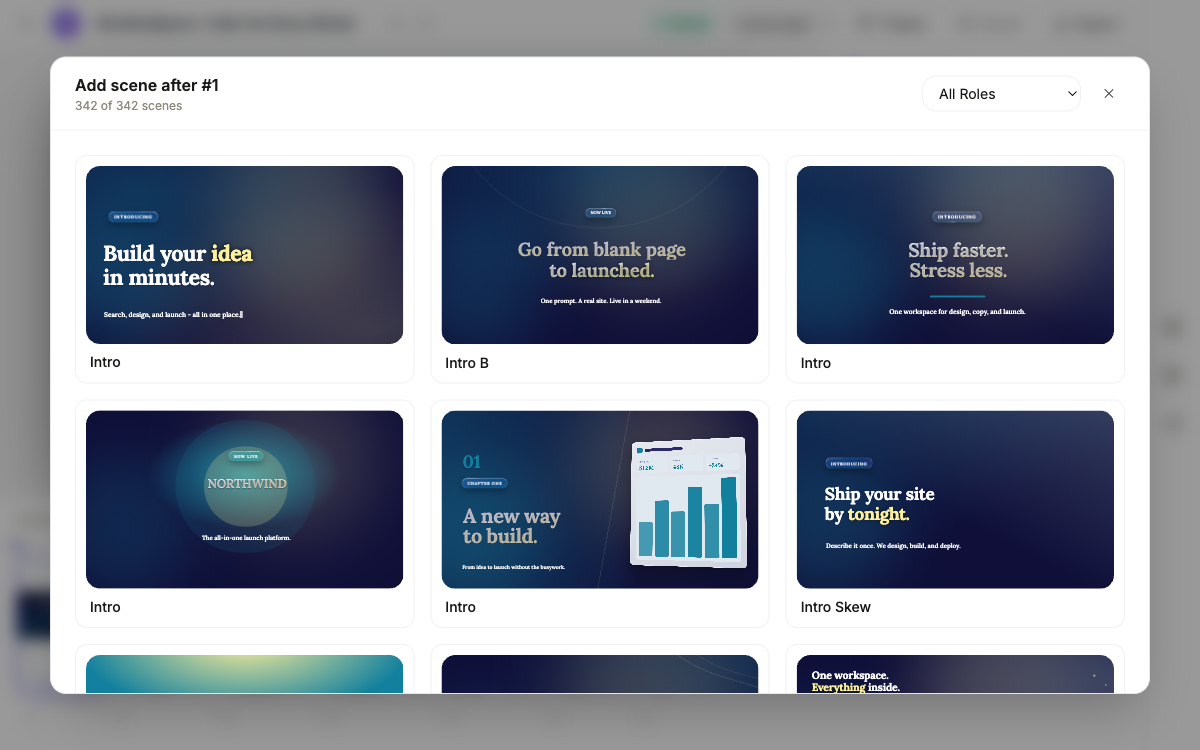 Hundreds of ready-made scenes. Pick one and it drops in right after the selected scene.
Rearranging is direct: drag a scene to move it, hover for duplicate and delete, and drag a scene’s right edge to change how long it holds. Selecting a scene opens it in the side panel, where you edit the text, swap or generate images, and adjust each element’s colour.
Add a voiceover to each scene
Every scene can carry its own narration. Click the voiceover chip under a scene, write what the narrator should say, pick a language and a voice, and hit Generate. The voice is created in seconds, and you can regenerate it any time you change the script.
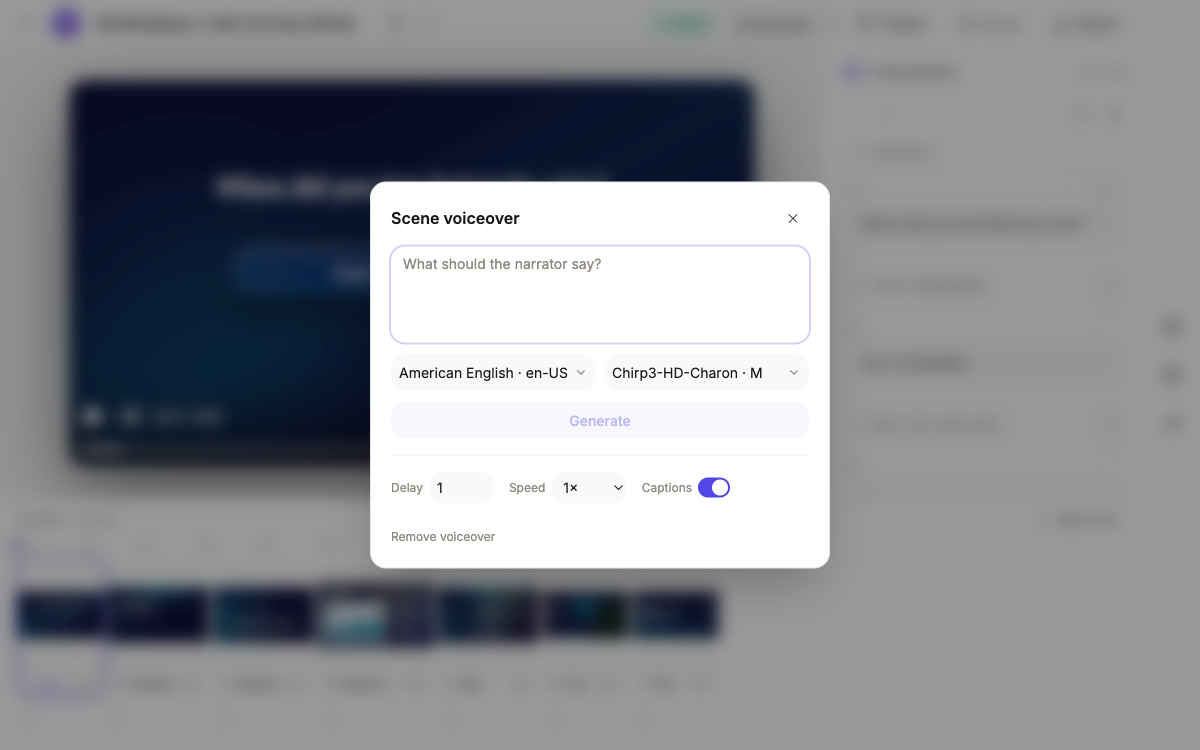 One script per scene. Choose the language and voice, then Generate.
There are finer controls too: delay the narration a beat, change its speed, and toggle on captions so the words appear on screen. If you add a music track, it automatically ducks under the narration.
Style the video and export the MP4
Set the overall look from the toolbar: Theme controls colours, dark or light mode, and fonts, and the right rail holds backgrounds and a music library. Pick the format that fits where it’s going, landscape for YouTube, vertical for stories and reels, and see exporting for YouTube, Reels and TikTok for the sizes. Then click Export and a finished MP4 renders in a few minutes, ready to post or send.
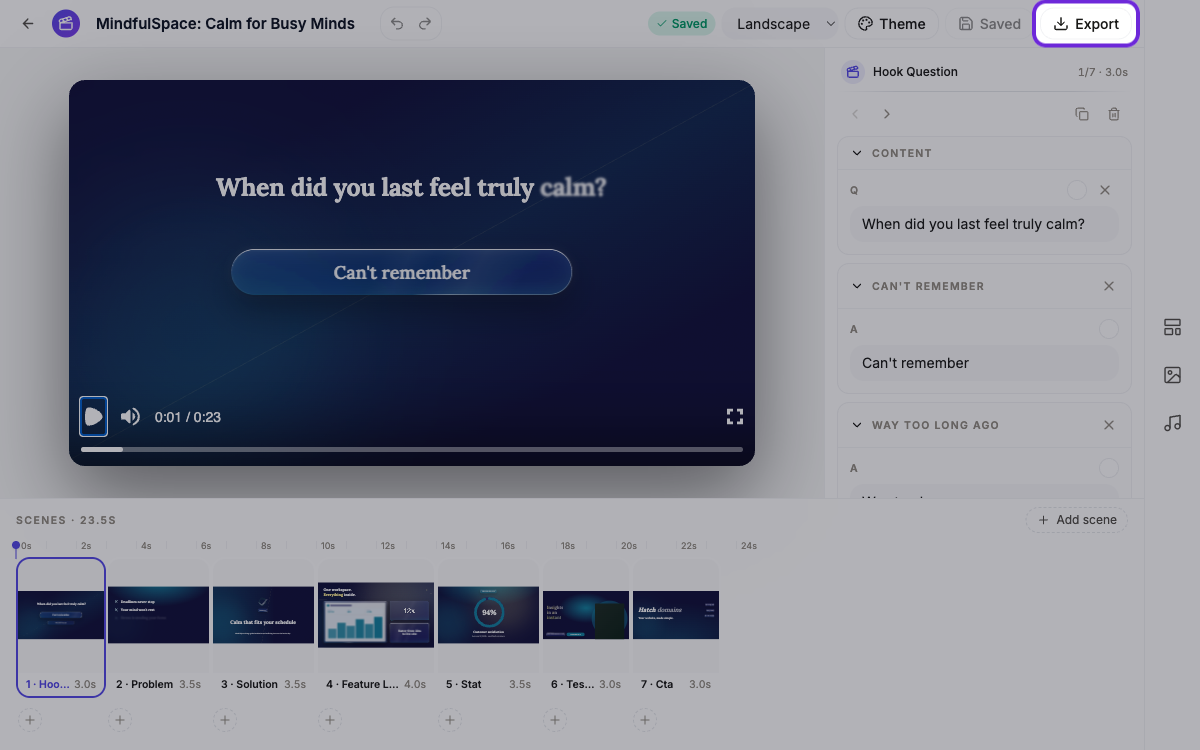 Pick landscape or vertical, then Export renders the finished MP4.
Add your brand to the video
At the bottom of the Theme panel’s Colors tab there is a Brand kit with two fields. Wordmark is your name in text, and it is filled in from the Product field you set in the generator. Logo URL takes a link to an image file, so host the logo somewhere first, there is no upload here.
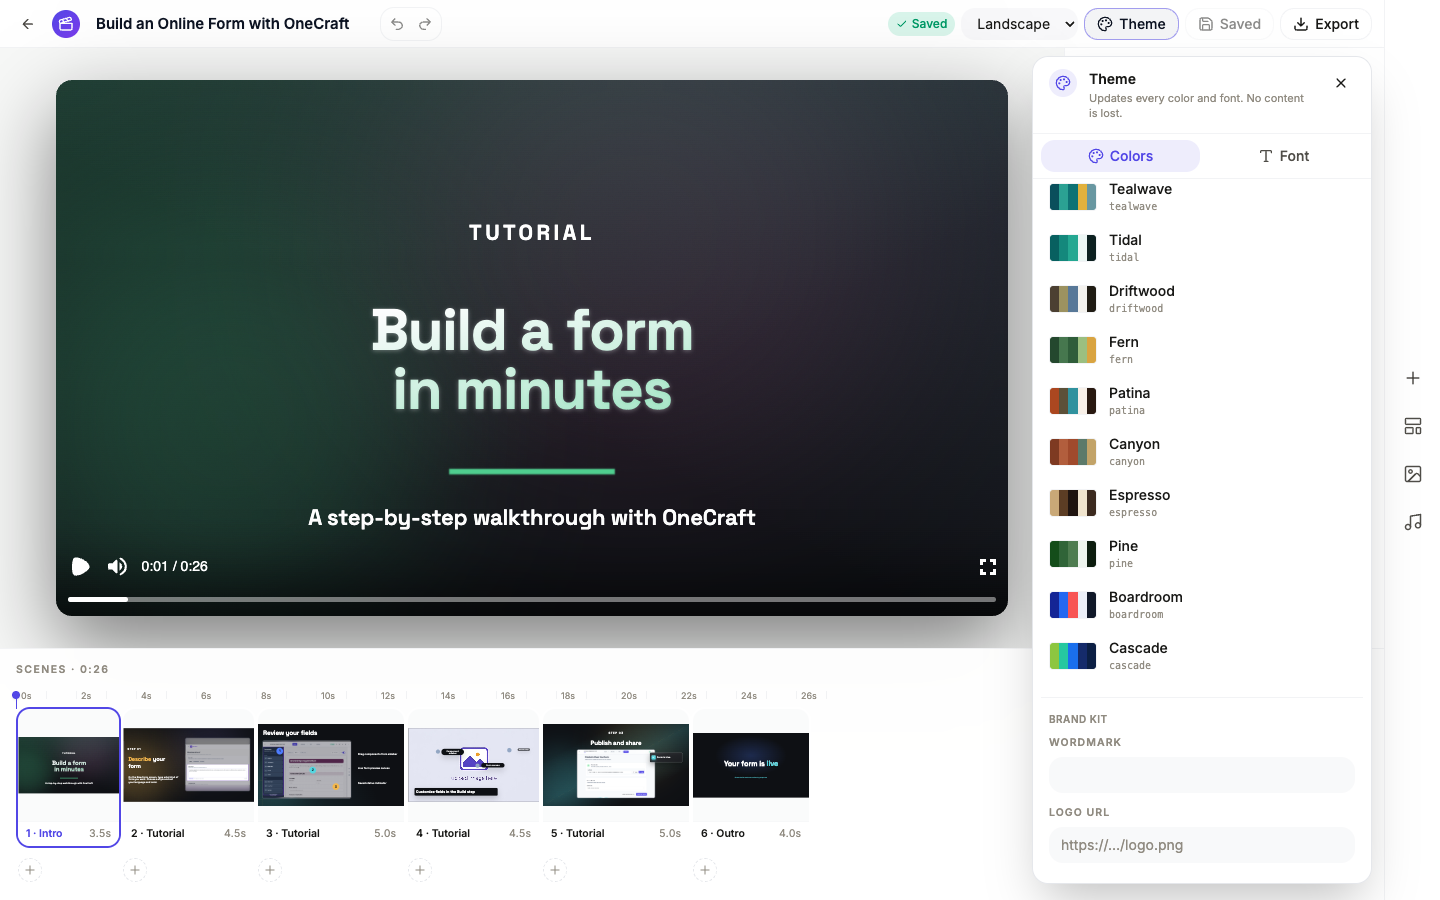 Wordmark is text, Logo URL is a link. A logo replaces the wordmark wherever both could show.
One catch: this only shows up on scenes built to carry a logo, like the closing logo bumper. If your video has no such scene, nothing appears. Add one from the scene library if you want the brand on screen.
Ready to try it yourself?
Start free. Describe what you need and let OneCraft do the first draft.
Get startedSee it in the product
More promo videos tutorials
- Add voiceover, captions and music to a videoGive every scene its own narration in the language and voice you pick, turn on captions, and add a music track that ducks under the voice automatically.
- Capture your screen and turn it into a tutorial videoShare your screen once, snap a shot for every step from a small floating button, then let OneCraft turn those shots into a narrated walkthrough video.
- Export one video for YouTube, Reels and TikTokBuild the video once, then switch between landscape and vertical and export an MP4 for each platform. Your edits are kept per format, so nothing breaks.