How to
Capture your screen and turn it into a tutorial video
Share your screen once, snap a shot for every step from a small floating button, then let OneCraft turn those shots into a narrated walkthrough video.
Promo Videos4 min readUpdated
This guide shows you how to capture your screen inside OneCraft and turn those shots into a tutorial video, without leaving the browser or opening a screen recorder.
The hard part of a how-to video was never the video. It was collecting the screenshots. So OneCraft collects them for you: share your screen once, then press a button every time you finish a step.
Switch the video type to Tutorial
Open the video generator and set Video type to Tutorial. The page changes to “What are we teaching?”, and a line appears offering to capture your screen.
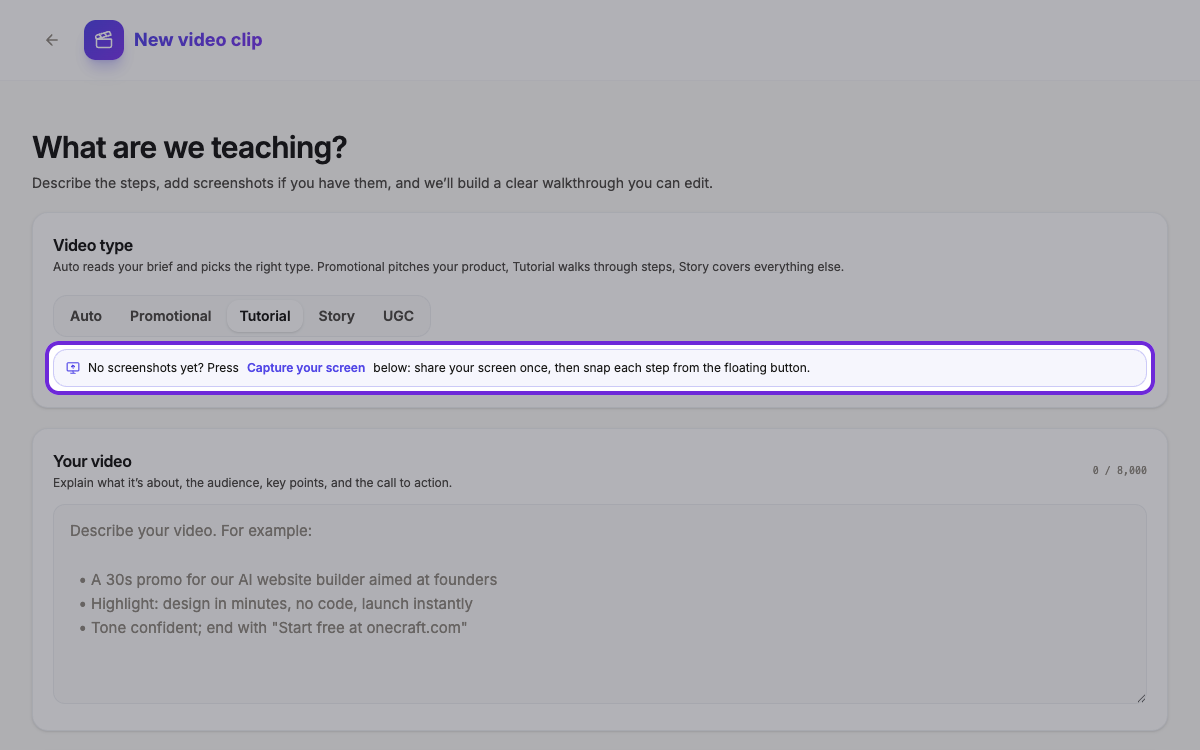 Pick Tutorial and the capture option appears right under it.
You can start the capture from that line, or from Capture your screen further down, next to Upload images or documents. Both do the same thing.
Share your screen once
Press it and your browser asks what you want to share: a whole screen, a single window, or one browser tab. Pick the thing you’re demonstrating. A tab is usually the cleanest choice, because nothing else on your desktop can wander into a shot.
Nothing is recorded. OneCraft holds the shared picture and only takes a still frame when you ask for one, so there is no video file to trim afterwards and no upload to wait for.
Snap a shot for every step
A small panel appears and floats on top of your other windows, so you can work in your app and still reach it. It shows a live preview of what you are sharing, a counter, and two buttons.
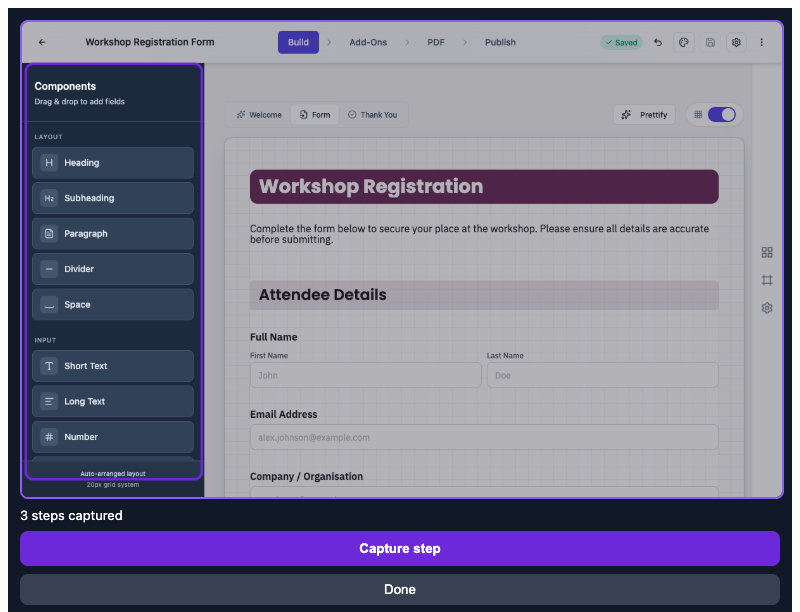 The preview is also your check that you are sharing the right thing.
Now work through your walkthrough. Do the first step, press Capture step, do the second, press it again. The counter tells you where you are, “3 steps captured”. Take them in the order you want them explained, because that order becomes the order of the scenes.
Press Done when you have everything. Stopping the share from your browser’s own sharing bar ends it the same way.
Keep the good ones
You land back on the generator with every shot laid out for review. Remove anything blurry, half loaded, or holding something private with the small X in its corner, then press Add 3 steps to video. Discard throws the whole set away if the take went wrong.
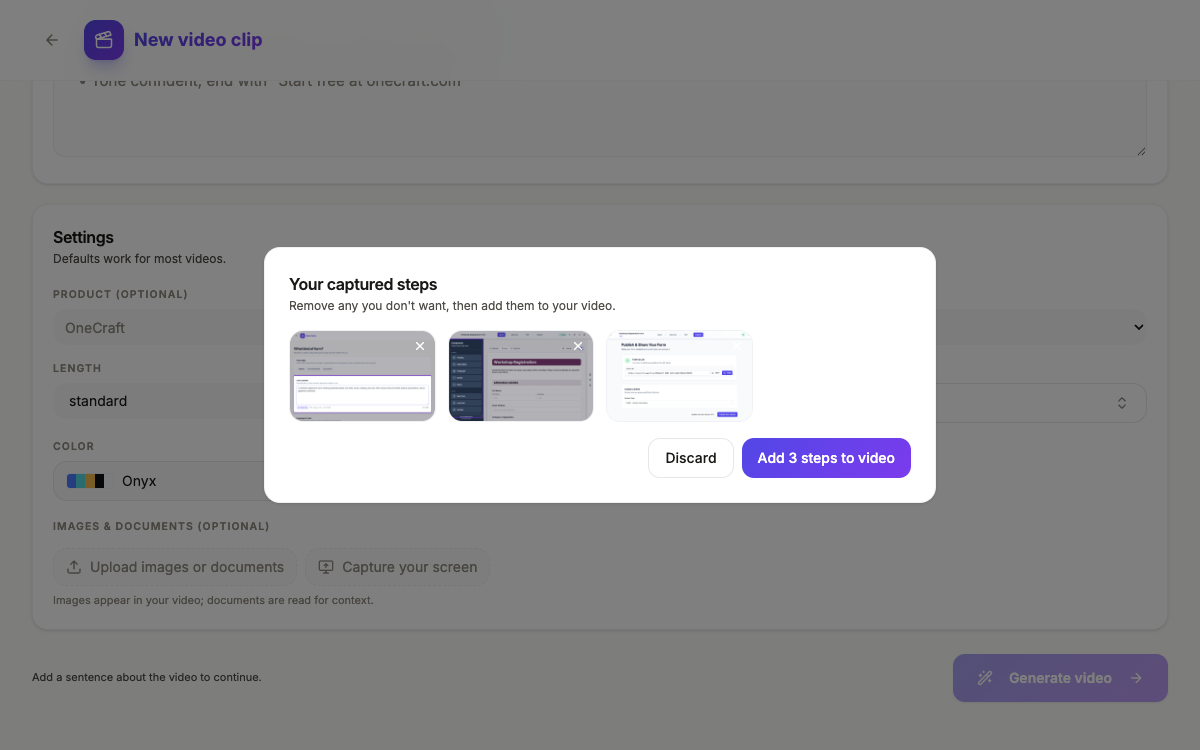 Check the shots before they go into the video, not after.
The ones you keep upload as step-1.png, step-2.png and so on, and join anything you had already uploaded. A tutorial takes up to 30 steps and 5 documents.
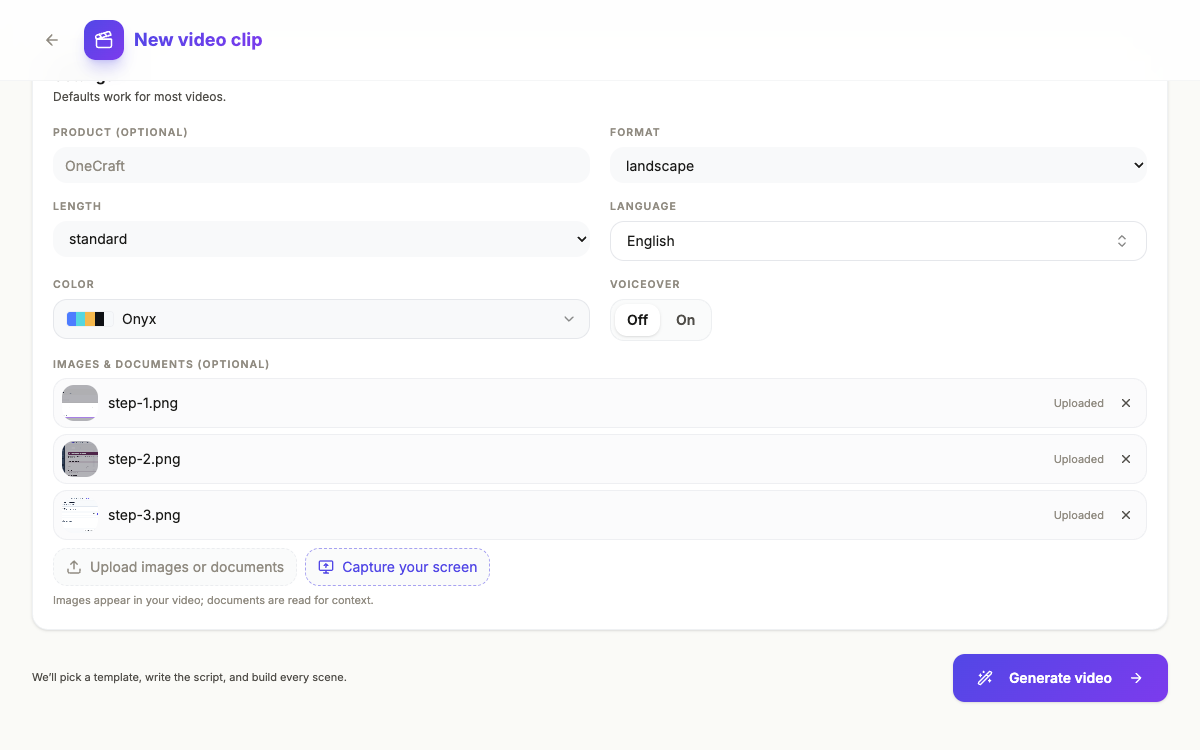 Images appear in the video. Documents are read for context, not shown.
Describe what you’re teaching and generate
Write your brief in Your video: the steps, who it’s for, and the tone. Set the format, length, language and color if the defaults don’t suit, turn Voiceover on if you want narration, then press Generate video.
OneCraft reads every shot, writes the script, and builds one scene per step with your screenshot in it.
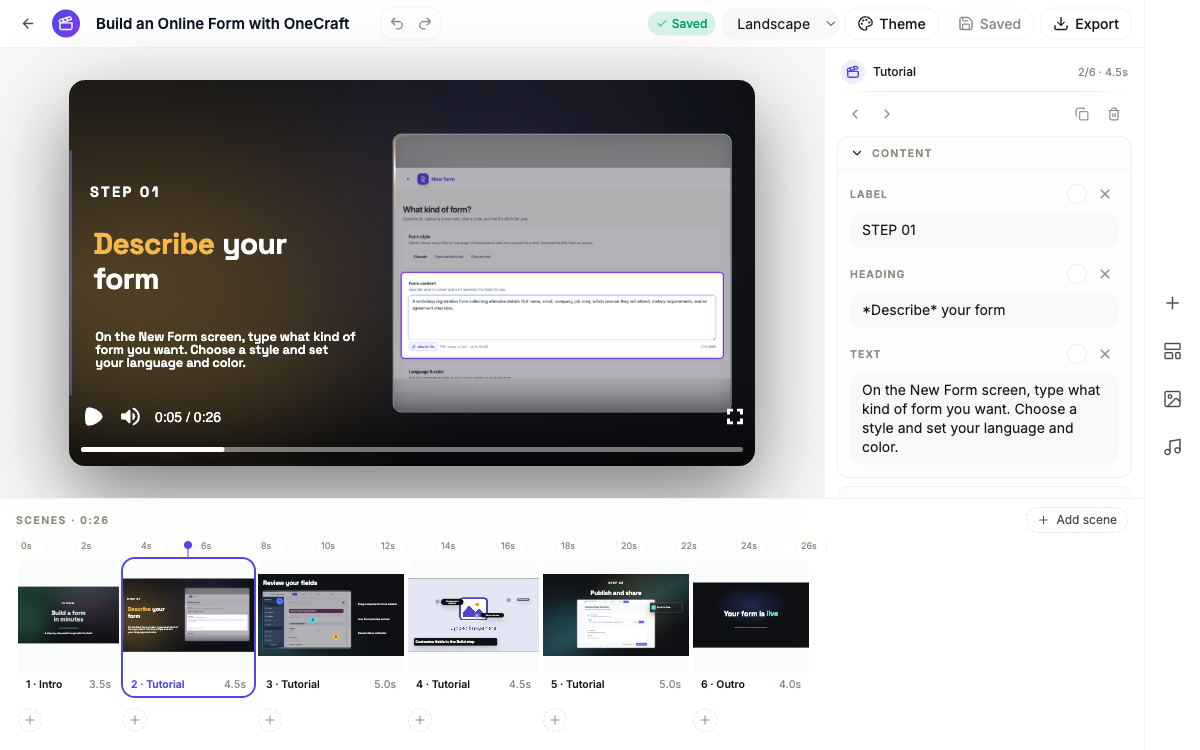 Each step becomes a scene: a label, a heading, the explanation, and your shot.
Edit it like any other video
From here it is a normal video project. Rewrite any line in the panel on the right, retime scenes on the timeline, add or delete scenes, and switch between landscape and vertical.
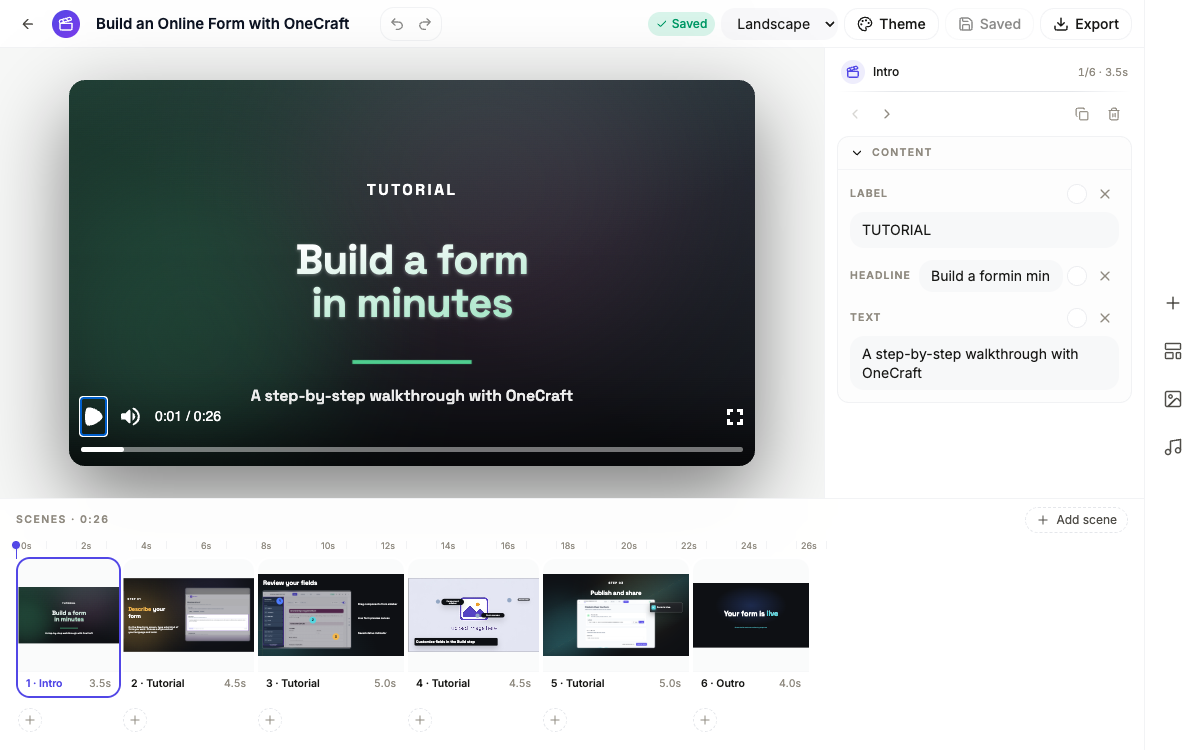 Six scenes and 26 seconds, built from three captured steps.
One thing to watch: if OneCraft plans more steps than you captured, the extra scene shows an empty image box that says “upload image here”. Either drop an image into it or delete that scene. Capturing one shot per step you actually want on screen avoids it.
For the rest of the tutorial flow, see Make a how-to video with AI. To add narration and captions, see Add voiceover, captions and music to a video, and when you’re ready to publish, Export one video for YouTube, Reels and TikTok.
Ready to try it yourself?
Start free. Describe what you need and let OneCraft do the first draft.
Get startedSee it in the product
More promo videos tutorials
- Add voiceover, captions and music to a videoGive every scene its own narration in the language and voice you pick, turn on captions, and add a music track that ducks under the voice automatically.
- Export one video for YouTube, Reels and TikTokBuild the video once, then switch between landscape and vertical and export an MP4 for each platform. Your edits are kept per format, so nothing breaks.
- Make a how-to video with AIPick the Tutorial video type, describe the steps, add your own screenshots, and AI builds a narrated walkthrough video you can edit and export.