How to
Add e-signatures with multiple signers
Add signature fields to a form, choose how each signer's email is collected, set the order people sign in, and collect signatures that are legally clear, with the date and time on record.
Forms4 min readUpdated
This guide shows you how to add e-signatures to a form, set up more than one signer, and control the order they sign in.
The signature lives inside the same form people are already filling in, so there is no separate signing tool, no printing, and no scanning. When everyone has signed, you get a completed PDF with every signature in place, time stamped and traceable.
Add a signature field to your form
In the builder, open Add-Ons and find Electronic Signing. Drag the E-Signature component onto your form wherever a sign-off belongs. Each E-Signature component represents one signer, and the field includes a signature box and a date line.
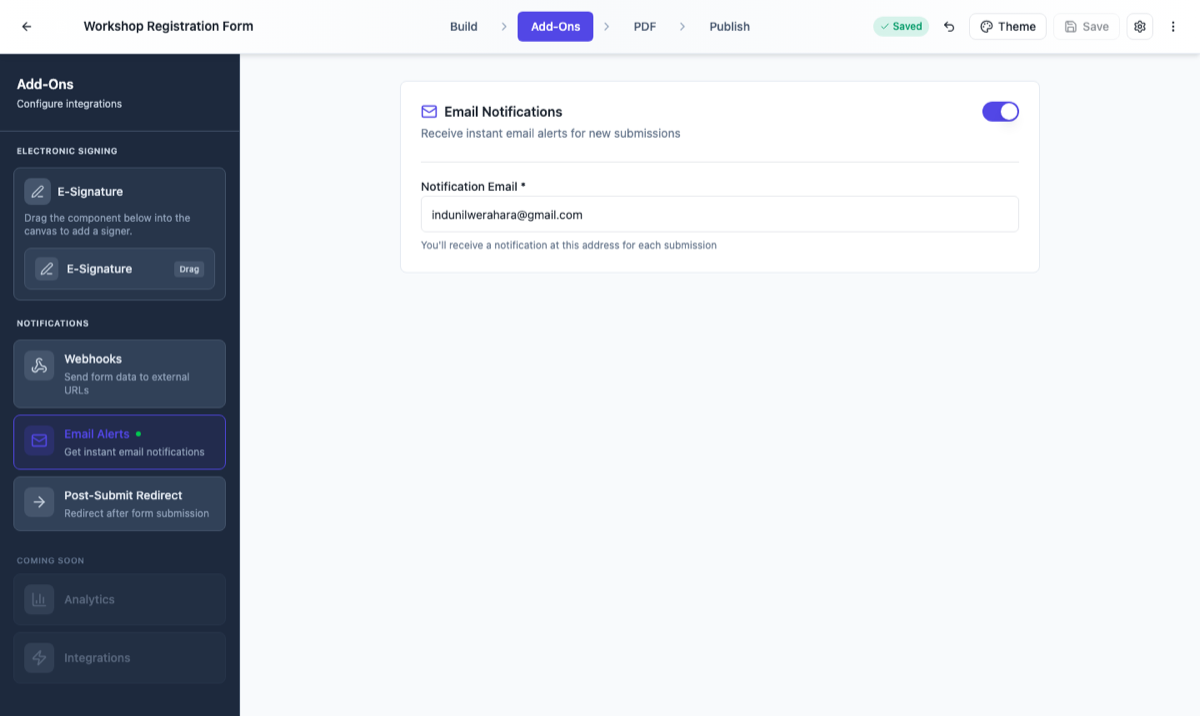 Open Add-Ons, then drag the E-Signature component onto the form to add a signer.
Configure the signer and their email
Click the signature field to open E-Signature Setup. Give the field a clear label, like “Attendee signature” or “Manager approval”, so everyone knows who signs where. Then choose how the signer’s email is collected:
- Enter Email Directly, you type the signer’s email and optional name yourself. Use this when the signer is always the same person, like a manager or a company representative.
- From Form Field, the email is taken from a field the respondent fills in, like their own email address. Use this when the person filling the form is also the one who signs.
- Form Submitter Provides, the respondent types the signer’s email while filling in the form. Use this when the respondent knows who should sign, like naming their supervisor.
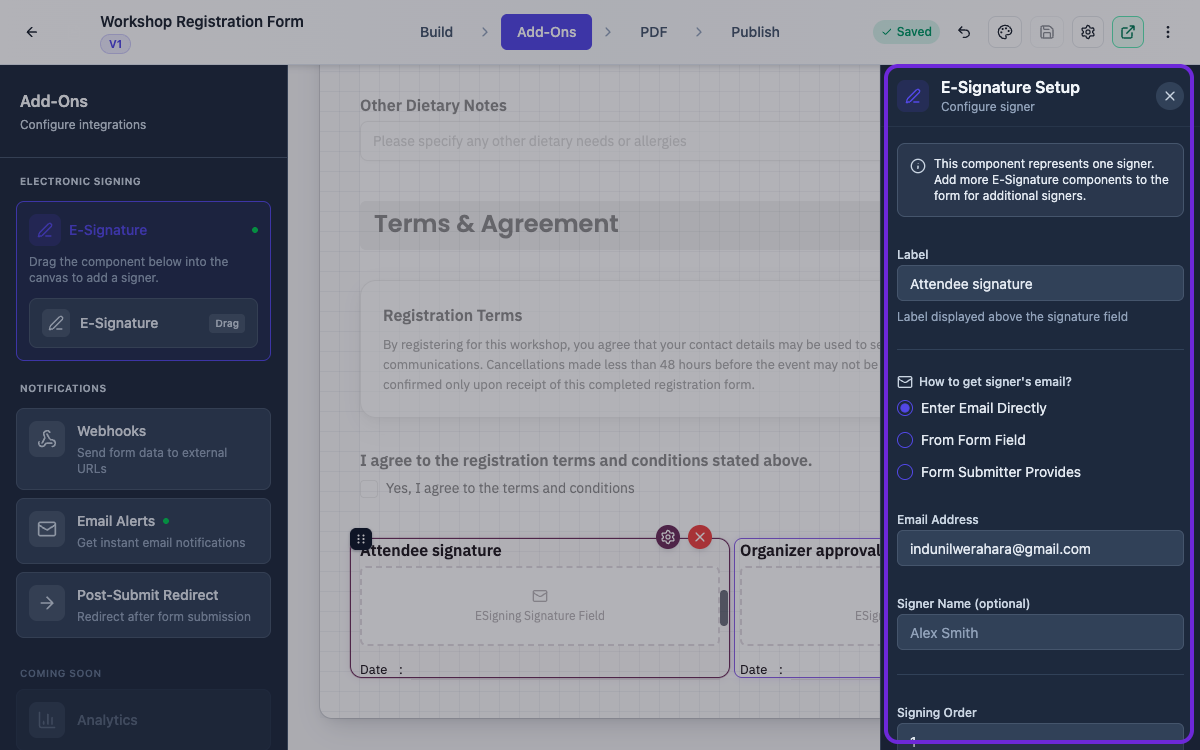 Each signature field has its own setup: a label, the signer’s email, and an optional name.
Add multiple signers
Add a separate E-Signature component for each person who needs to sign. A client and a provider. An employee and a manager. Each signer gets their own clearly labelled field, their own email invitation, and their own place in the document.
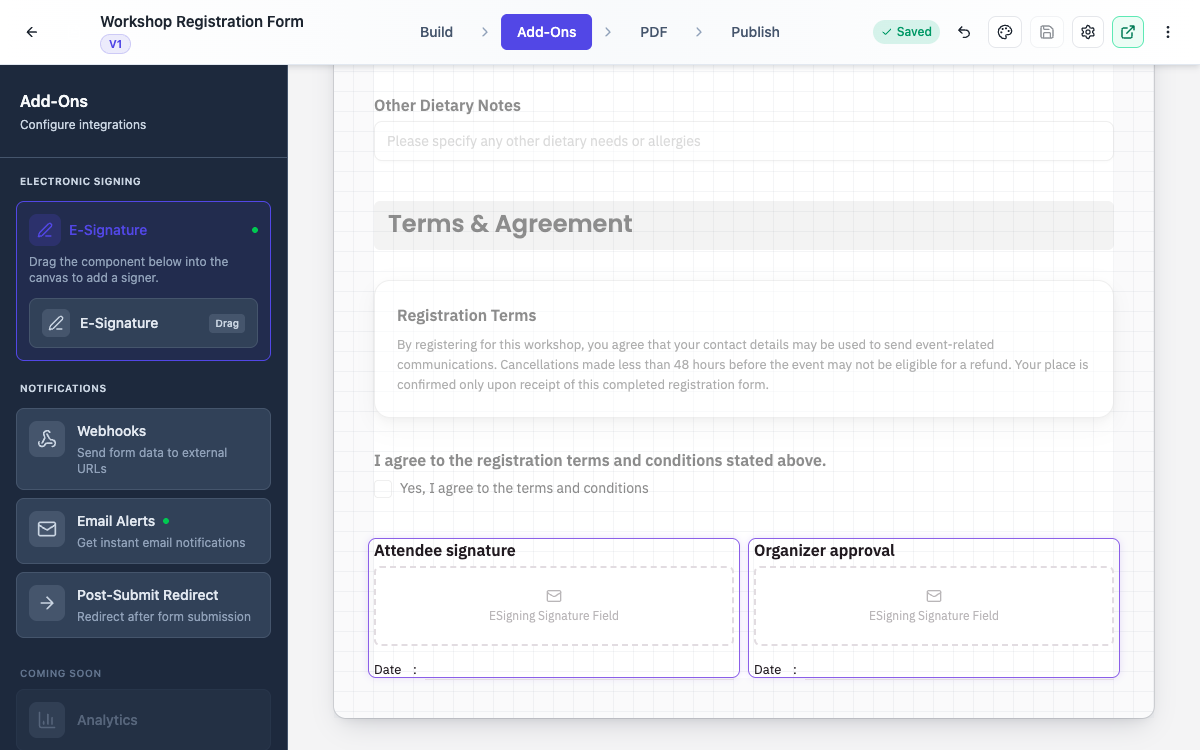 One component per signer. Labels make it obvious who signs where.
Set the signing order
Some documents need to move through people in a set order. Open each signer’s setup and set the Signing Order: 1 signs first, 2 signs second, and so on. The form takes care of the rest. The first person receives their signing link right after the form is submitted, and the next signer is invited automatically once the previous one has signed.
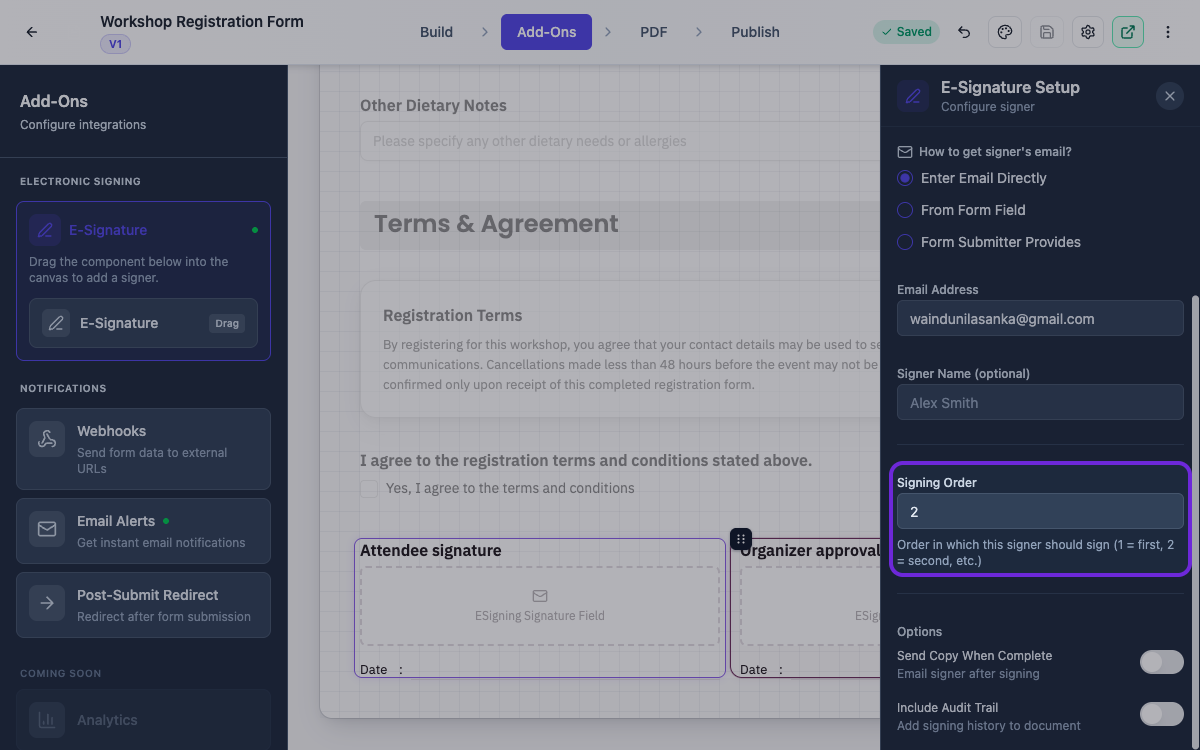 Signing order 1 signs first, 2 signs second.
Publish the form and collect signatures
Publish the form and share the link. When someone submits a response, the completed form becomes a PDF and turns into a signature request in OneCraft’s e-signing engine. The first signer receives a personal signing link by email right away, and the next signer is invited automatically once the previous one has signed. No account needed, and no software to install.
How signers review and sign the document
The signer opens the link and lands on the secure signing page. It shows the document with their signature box highlighted, and a Go to signature button that jumps straight to the right spot.
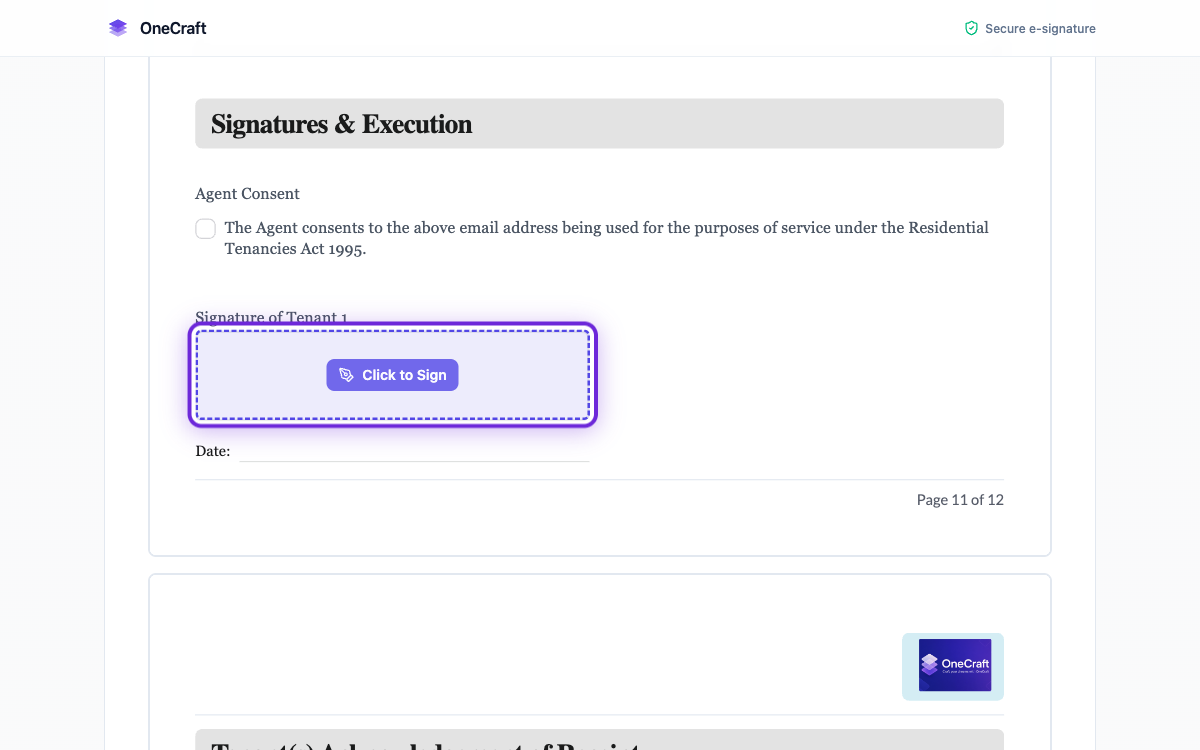 The signer reviews the completed document and clicks the highlighted box to sign.
Clicking the box opens Your signature. The signer can draw their signature with a mouse, a trackpad, or a finger on their phone, or simply type their name. The signing date is filled in automatically. Before finishing, they tick the consent line agreeing to sign electronically, then click Finish signing.
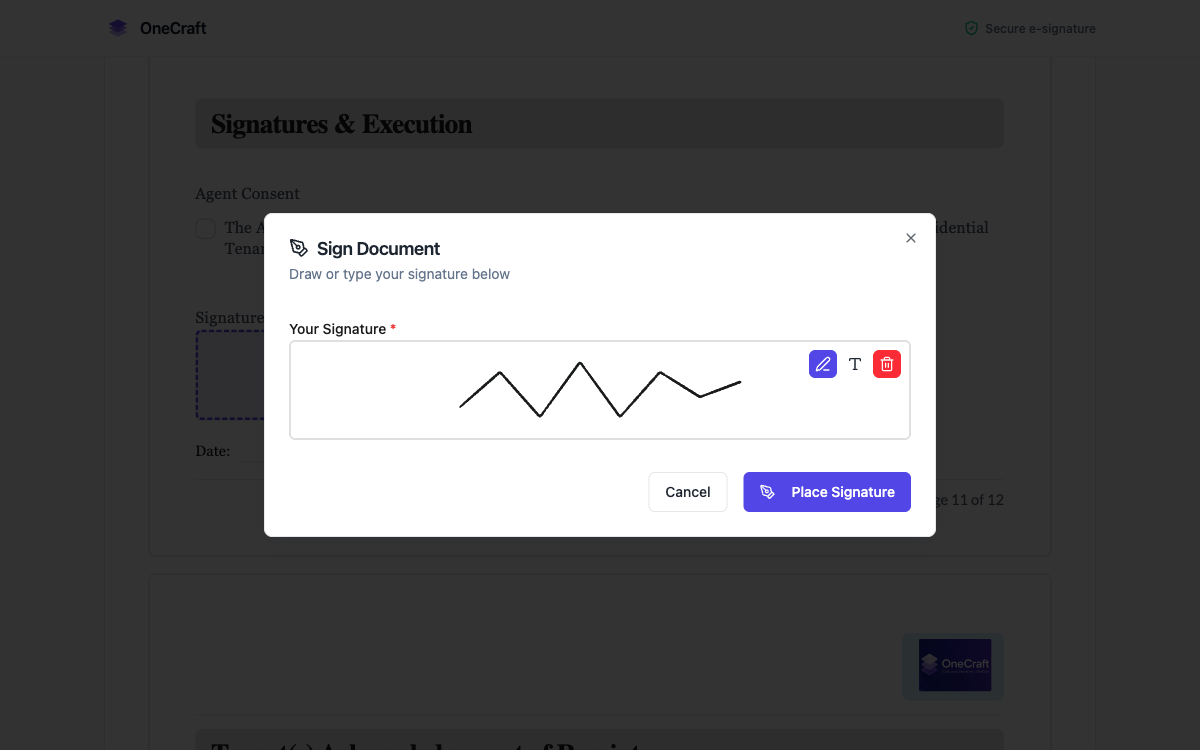 Draw or type the signature, then place it on the document.
The page works just as well on a phone, where every field moves into a Complete your details panel above the document, so nobody has to wait until they’re back at a desk.
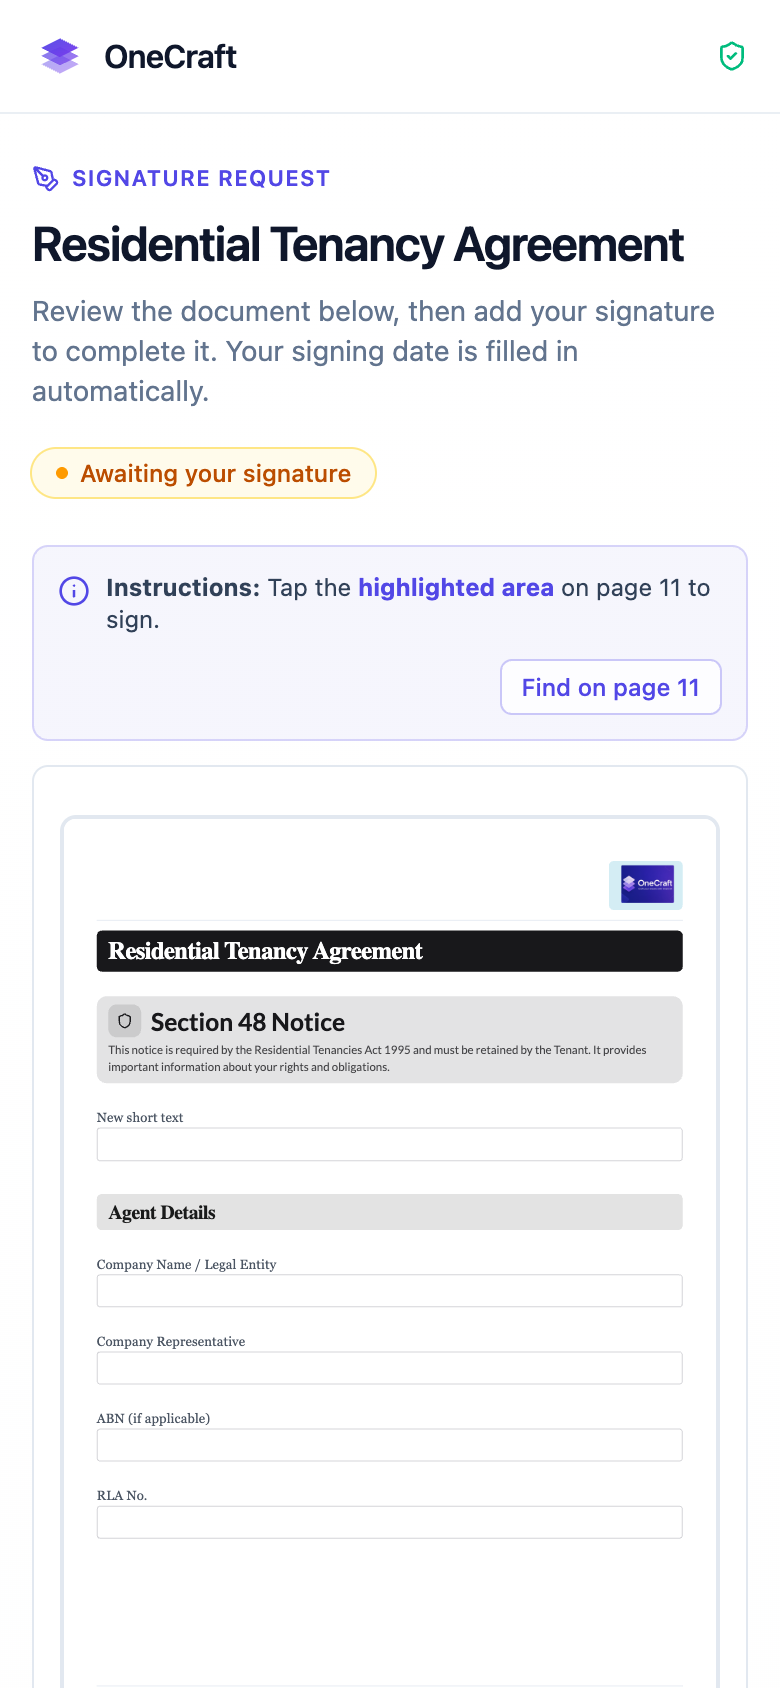 Signing works on any device, no app or account needed.
Track the signatures and download the result
Every signature request from a form appears in your envelopes list: open E-sign request from the dashboard. The request’s status page shows who has viewed and who has signed, lets you resend an invitation, and keeps a full audit trail of every step. Once everyone has signed, you can download the signed document and its certificate from the same page.
For sending a standalone PDF out for signature, see Send a PDF for e-signature.
Ready to try it yourself?
Start free. Describe what you need and let OneCraft do the first draft.
Get startedSee it in the product
More forms tutorials
- Automate your form with add-onsConnect webhooks, get instant email alerts for new submissions, and send people to your own page after they submit.
- Build your own form themeStart from a built-in theme, or build one from scratch with your own layout, colours, fonts and effects, save it, and reuse it on every form you make.
- Classic vs conversational formsUnderstand the two kinds of form, one canvas you lay out yourself or one question at a time, and choose the right one before you build.