How to
Turn a long classic form into steps
Switch a classic form to Paginated and it becomes a step by step wizard with a progress bar, a page counter and Back and Next buttons, without rebuilding anything.
Forms3 min readUpdated
This guide shows you how to turn a long classic form into a step by step wizard, using the Paginated canvas layout.
A twenty question form that arrives as one endless scroll gets abandoned. The same twenty questions, six at a time, do not. You do not have to rebuild anything to get there.
Three ways to lay out a classic form
Open the Layout panel from the icon rail on the right edge of the classic builder. Canvas Layout at the top gives you three choices:
- Flow drops components anywhere, so two short fields can share a row. This is the default.
- Single Column stacks everything full width, top to bottom.
- Paginated splits the form across A4 sheets and turns it into a wizard.
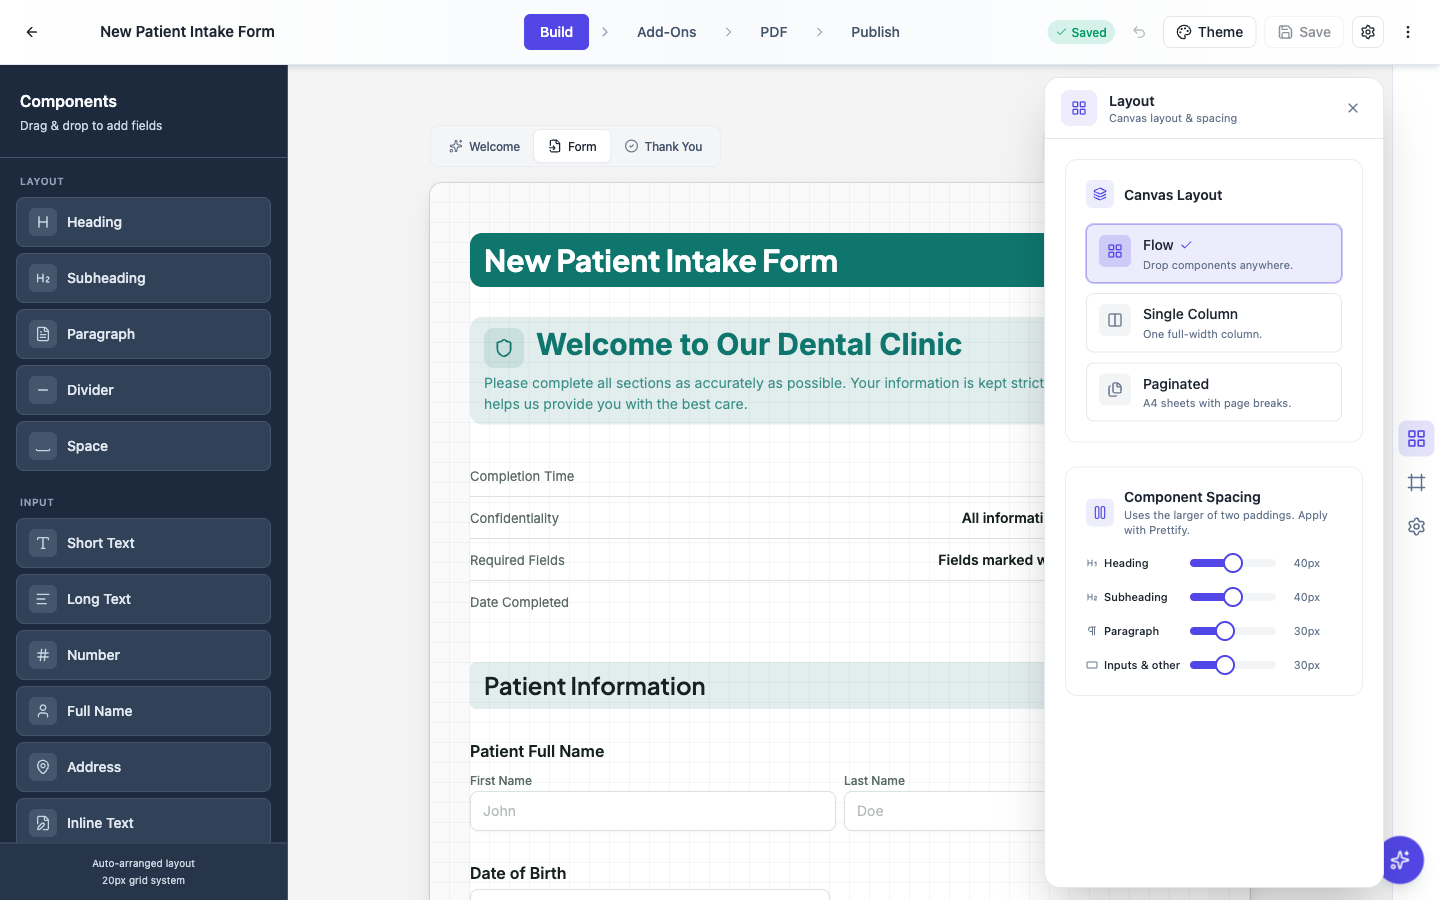 Three canvas layouts. Flow is the default, and despite the name it is the least guided of the three.
Switching between them never touches your fields. The same form, presented differently.
What Paginated does to the builder
Pick Paginated and the canvas starts drawing sheets. A dashed separator labelled PAGE 2, PAGE 3 and so on marks where each new page begins, so you can see exactly what a person gets on each step.
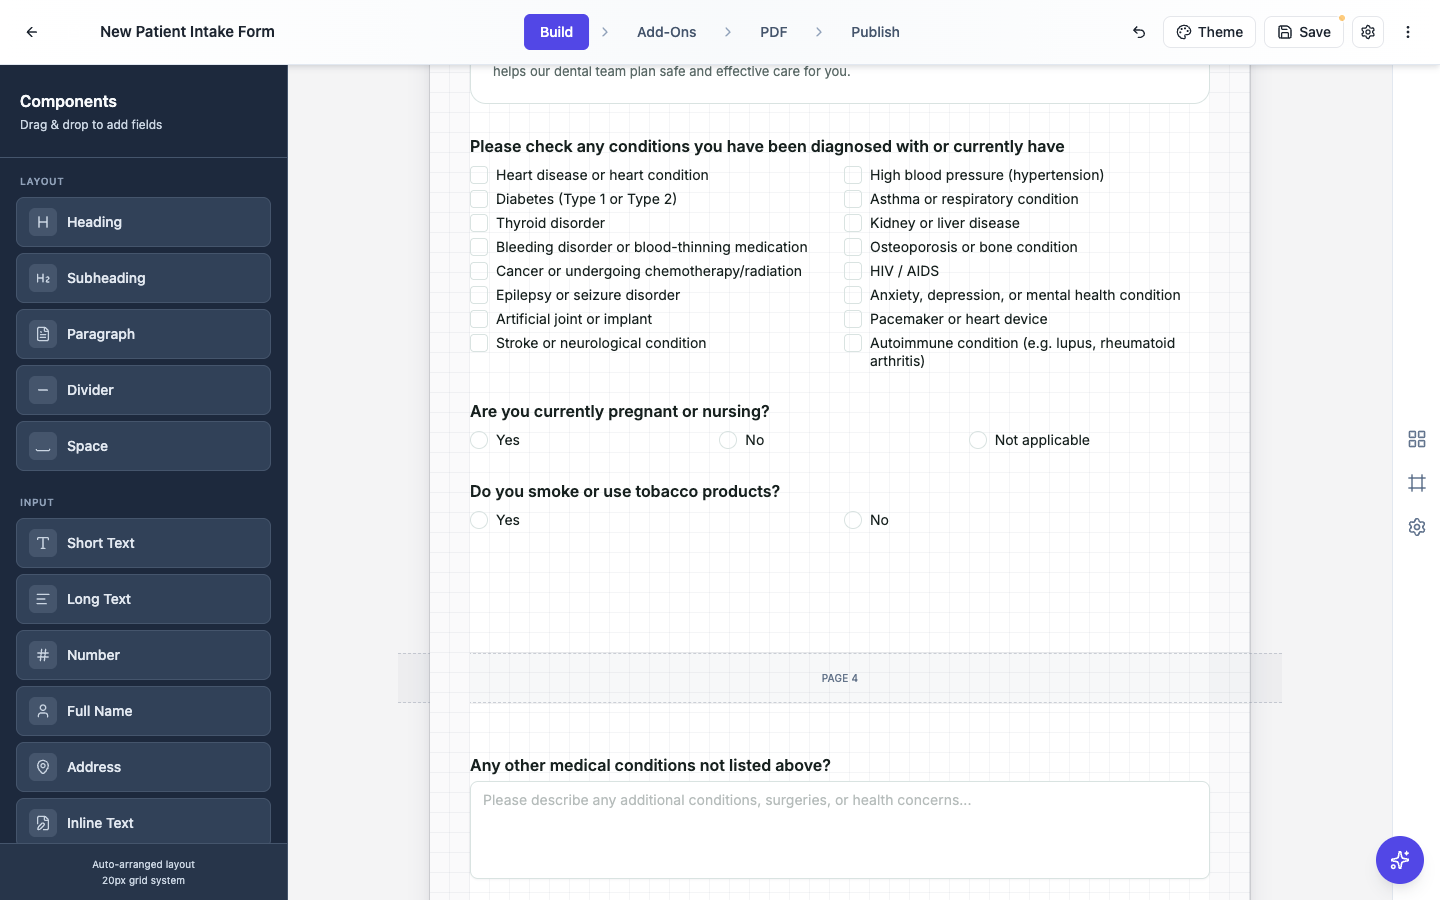 The separator shows where one step ends and the next begins.
You do not place these breaks yourself. Pages fill themselves, and nothing gets cut in half: a component that would cross the bottom of a sheet moves to the next one whole, and a section heading is never stranded at the bottom on its own. If you want a step to end sooner, add a Space above the point where you want the break, or move components up.
What the person filling it in sees
Preview the form and it is a different experience. A thin progress bar sits along the top of the card and fills as they move through, with a Page 1 of 6 pill in the corner.
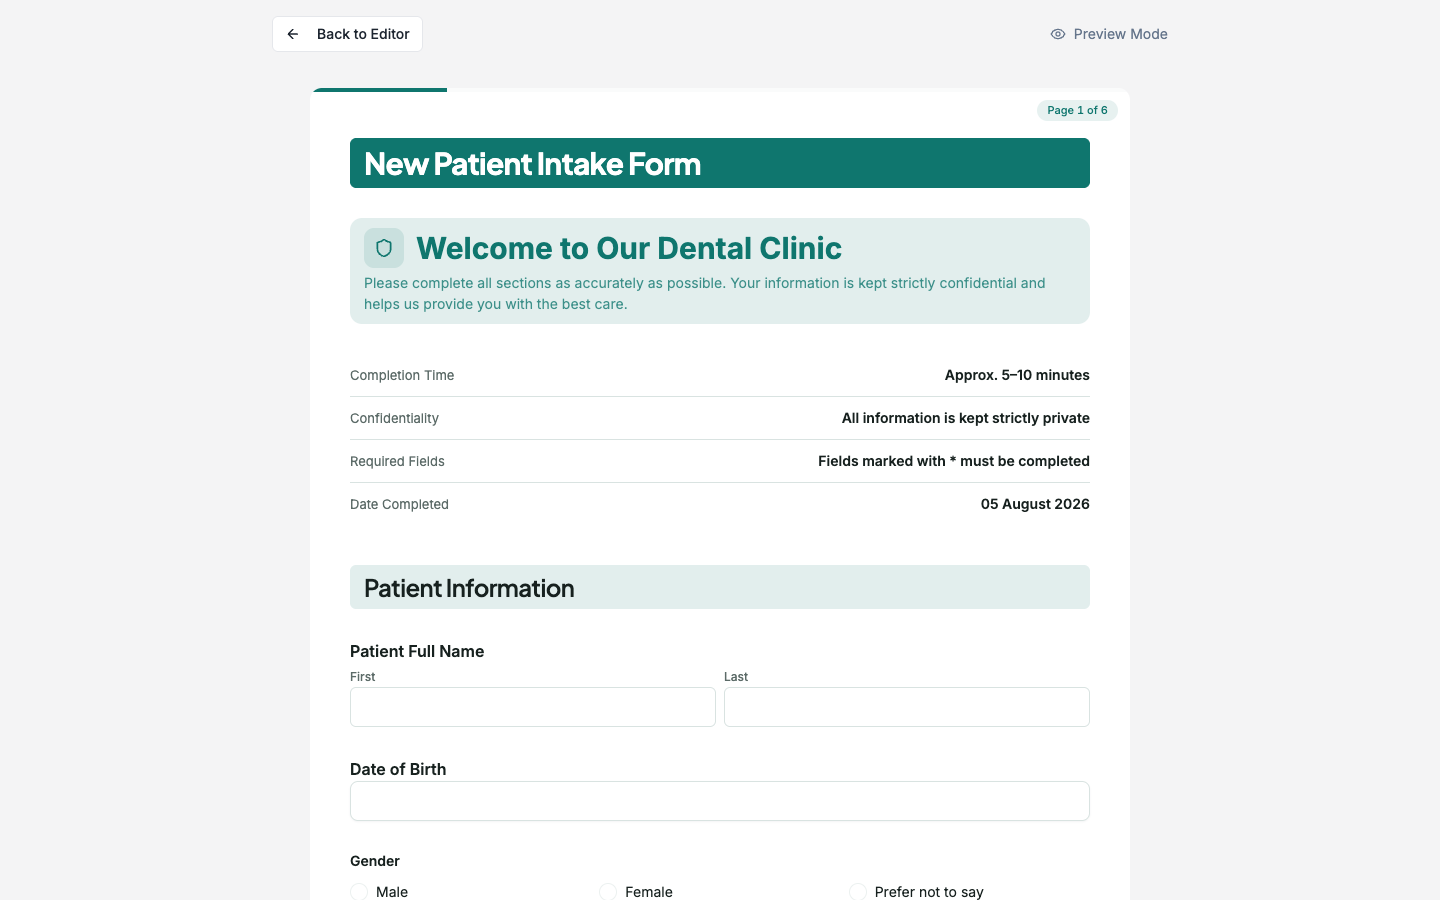 A progress bar and a page counter, so people know how much is left.
At the bottom sit Back and Next. Back is greyed out on the first page, and on the last page Next is replaced by your submit button.
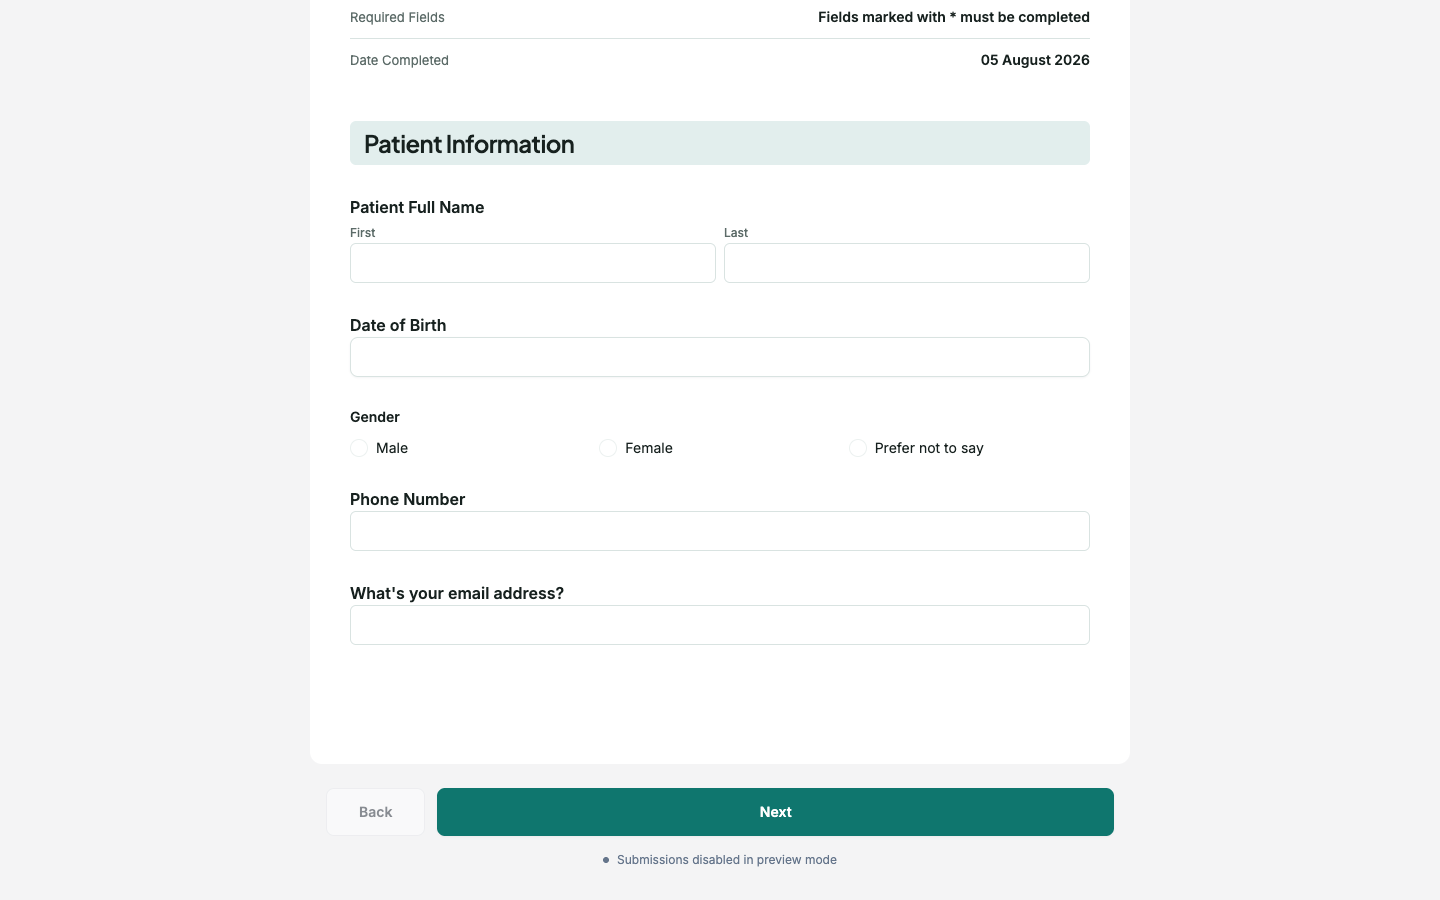 Back and Next. On the last page, Next becomes your submit button.
Required fields are checked when someone presses Next, not at the end. Miss one and a message names it, “Email address is required”, so nobody fills in six pages before finding out about a mistake on page one.
One thing to know before you ship it
Paginated is a desktop layout. On a phone the form falls back to a single column, because a fixed A4 sheet does not make sense on a small screen. So a person on a laptop steps through pages and a person on a phone scrolls, and both get the same fields and the same required checks.
If your form is mostly filled in on phones, Paginated buys you less than you think. A Conversational form is the better answer there, since it asks one question at a time on any screen. See classic vs conversational forms for that decision.
Where the page numbers in the footer come from
If you turn on a footer with Page number in the Page & Brand panel, those numbers follow the same pages the wizard uses. Set it to show on All pages and every step is numbered.
Ready to try it yourself?
Start free. Describe what you need and let OneCraft do the first draft.
Get startedSee it in the product
More forms tutorials
- Add e-signatures with multiple signersAdd signature fields to a form, choose how each signer's email is collected, set the order people sign in, and collect signatures that are legally clear, with the date and time on record.
- Automate your form with add-onsConnect webhooks, get instant email alerts for new submissions, and send people to your own page after they submit.
- Build your own form themeStart from a built-in theme, or build one from scratch with your own layout, colours, fonts and effects, save it, and reuse it on every form you make.