Videos
Capture screenshots for a tutorial, one step at a time
To capture screenshots for a tutorial, share your screen once, then press a button for each step and it snaps one still frame. There is no recording, no video file, and nothing is processed from footage afterwards. What you end up with is a set of PNG screenshots and a walkthrough built from them.
Stills, one per press
Screen sharing is started through the browser's own display media picker, and a small panel appears with a live preview of what is being captured. Pressing Capture step, or the Space bar, grabs the current frame and saves it as a PNG. Nothing is buffered, nothing is encoded and no video file is produced. The cursor is kept in the frame deliberately, so the pointer position marks the spot when you capture with the keyboard and your mouse is parked on the control you are pointing at.
Why stills are the right unit for a walkthrough
A recording of somebody clicking through software is mostly dead time: cursor travel, page loads, hesitation. A viewer following along wants a clean frame of each screen, held long enough to read, with a clear instruction. Stills give you that by construction, and they let each step be retimed, reordered, dropped or renarrated afterwards, which footage does not. The cost is that a genuine animation cannot be shown, which is the honest trade.
The panel floats above the app you are capturing
Where the browser supports it, the control panel opens in a small always on top window, so you never leave the software you are documenting to press the button. It carries the live preview, the capture button, and an area selector. That selector lets you draw a rectangle over the preview so only part of the screen is captured, which is how you crop out a second monitor, a browser chrome you do not want, or a notification bar.
Then the review grid
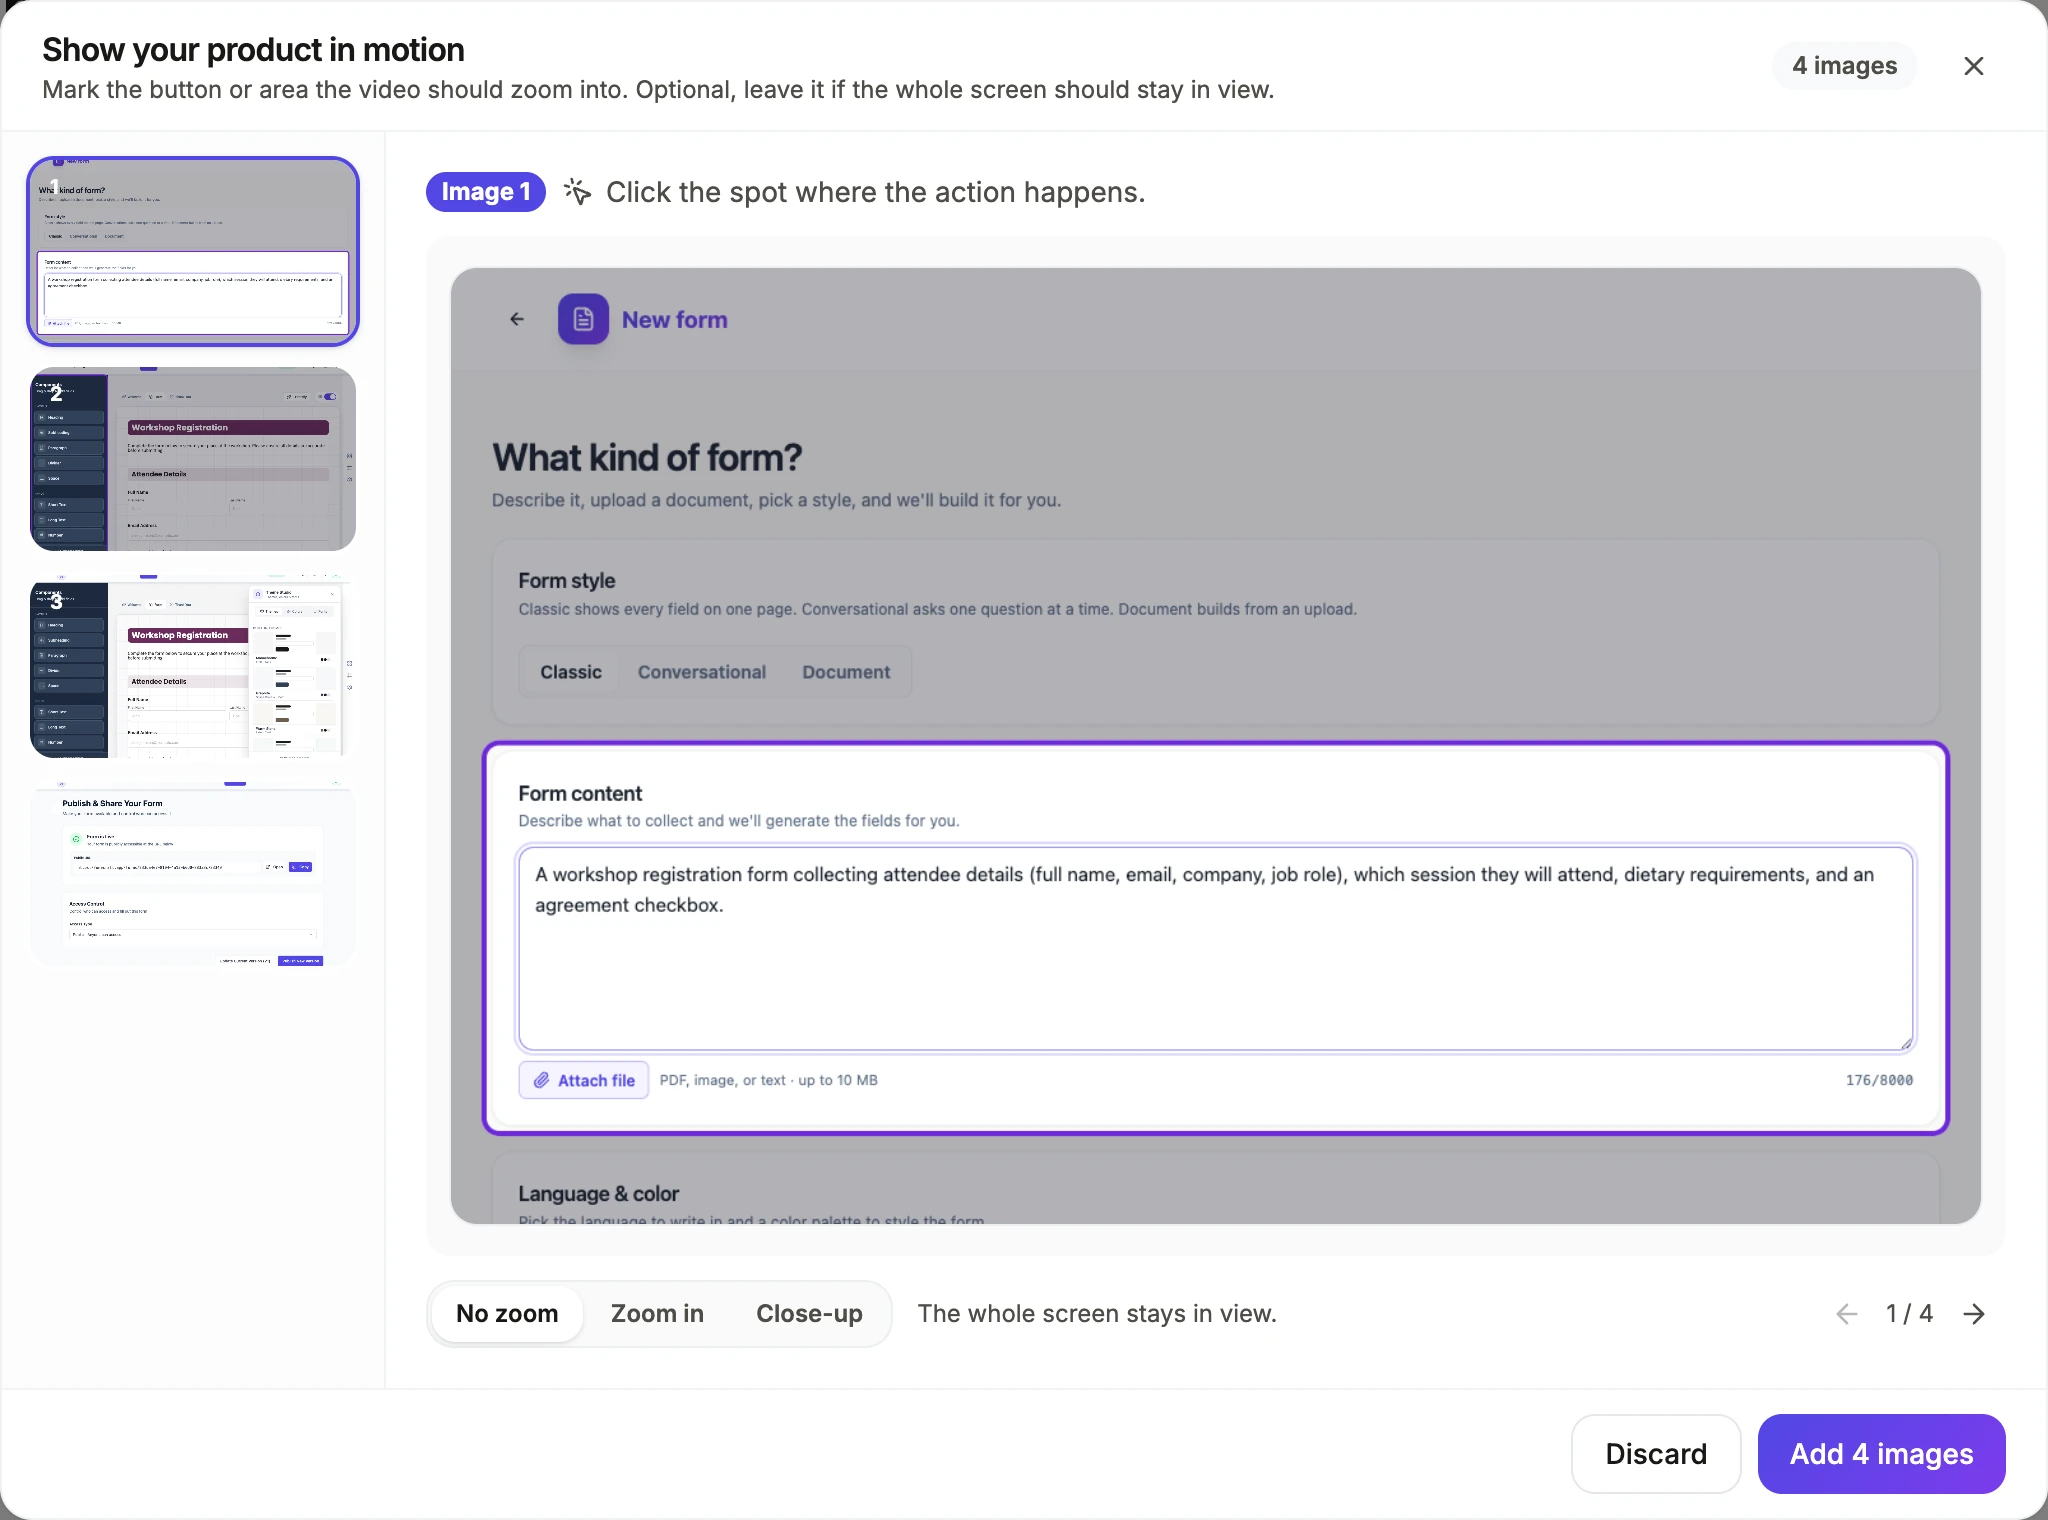
Captured shots do not go straight into a video. They land in a review dialog, one at a time, where you can drop the bad ones and click the exact point on each picture where the action happens, choosing No zoom, Zoom in or Close-up. A marked point plays back as a cursor glide to that spot, a click ripple, then the camera easing in, at one and a half times for Zoom in and just over two times for Close-up.
How it works, in three steps
Step 1
Share the screen once
Press Capture your screen and pick the window or display. The panel appears and stays put while you work through the process.
Step 2
Snap a frame per step
Press Capture step, or the Space bar so your mouse can stay on the control you are pointing at. Set a capture area first if you need to crop.
Step 3
Mark the click points
In the review grid, drop the shots you do not want and click the spot on each keeper, then choose how far the camera should push in.
The full walkthrough with screenshots is in the guide Capture your screen and turn it into a tutorial video.
Limits worth knowing
- This does not record motion video. It takes still screenshots, so an animation, a transition or a drag cannot be shown as it happens.
- Desktop browsers only. Screen sharing is unavailable on phones, and the generator tells phone users to upload screenshots instead.
- Audio is not captured with the screen. Narration is written and spoken separately.
- Nothing is redacted. Whatever is on the screen when you press capture, including names and account numbers, is in the picture.
Questions people ask
Can I record a video of my screen instead?
Not with this flow. You can upload a video file you recorded elsewhere, as mp4, webm or mov up to 200 MB, and place it in a clip scene, which plays it with trim, fit and audio controls. The capture button here produces still frames only, which is what the step by step tutorial layouts are built around.
How do I show a dropdown or a hover state?
Open the menu, then press Space rather than clicking the capture button, so the menu stays open while the frame is taken. That is exactly what the keyboard shortcut exists for. The real cursor stays in the frame too, so park it on the item you want the viewer to notice before you press.
Can I capture only part of the screen?
Yes. The panel has an area selector where you drag a rectangle over the live preview, and every capture after that is cropped to it until you clear it. That is the quickest way to leave out a second monitor, a bookmarks bar or a chat window you would rather nobody saw in a published tutorial.
What resolution are the captures?
Whatever your shared screen is, at up to 15 frames a second for the preview stream. On a high resolution display that is plenty for a full screen tutorial layout, and a captured shot filling the frame may be scaled up by no more than two and a half times.
Which browsers can capture the screen?
Any desktop browser that offers screen sharing through getDisplayMedia. Phones do not, so the generator tells phone users to upload screenshots instead. The floating always on top panel uses Document Picture-in-Picture, which Chrome and Edge support. In a browser without it, the same panel opens inside the generator page, so you switch back to that tab to press Capture step.
Is there another way to capture steps besides sharing the screen?
Yes. The generator offers a browser extension as its first option: install it, click through your product with Start recording on, then press Send to OneCraft, and the steps land in the generator with their click points already marked. Sharing the screen here suits a quick walkthrough; the extension saves marking every click by hand on a longer one.
Make your own video
The button opens the generator with this use case already described. Change the wording to match yours, generate, then edit anything you like.
Create a video with OneCraftRelated pages
Turn a one line idea into a video
A single sentence is a legitimate input, and it is worth knowing exactly how much is being invented on your behalf when you use one. The answer is: the arc, the scene roles, every word on screen, every spoken line, the voice, the tone and often the format as well.
Cursor and spotlight in a tutorial video
Two devices point at things in a walkthrough. A cursor that travels to a control and clicks it, and a spotlight that rings a region and dims everything around it. Both are aimed by hand on the preview, and that is deliberate: the AI is kept away from them because a pointer aimed at the wrong pixel is worse than no pointer.
Turn a script into a video
If you already have an approved script, the default behaviour will annoy you. The promo director rewrites for pace, aiming at five to eight words a scene, because that is what fits a two and a half second cut. Getting your own wording through is possible, but it takes a deliberate second step.
More finished work of this kind is on the video examples hub.
Written and checked by the OneCraft team. Last checked .