How to
Style text and add callouts, stats and lists
Build a slide piece by piece. Insert headings, lists, cards, big stats and eight kinds of callout, then set the size, font, colour, weight and alignment of any text.
Presentations5 min readUpdated
This guide shows you how to build up a slide by hand: adding headings, lists, stat blocks and callouts from the element rail, and styling any piece of text so it looks deliberate.
The AI gives you a designed slide. This is how you add the one thing it didn’t know about, and how you make a line of text look the way you meant it.
The element rail
The rail on the right edge of the builder holds three categories. Click one and its panel opens: click a tile to insert it, or drag the tile onto the canvas to place it exactly.
Text is the biggest, in five groups:
| Group | What’s in it |
|---|---|
| Headings & body | Title, Large Text, Heading 1, Heading 2, Accent Title, Body, Blockquote, Pull Quote, Eyebrow, Caption |
| Boxes | Title Box, Content Box, Text Box |
| Cards | Numbered Card, Numbered Cards 2×2 |
| Lists | Bullet List, Numbered, Task List, Checklist, Steps, Pros & Cons, Definitions |
| Stats | Big Stat, 3 Stats, KPI Card |
Visuals holds the eight callouts, plus Image and Icon. Data holds charts, diagrams, matrices, tables, Gantt and maps, which have their own guide: add charts, maps and diagrams to slides.
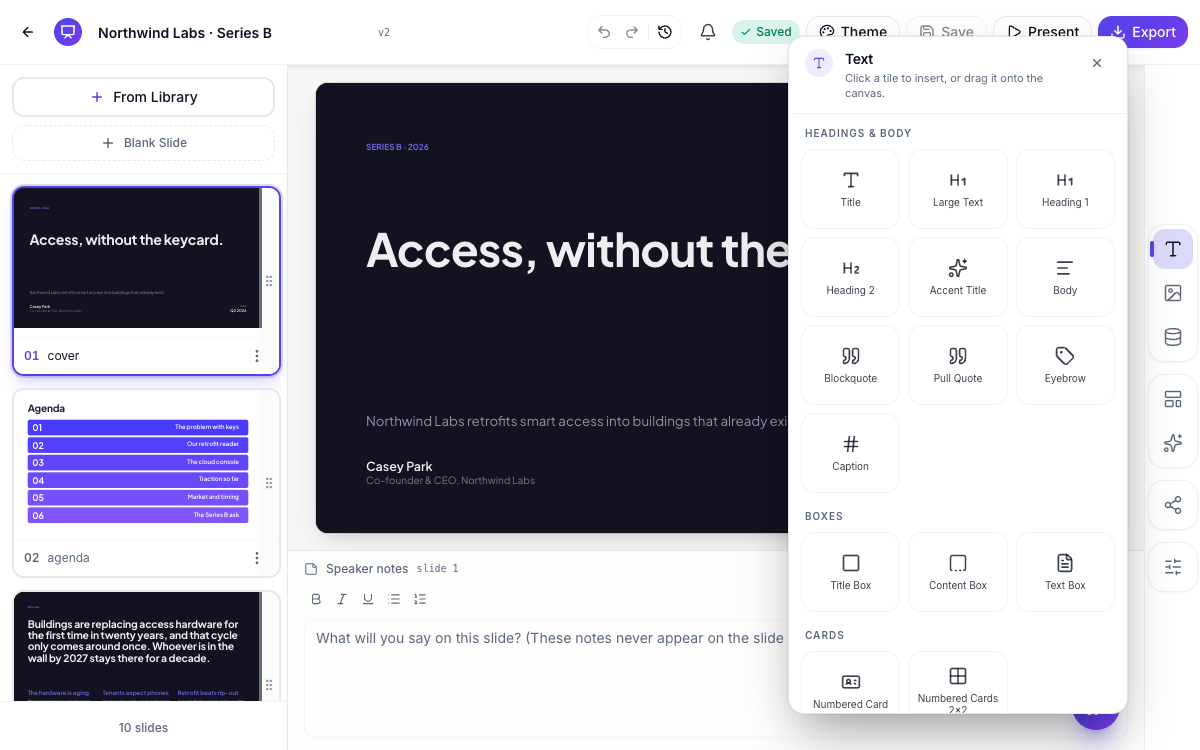 Click a tile to insert it, or drag it onto the exact spot you want.
Everything you insert arrives already wearing the theme, so a stat block you add on slide 9 matches the ones the AI made on slide 3.
The pieces that do the most work
Big Stat and KPI Card. One number, big, with a label under it. A room remembers “94% retention” and forgets a paragraph that says the same thing. 3 Stats gives you the row-of-three version.
Callouts. Eight of them, each with its own icon and colour: Note, Info, Warning, Caution, Success, Question, Tip and Idea. Use one when a line needs to sit apart from the body text, a caveat under a proposal, a tip under a process step.
Lists. Seven kinds, and they aren’t cosmetic. Steps numbers a sequence, Checklist and Task List mark things done, Pros & Cons splits into two columns, Definitions pairs a term with its explanation. Pick the one that matches the shape of the thought.
Numbered Cards. One card or a 2×2 grid, each with its own number, heading and description. The workhorse for “our three principles” or “four phases”.
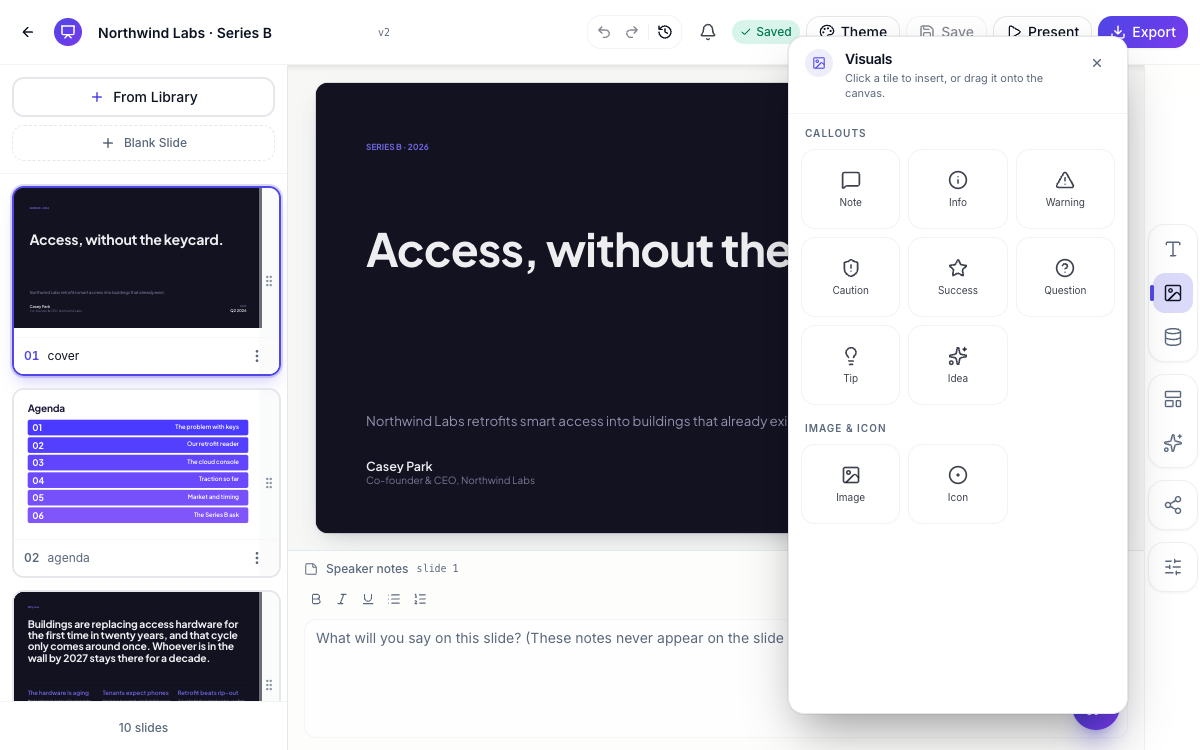 Stat, callout and steps. Each one arrives in the deck’s theme.
Type, move, resize
Click text on the canvas and type. On a list or a card, clicking once selects the whole block and clicking again selects the line inside it, so you can edit one item without disturbing the rest.
Drag anything to move it, or nudge it with the arrow keys, holding Shift for a bigger step. Drag a corner to resize it. Cmd-click, or Ctrl-click on Windows, adds more things to the selection: the inspector then says how many are selected, and you can drag them together or press Delete to remove them.
Text fits itself to the box it’s in, so a long headline scales down rather than spilling off the slide. If a heading has gone small, the fix is a shorter heading.
Style any piece of text
Select text and the inspector on the right shows its Style section:
- Size — steps from the theme’s type scale, each showing its pixel size and weight. Sizes are steps rather than free numbers, which is what keeps every heading in the deck consistent.
- Font — Theme default, or any of the 27 fonts, for this one piece of text.
- Colour — eight theme colours (Ink, Muted, Soft, Brand, Secondary, Accent, Highlight, On brand), or a custom colour if you need an exact one.
- Weight — Light 300 through Black 900.
- Align — left, centre, right.
- Shadow — a soft drop shadow, for text sitting over a photo.
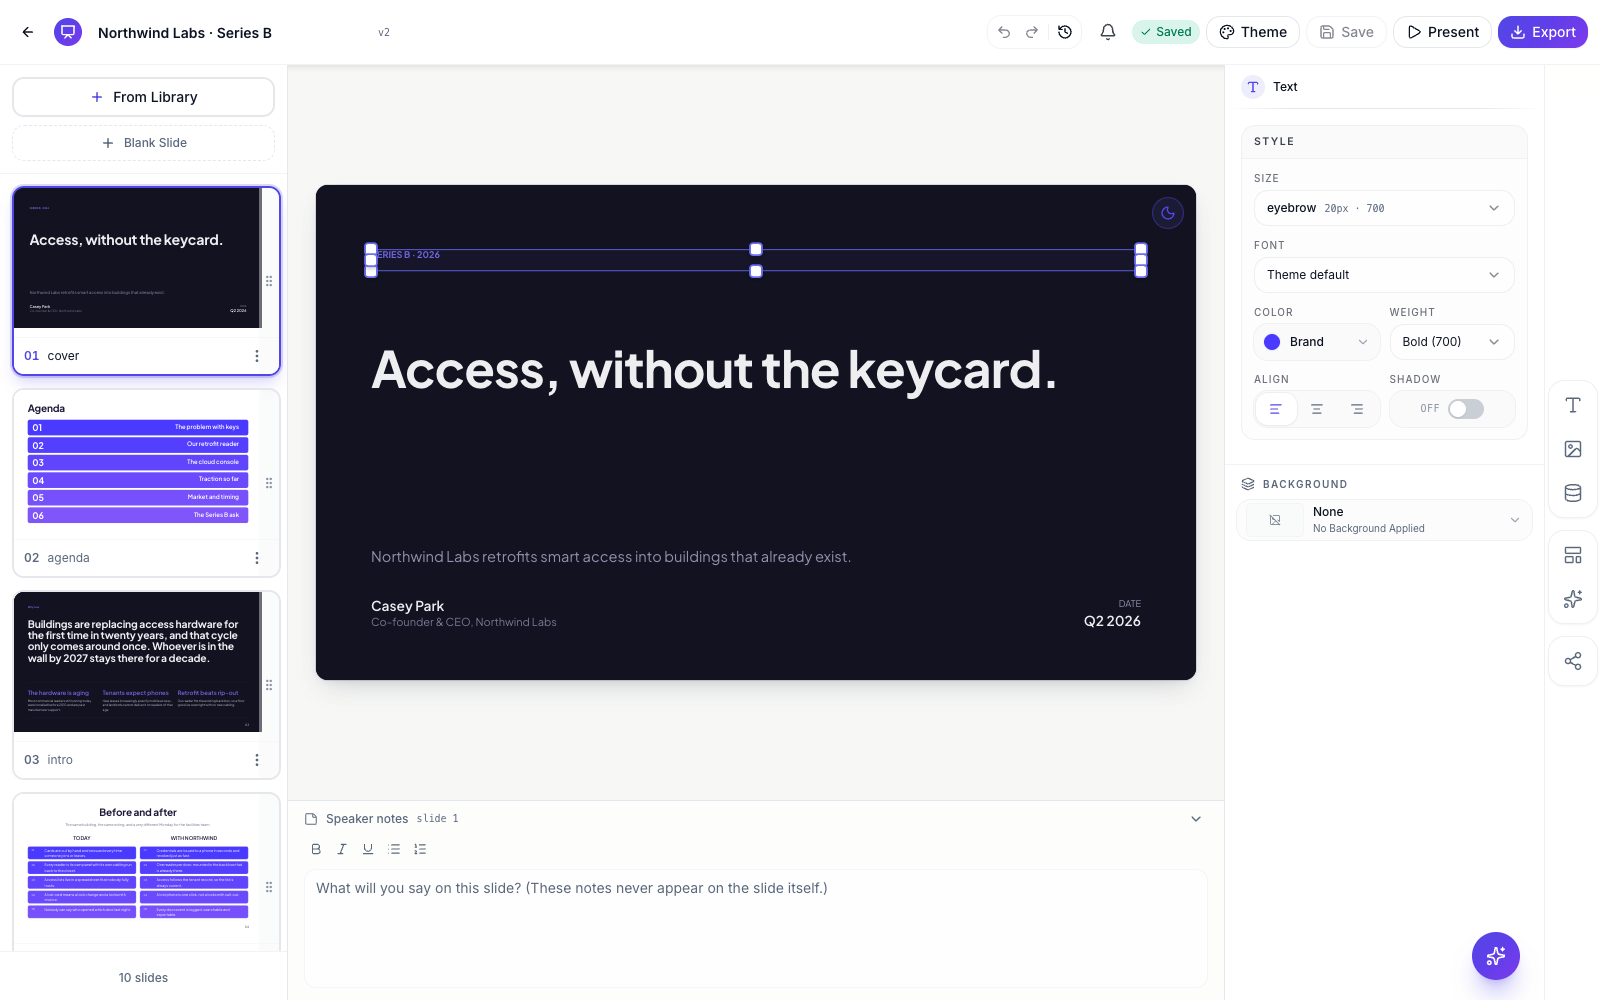 Theme steps rather than free numbers, which is why the deck stays consistent.
Stick to the named colours where you can. They’re the theme’s colours, so they re-resolve when you swap the theme; a custom colour is frozen wherever you set it. Reset at the top of the section clears your styling and puts the design’s own back.
Editing lists and tables
Selecting a list gives you an Items section: Add, Move up, Move down, Clear contents and Delete item. Building a list is adding empty items and typing into them on the canvas.
Tables work the same way with Columns and Rows, each with add, reorder and delete, plus a Caption field for the line under the table.
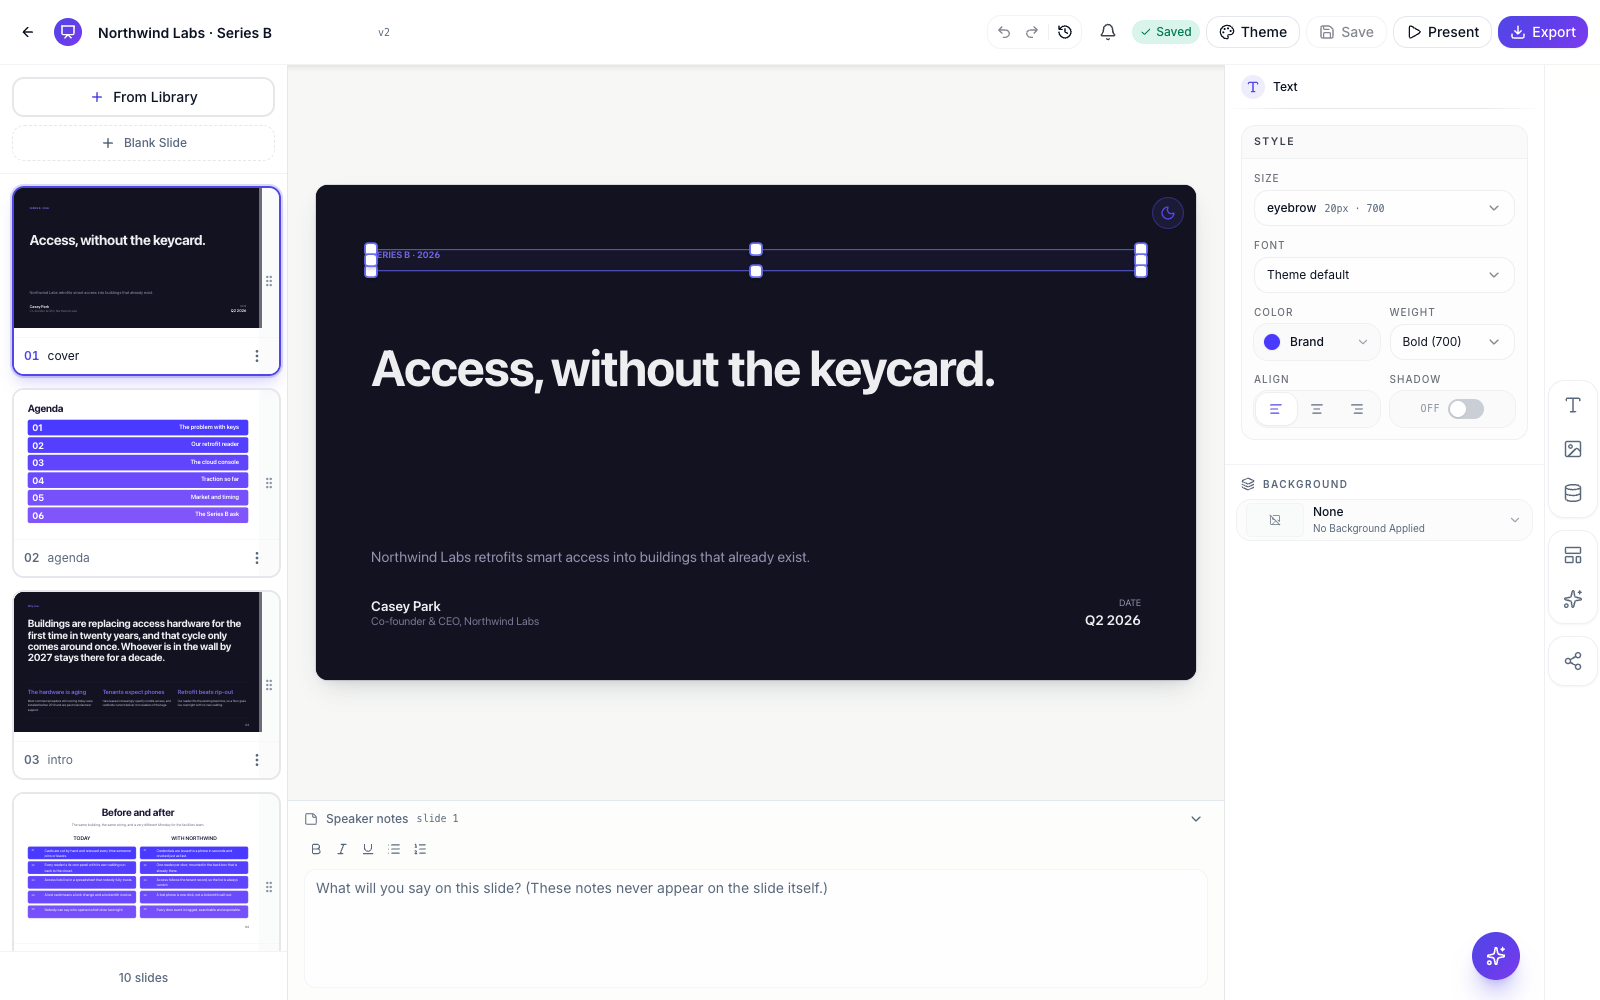 Add, reorder or remove items. The layout re-spaces itself.
When it’s faster to ask
For “add a callout under the third point saying the pilot starts in March”, the AI assistant is quicker than the rail, and it writes the words too. The rail is for placing things exactly and for styling; the assistant is for describing the outcome. Both edit the same slide: edit your deck with the AI assistant.
Ready to try it yourself?
Start free. Describe what you need and let OneCraft do the first draft.
Get startedSee it in the product
More presentations tutorials
- Add and generate images in slidesReplace any picture on a slide. Upload your own, describe one and let AI make it, reuse an image you already have, then set its corners, frame and shadow.
- Add charts, maps and diagrams to slidesPut real data on your slides. Ten chart types, world maps, Gantt timelines, flowcharts and classic frameworks like SWOT and Venn, all editable and styled by your theme.
- Add, reorder and restructure slidesAdd slides from a library of 353 designs or start blank, drag slides into a new order, duplicate or delete them, swap a slide's layout without losing its content, and set how each one enters.