How to
Add a pricing table with optional extras
Set up the items in a proposal or quote, mark some as optional extras, let the client choose quantities, and control how the pricing table looks on the page.
Proposals4 min readUpdated
This guide shows you how to build the pricing table in a proposal or quote: the items, tax and deposit, optional extras the client can add, and quantities the client can choose.
Optional extras are the easiest upsell there is. The client sees the core price first, then a short list of things they can tick, and the total moves as they choose. You set it up once in the builder.
The table on the page
Every generated proposal and quote has a pricing table. Items are grouped under headings like “Website” and “Optional extras”, optional items carry an OPTIONAL tag, and the totals underneath show the subtotal, tax, total, the deposit due now and the balance.
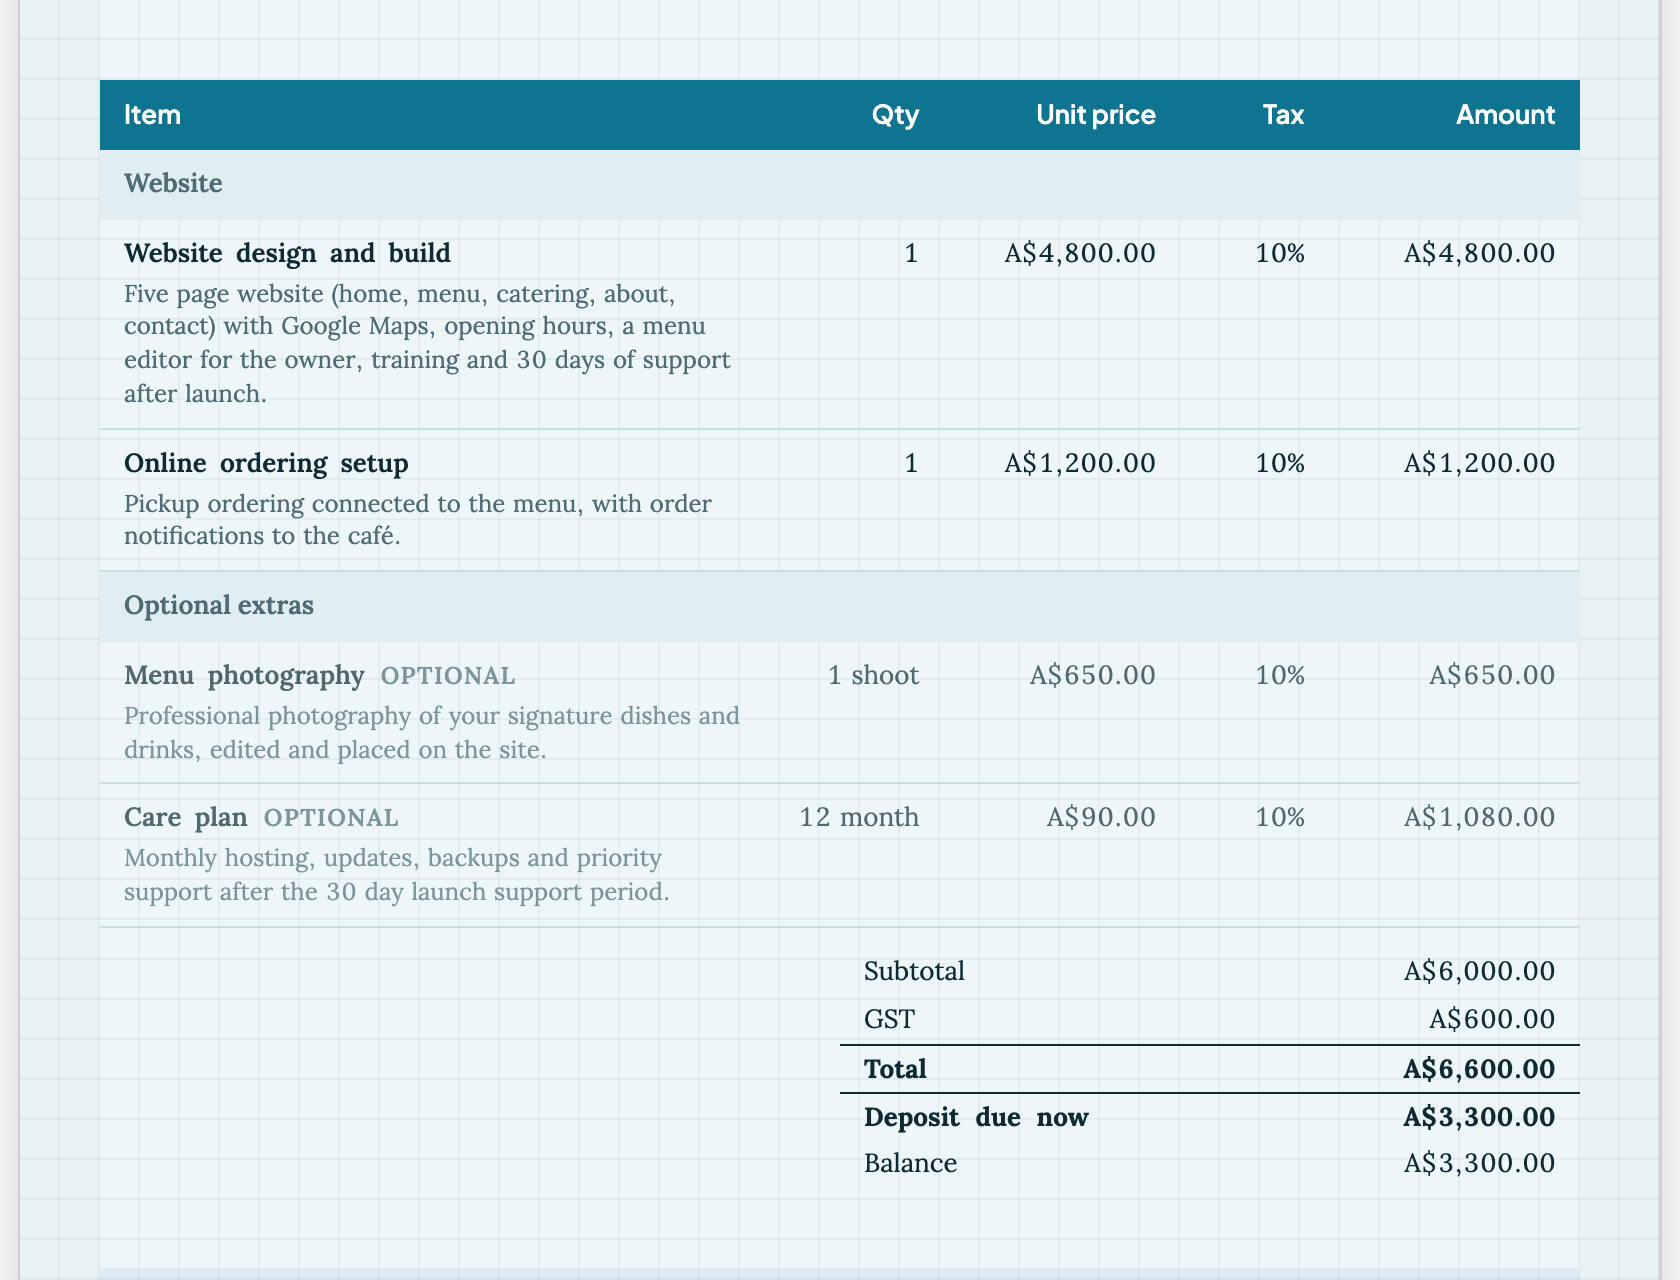 Core items first, optional extras below, totals at the bottom.
You do not type numbers into the table itself. All prices live in the Pricing panel, and the table follows it as you type.
Open the Pricing panel
Click the Pricing icon on the right rail of the builder. The panel saves on its own; the badge at the top says Saving… and then Saved.
From the top:
- Client: who the proposal is for.
- Kind: Proposal or Quote, plus the Currency.
- Valid until and Acceptance: the last day the client can accept, and how they accept. Click to accept lets them sign on the page.
- Tax: a Tax label such as GST or VAT, and a Prices include tax switch. Each item carries its own tax rate.
- Deposit: None, Percent of total or Fixed amount.
- Terms: payment terms, validity and anything excluded.
Add and edit items
Scroll down to Items. Each item has a name, an optional description, Qty, Unit, Unit price, a tax rate, Discount % and a Group heading. Drag the handle on the left to reorder items, use the copy icon to duplicate one, and the bin to delete it. Add item puts a new row at the bottom.
Mark an item as optional
Turn on Optional item for anything the client may add on. A second switch appears, Selected by default:
- Off: the extra starts unticked and is not counted until the client ticks it. The card says “Not counted until the client selects it”.
- On: the extra starts ticked and counts towards the total, and the client can untick it.
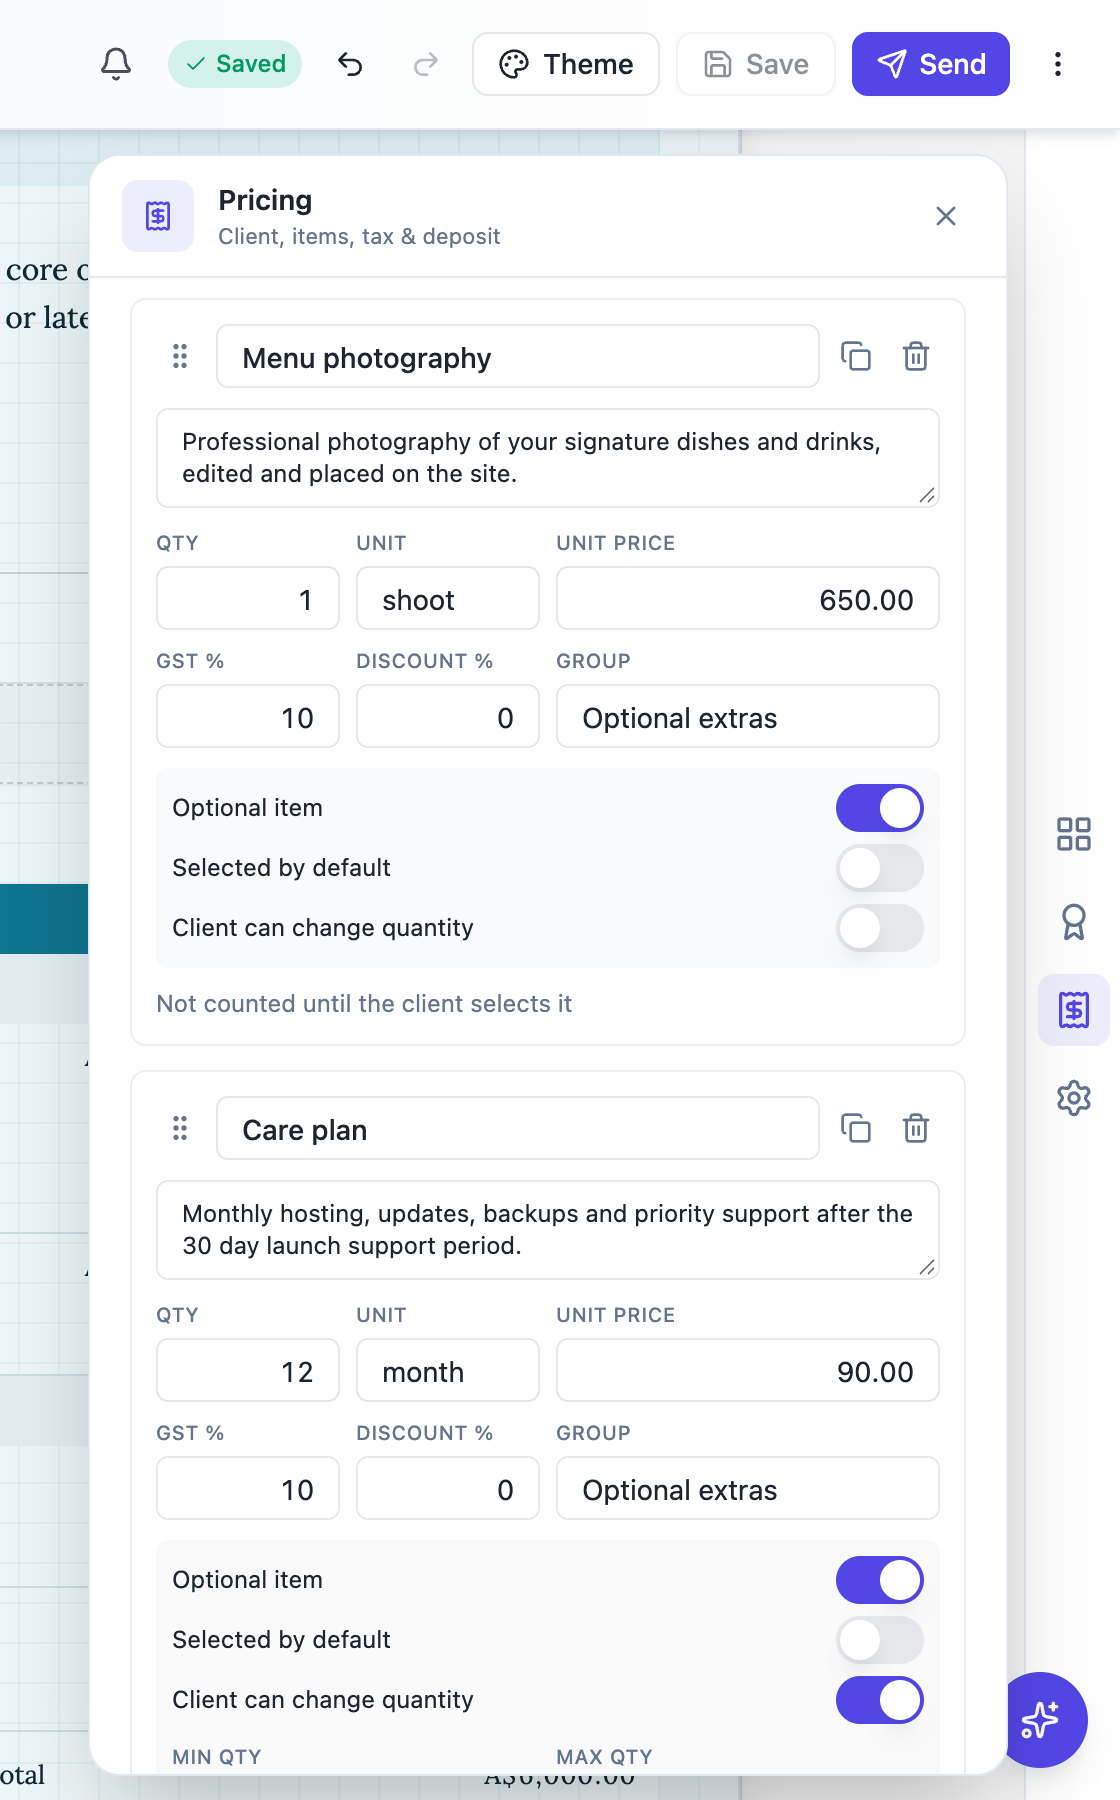 Menu photography is an optional extra that starts unticked.
Let the client choose a quantity
Turn on Client can change quantity for items sold by the month, the hour or the unit. Set Min qty and Max qty to keep the choice sensible. In this example the care plan can run from 1 to 12 months, and the quote shows 12 as the starting point.
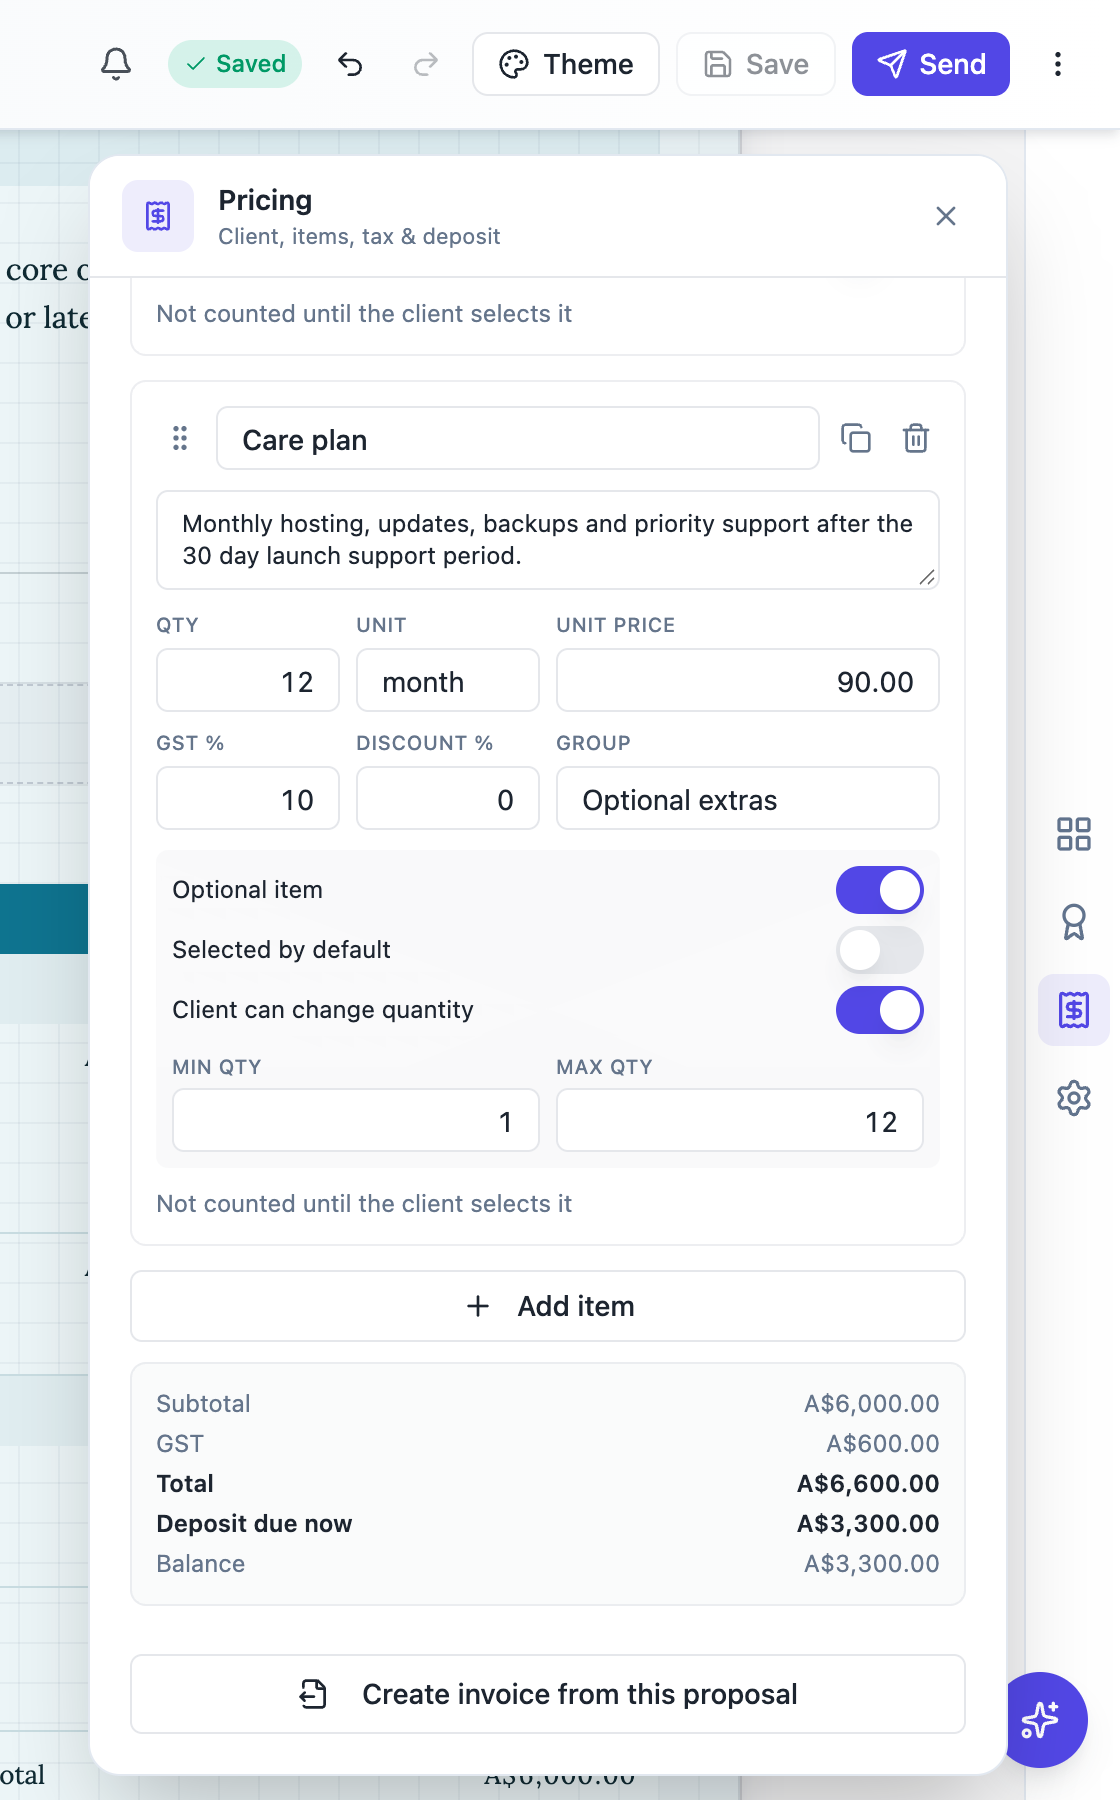 The totals under the items update as you change anything.
The totals box under the items shows Subtotal, the tax, Total, Deposit due now and Balance, counting only what is selected.
Choose what the table shows
Click the pricing table on the page and open its settings with the gear icon. Under Pricing Table you can rename the Title, pick Detailed (subtotal, tax, total) or Simple (total only) for the totals, and switch Show quantity, Show tax, Show discount and Show descriptions on or off.
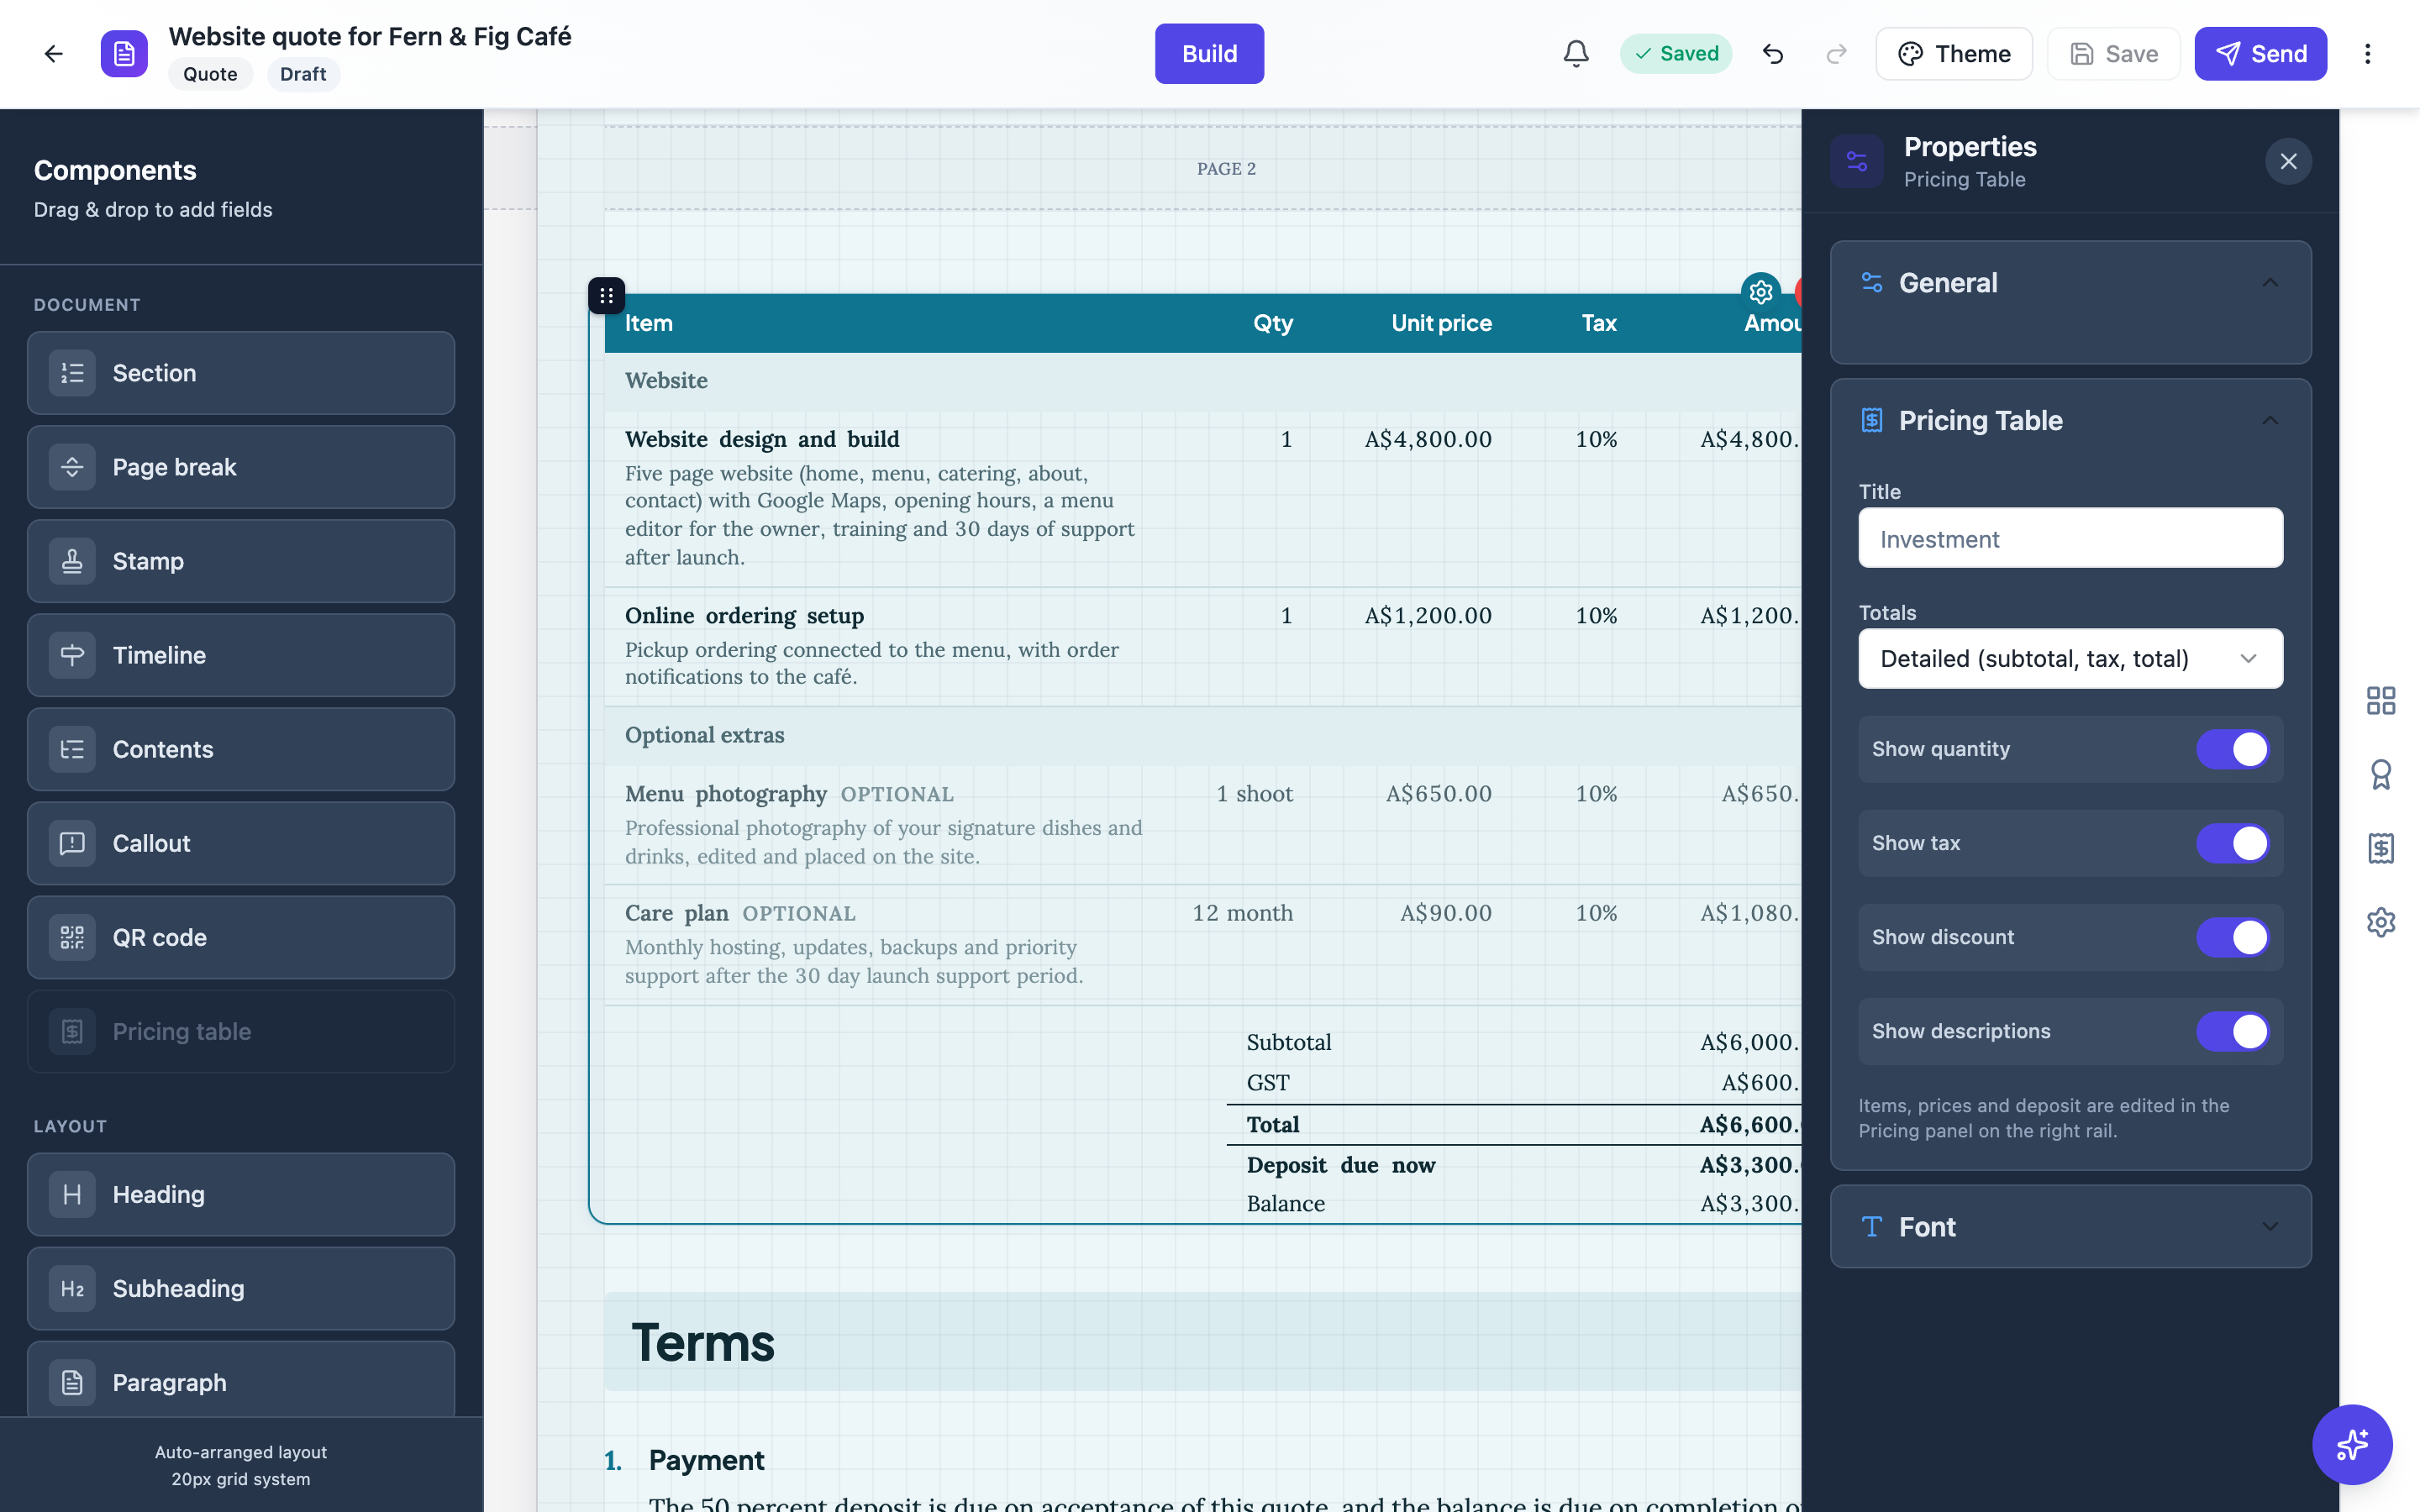 Hide the discount or tax columns when they would only show zeros.
What the client sees
When the client opens your link, a Your selection panel sits beside the document. Core items have a green tick, optional extras have a checkbox, and items with a client quantity have a number box. The totals and the deposit change as they choose, and the pricing table in the document follows along.
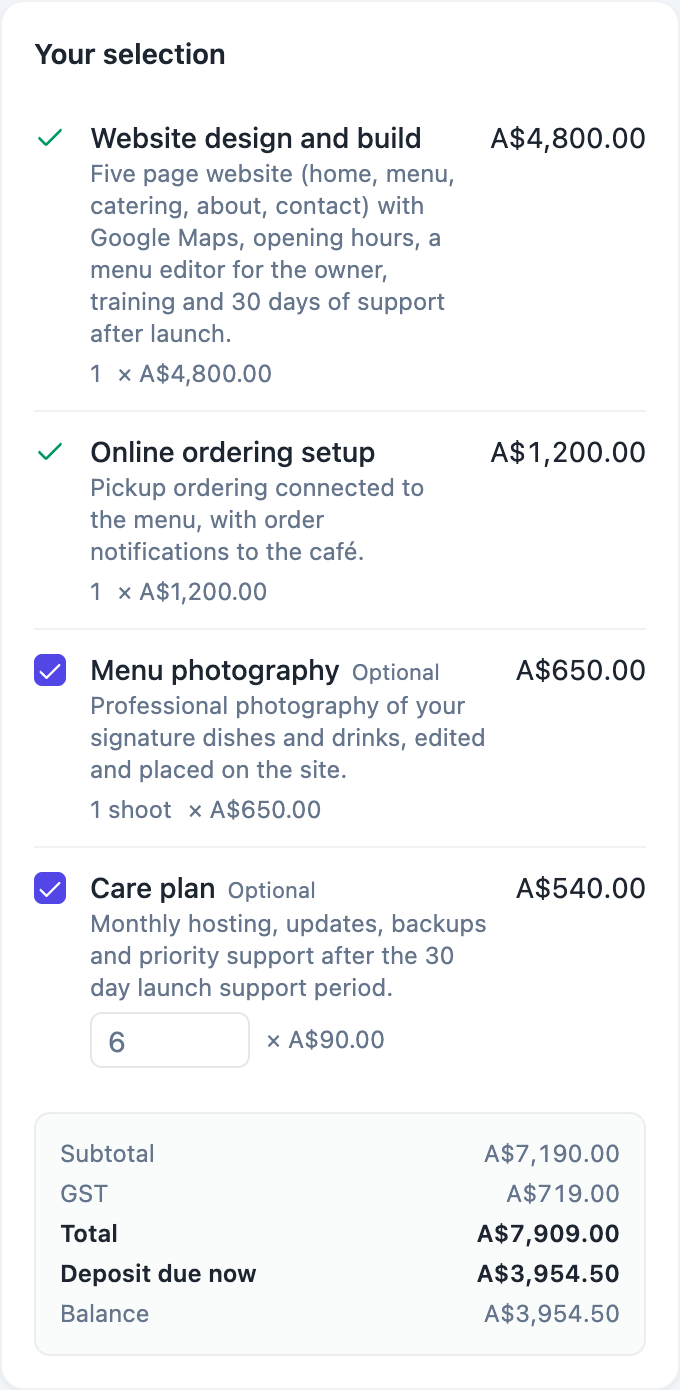 The client ticked both extras and chose six months of the care plan.
What they accept is what gets invoiced. See send a proposal and get paid for the full journey. The quote with optional extras and proposal with a pricing table pages show more, and proposals by service has finished examples.
Ready to try it yourself?
Start free. Describe what you need and let OneCraft do the first draft.
Get startedSee it in the product
More proposals tutorials
- Create a quote with AIDescribe the job, give your prices, and get a priced quote with scope, terms and signature lines in under a minute. Then check the numbers and send it.
- Manage clients in ProposalsKeep a client list with names, companies, emails, addresses and tax IDs, and pick a client in one click when you write a proposal, a quote or an invoice.
- Send a proposal and get paidWrite a proposal with AI, add a pricing table with optional extras and a deposit, send a private link, let the client accept and sign online, then collect the deposit through a pay link.