Create a form from scratch with AI
Describe the form you need and let AI build it. Restyle it, add e-signatures and email alerts, then publish a link that works on any device.
Forms6 min readUpdated
This guide shows you how to build an online form with AI: describe what you need, edit the fields, style it, publish it, and collect responses.
You already know what you want to collect. Typing every field out by hand is the slow part. Describe the form in a sentence or two instead, and start from a finished draft.
Describe the form you need
Open the form generator, keep the Classic style selected, and write what the form should collect. Mention the fields you care about and any rules, like which answers are required. Then generate.
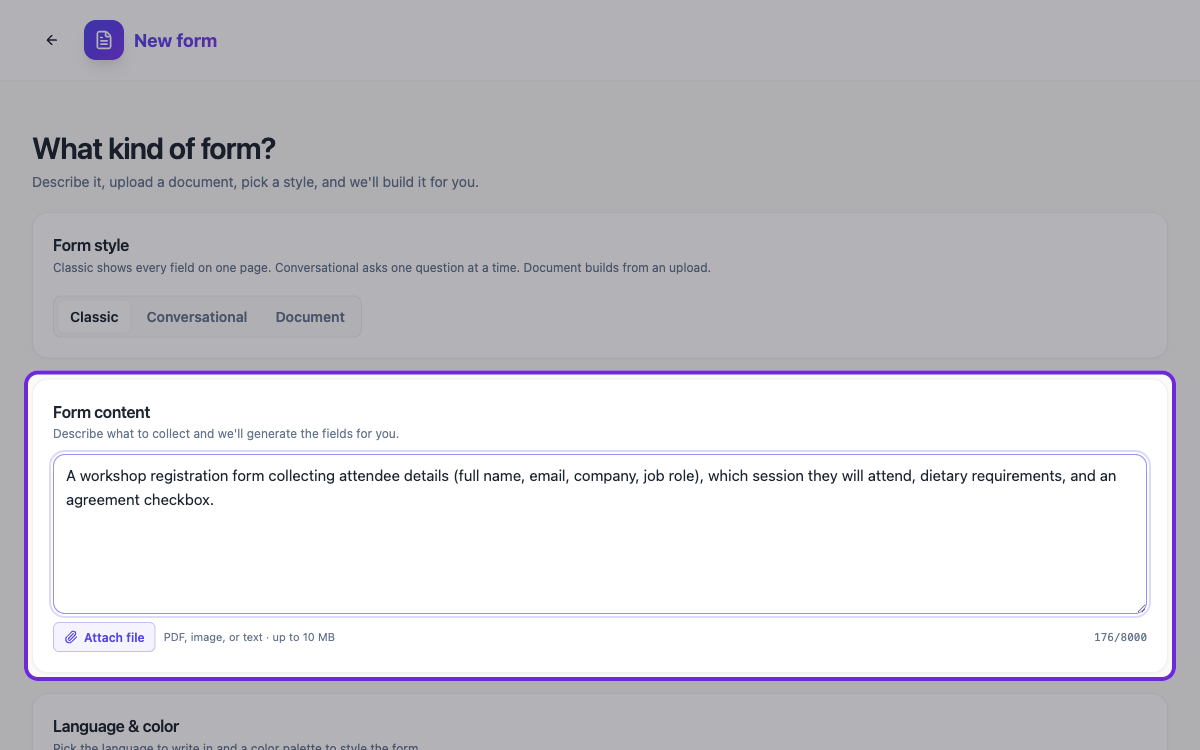 One or two sentences is enough. OneCraft generates the fields from your description.
Set the language and the colours before you generate
Under the description sits Language & color, and both settings are worth thirty seconds.
Language decides what language the form is written in. Every label, every help line, every button. Pick French and you get a French form, not an English one translated afterwards.
Color palette picks the colours the form is generated with, from twenty two palettes shown as swatches so you can see each one before you choose. Pick the closest to your brand now and you will have less restyling to do later. You can always change it afterwards in Theme Studio.
Edit the fields in the builder
A few seconds later your form is in the builder, organised into sections with sensible field types already chosen. From here it works like a canvas. The panel on the left holds every component you might want, from headings and text inputs to dates, dropdowns and file uploads. Drag anything in, reorder questions, and click any field to adjust its label, placeholder or validation.
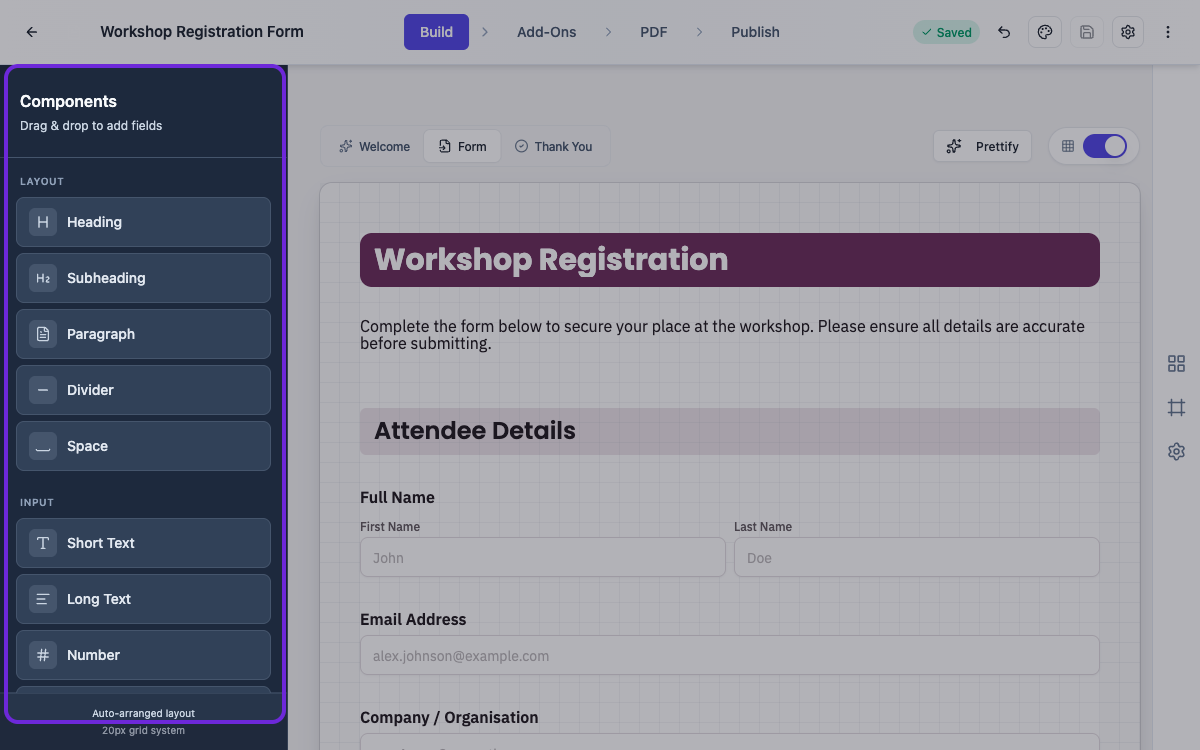 Everything on the left drags onto the form. Click any field to edit it.
Style your form with a theme
Click the Theme button in the top bar to open Theme Studio. Pick one of the built-in themes and the whole form restyles instantly. Want more control? The Colors and Fonts tabs let you tune the palette and typography to match your brand.
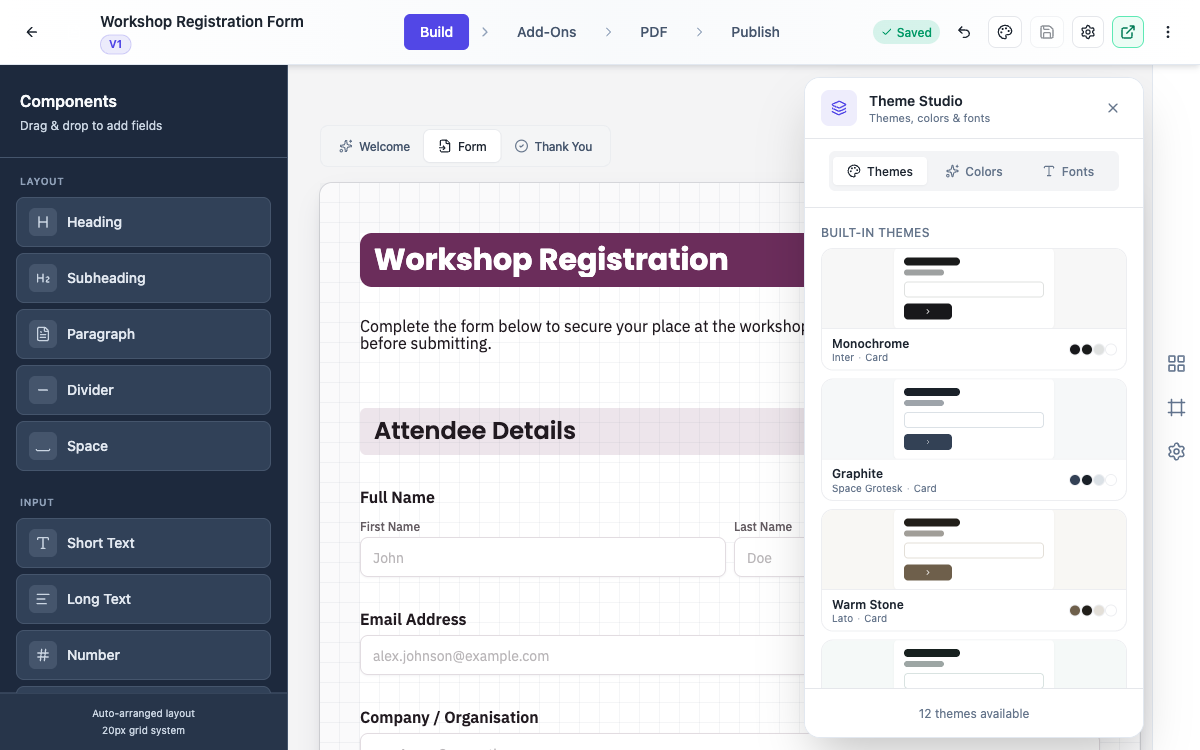 Theme Studio: pick a theme, or shape the colours and fonts yourself.
Put your logo on the form
Open Page & Brand from the icon rail and turn on Show logo under Brand Logo. Upload a PNG, JPG or SVG, add the Header text that runs beside it, and choose Horizontal or Vertical, All pages or First page, with an optional Logo shadow. The Footer section below it adds footer text and page numbers.
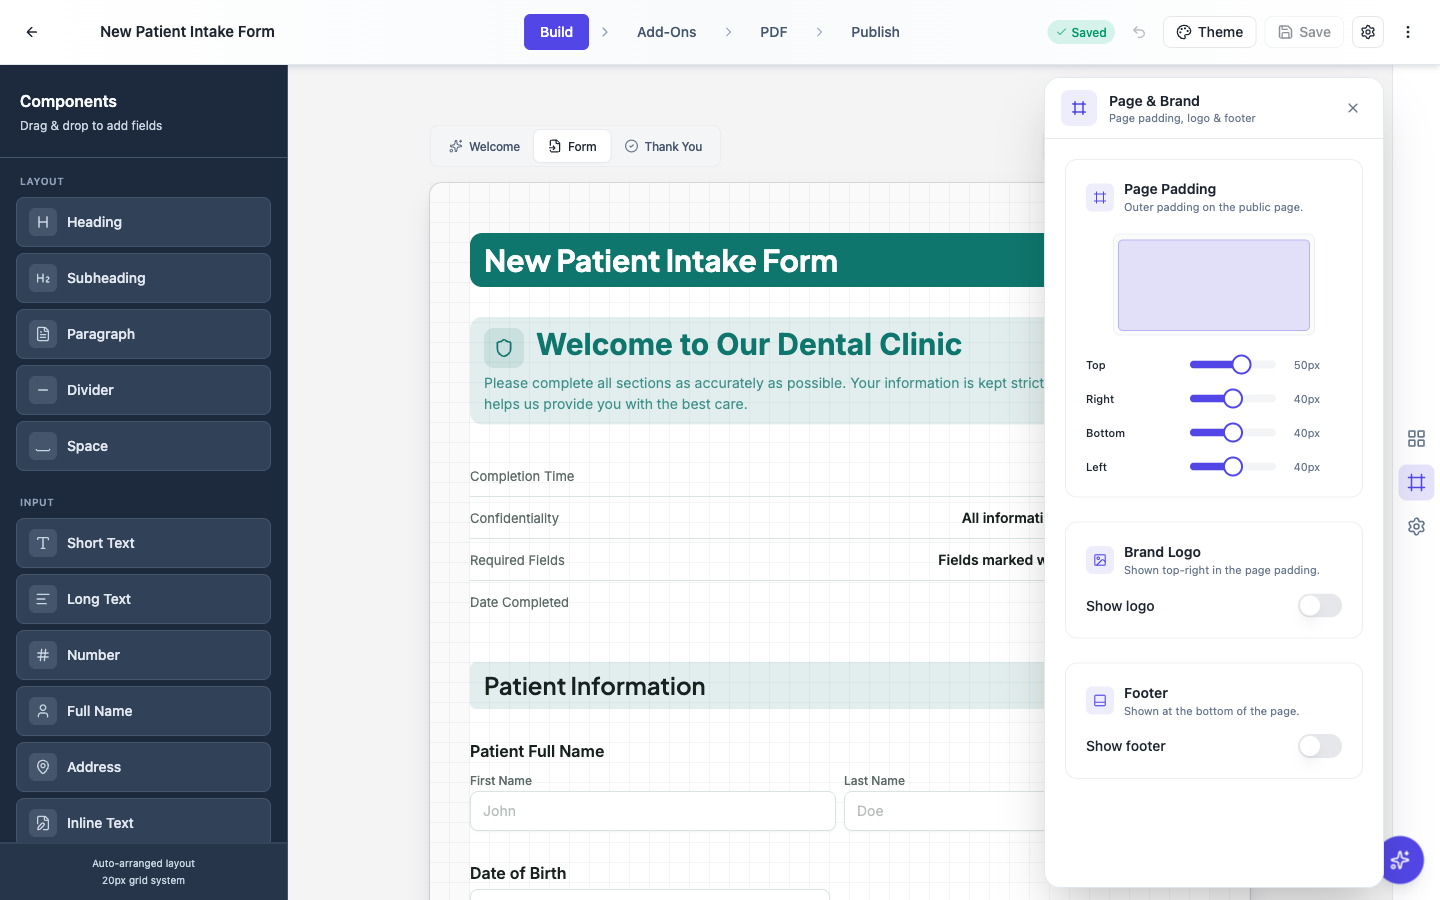 Brand Logo sits in the page padding, top right, on the live form.
Worth knowing: this logo also becomes the header on the PDF of each response, so you set it once and it turns up in both places.
Reword questions by asking the AI assistant
Rewriting labels one by one gets old. Open the AI assistant from the sparkle button in the bottom corner and say what you want in plain language. Reword the email question to be friendlier. Make every label shorter. Change the options on the plan question to Basic, Pro and Team.
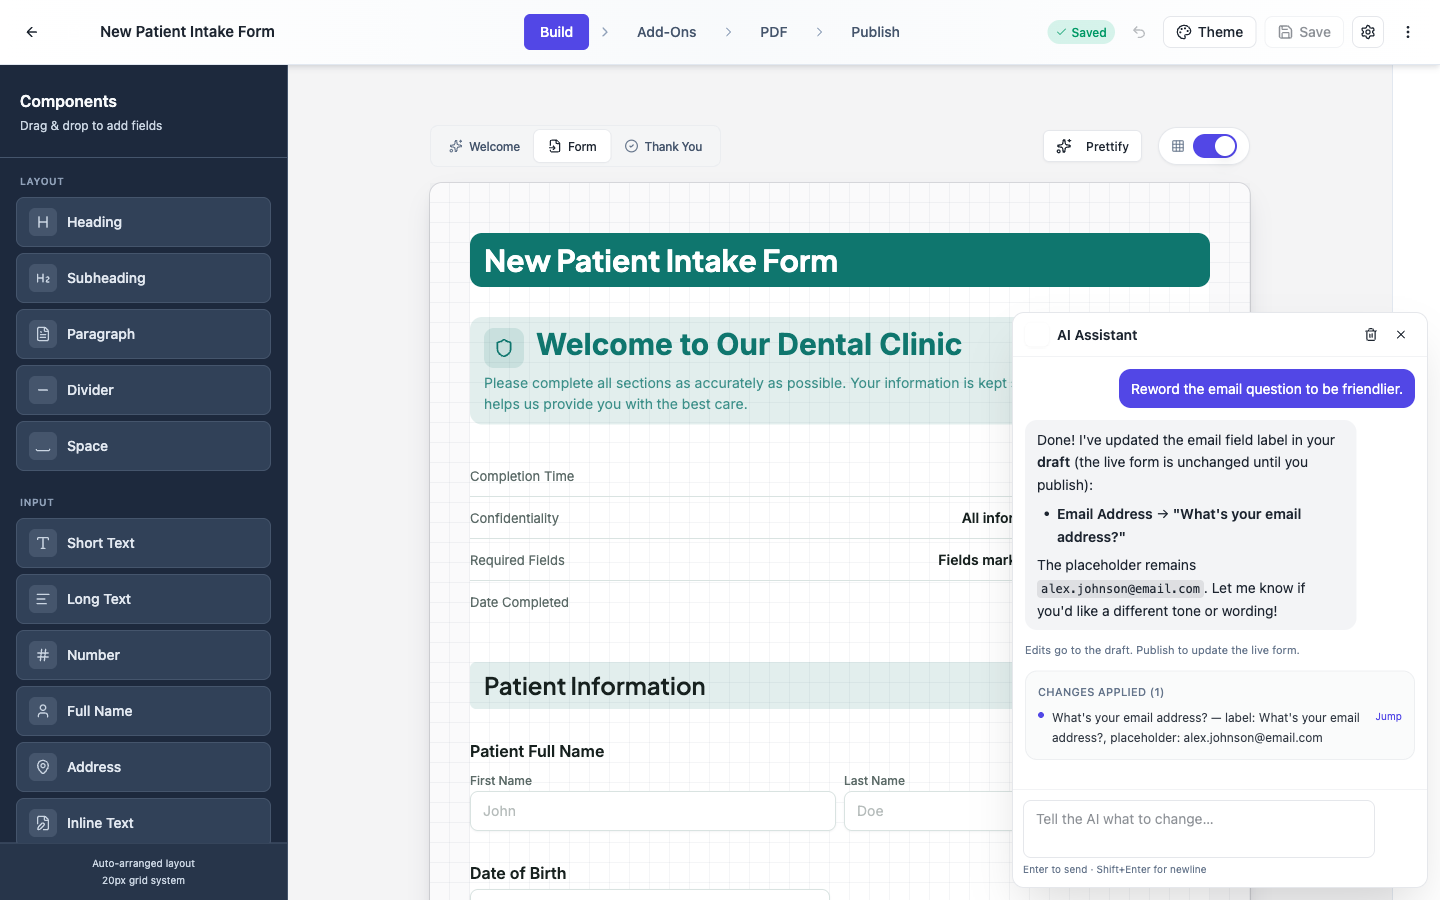 Ask in plain language. The assistant makes the edit and lists it under Changes applied.
Two things to know. The assistant edits wording only: your field labels, help text and options, the form title, and the text on your welcome and thank-you screens. It will not add, delete, reorder or resize fields, change a field type, touch validation, or restyle anything. And every edit goes to your draft, which is why the panel reminds you to Publish before the live form changes. If a change isn’t right, one undo takes the whole turn back.
Add email alerts, webhooks and e-signatures
The Add-Ons tab is where your form gets its superpowers. Turn on Email Alerts to get a message the moment someone submits. Add Webhooks to send responses to your other tools. And if the form needs a signature, drag in an E-Signature component from Electronic Signing.
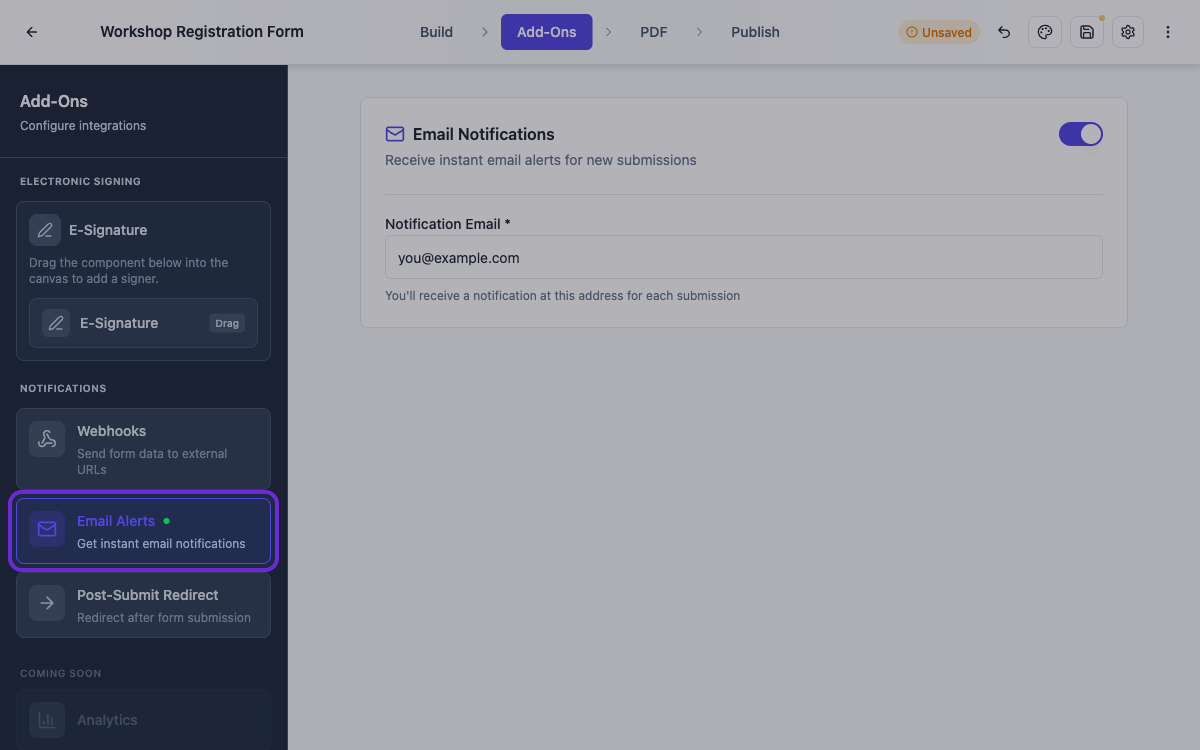 Email alerts, webhooks, redirects and e-signing all live in Add-Ons.
Download a fillable PDF
Some forms still end up printed or emailed as attachments, and that’s covered. Open the PDF tab to see your form laid out as a document, tidy it up if you like, then open the menu in the top corner. You get two options. Download PDF gives you a clean file, ready for printing. Download Fillable PDF gives you a real PDF form people can type into on their computer and send back, no website needed.
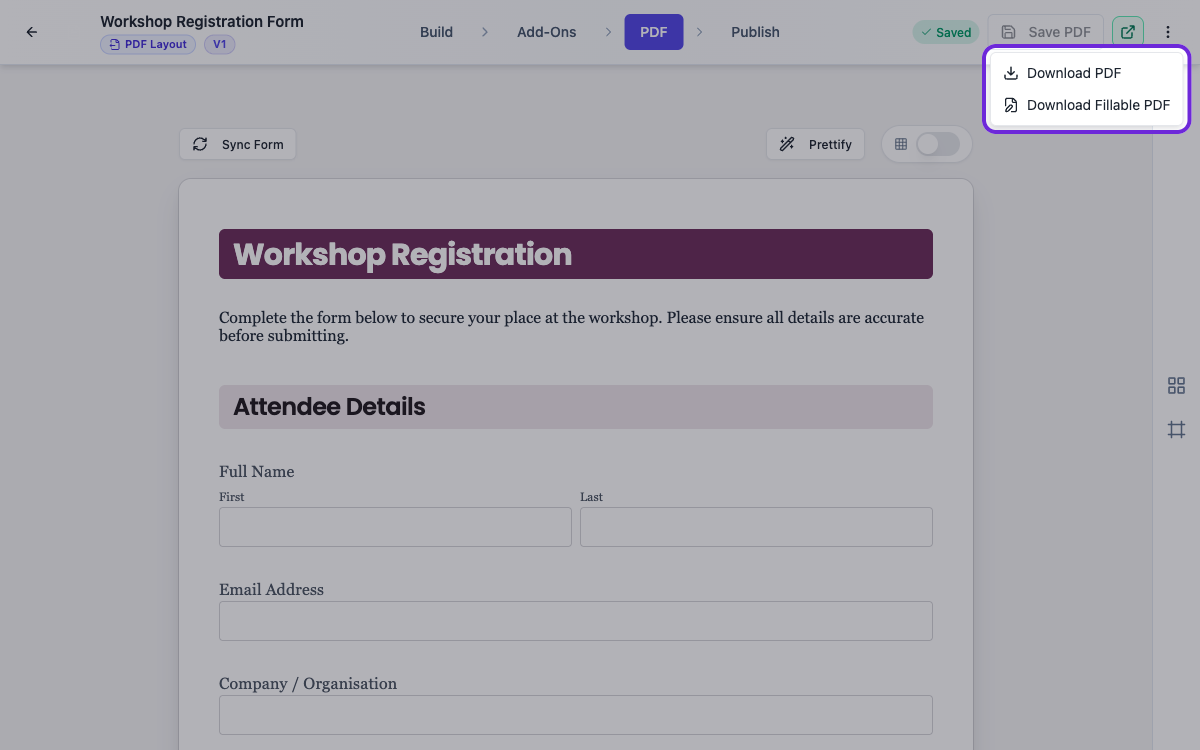 Two PDF exports: a clean file for printing, or a fillable PDF people complete on screen.
The PDF has its own layout, kept separate from the web form, so you can reorder it, hide the parts that make no sense on paper, and set a header and footer. See Shape the PDF version of your form.
Publish your form and share the link
When the form is ready, head to the Publish tab and click Publish Form. You get a public link right away, with Copy and Open buttons beside it. Share that link anywhere.
Two things worth reading once you are live. Control who can fill in your form covers the access types on this same tab, from a password to a company email allowlist. Publish updates without breaking your live link covers what happens when you edit a form people are already filling in.
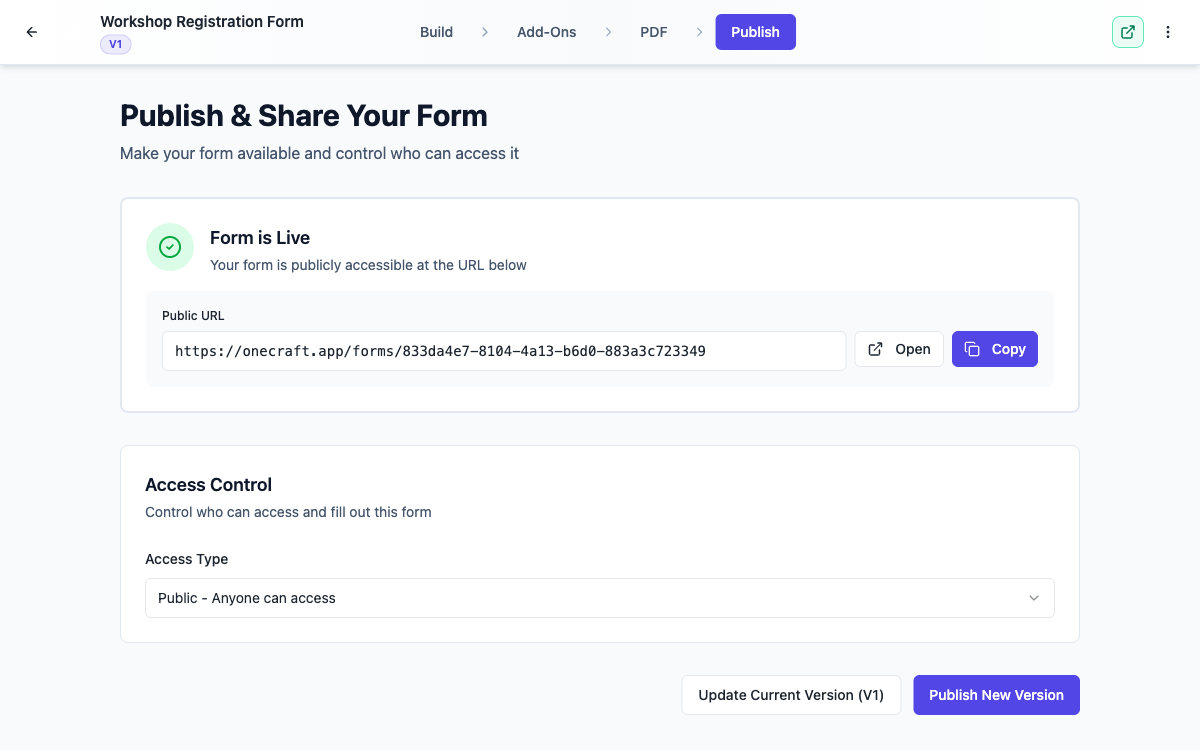 One click and your form is live, with the public link ready to share.
Your form works on mobile
There’s nothing extra to do for mobile. The published form adapts itself to whatever screen it opens on. On a laptop, fields sit side by side where it makes sense. On a phone, everything stacks into a clean single column that’s easy to fill with a thumb.
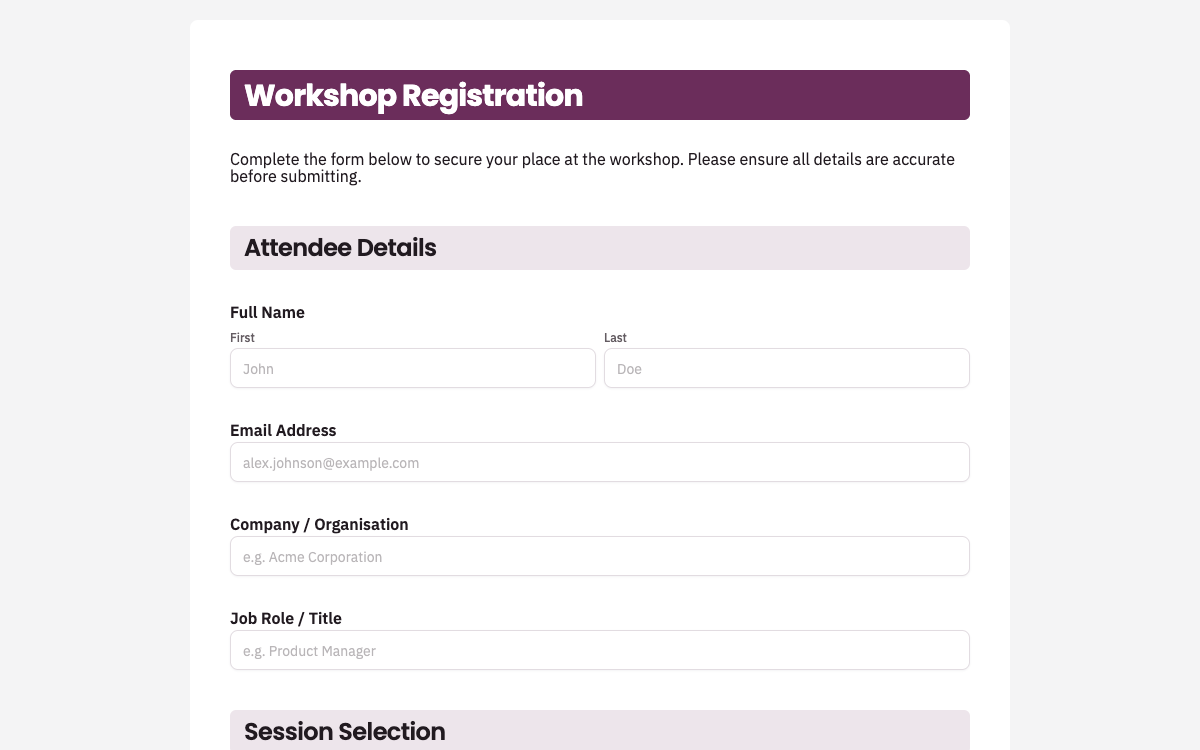 The published form on desktop, with fields side by side.
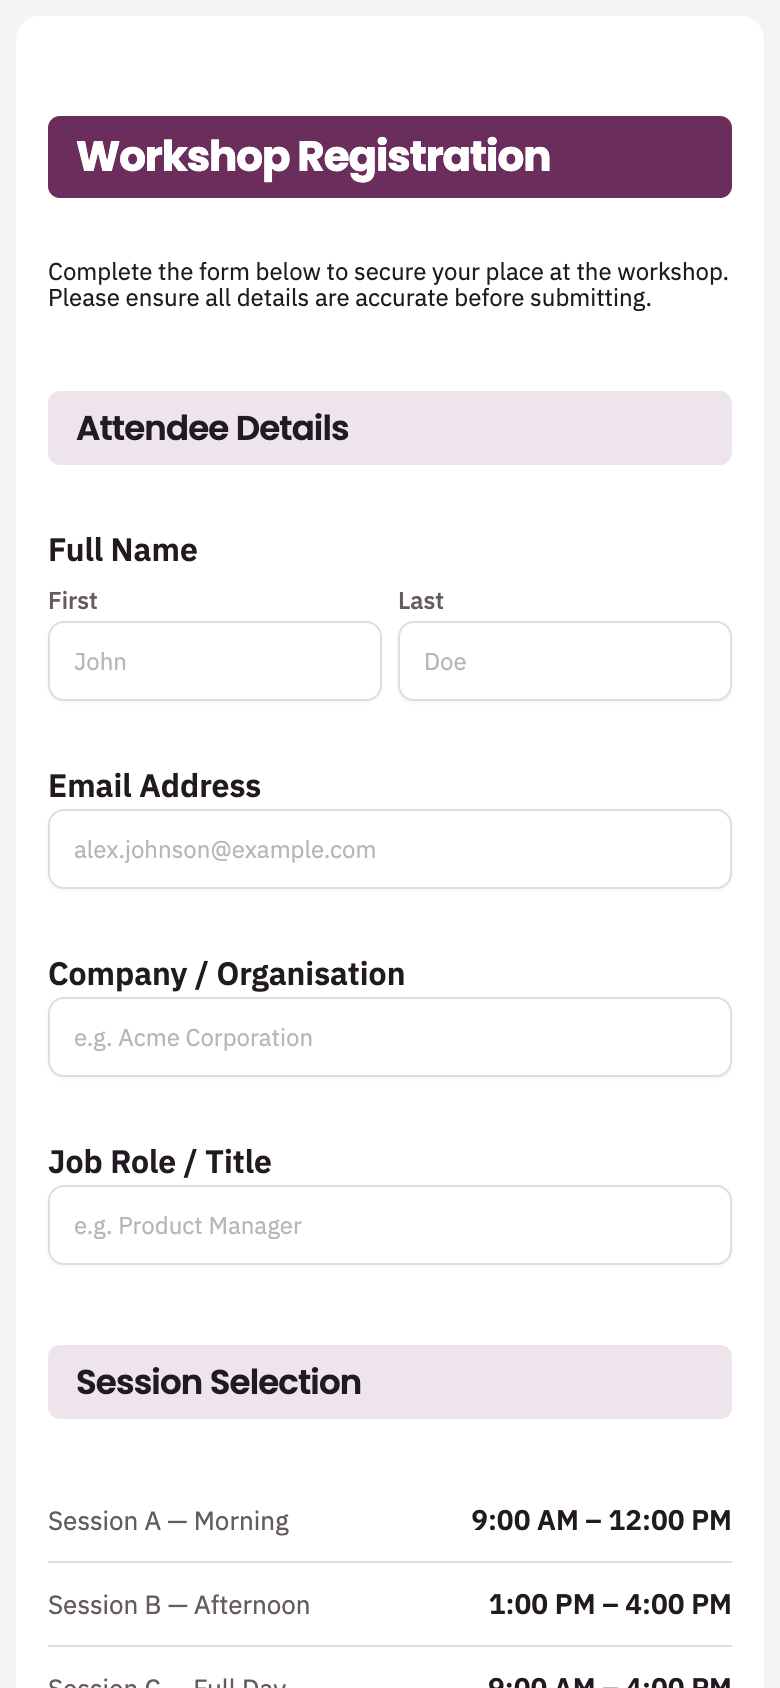 The same form on a phone. Same style, stacked for small screens.
View and export your responses
Every submission lands in one place. On the dashboard, once a form is published, its card gets a Responses option in the card menu. Each submission is a row and each field is a column.
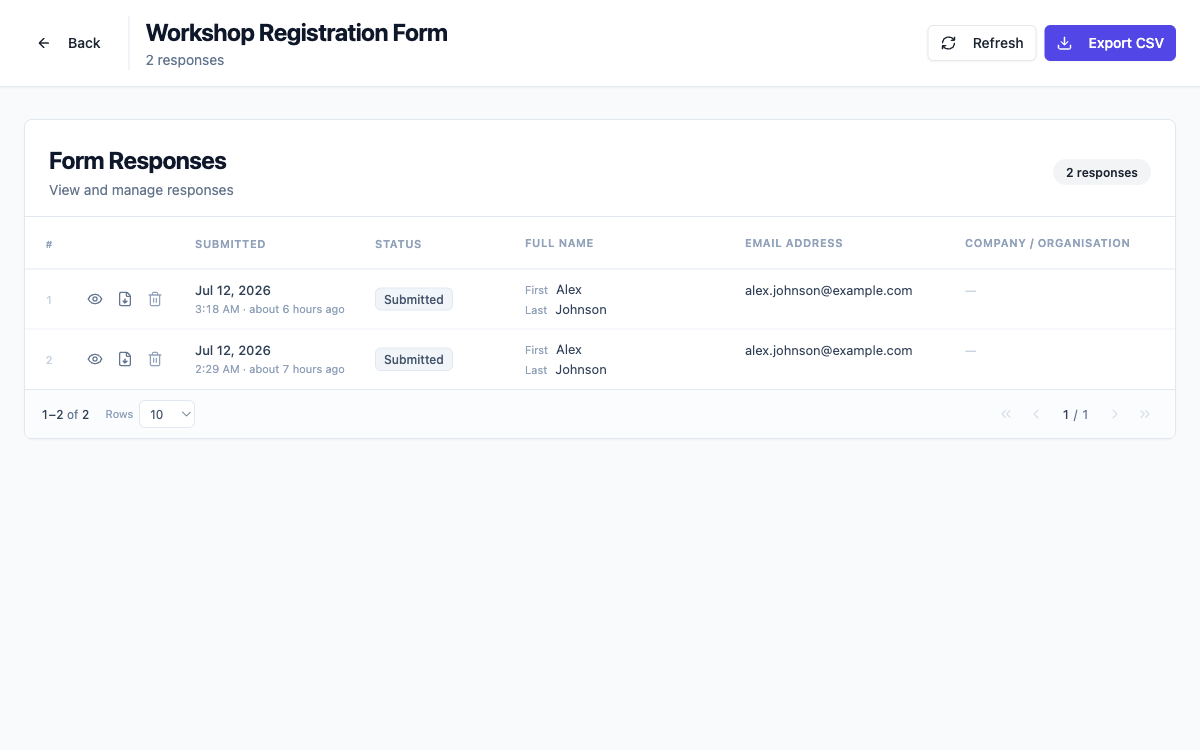 Each submission is a row. View one in full, or export them all as CSV.
Opening a single response, downloading its PDF, getting the files people uploaded and exporting everything to a spreadsheet are all covered in View, export and manage your responses.
Ready to try it yourself?
Start free. Describe what you need and let OneCraft do the first draft.
Get startedSee it in the product
More forms tutorials
- Add e-signatures with multiple signersAdd signature fields to a form, choose how each signer's email is collected, set the order people sign in, and collect signatures that are legally clear, with the date and time on record.
- Automate your form with add-onsConnect webhooks, get instant email alerts for new submissions, and send people to your own page after they submit.
- Build your own form themeStart from a built-in theme, or build one from scratch with your own layout, colours, fonts and effects, save it, and reuse it on every form you make.