How to
How to install my app on my phone for testing
Build a test version of your app with Expo, scan the QR code on Android or add your Apple account for iPhone, and install the real app without a store. Costs and limits included.
Sites3 min readUpdated
This guide shows you how to install your app on your phone for testing: a real build of the app, made in Expo’s cloud and installed straight onto your phone, without going through a store.
The phone frame in the builder shows how the app looks. A test build shows how it feels: real scrolling, the real keyboard, the app icon on your home screen.
Test build or store build
Open your app in the app builder. The right panel starts with Build for your phone: “Expo builds the real app in its cloud. You don’t need an Expo account.” It has two choices:
- Android or iPhone.
- Try it on your phone, a test version you install directly, or For the stores, the file you submit to the App Store or Google Play yourself.
For testing, pick Try it on your phone.
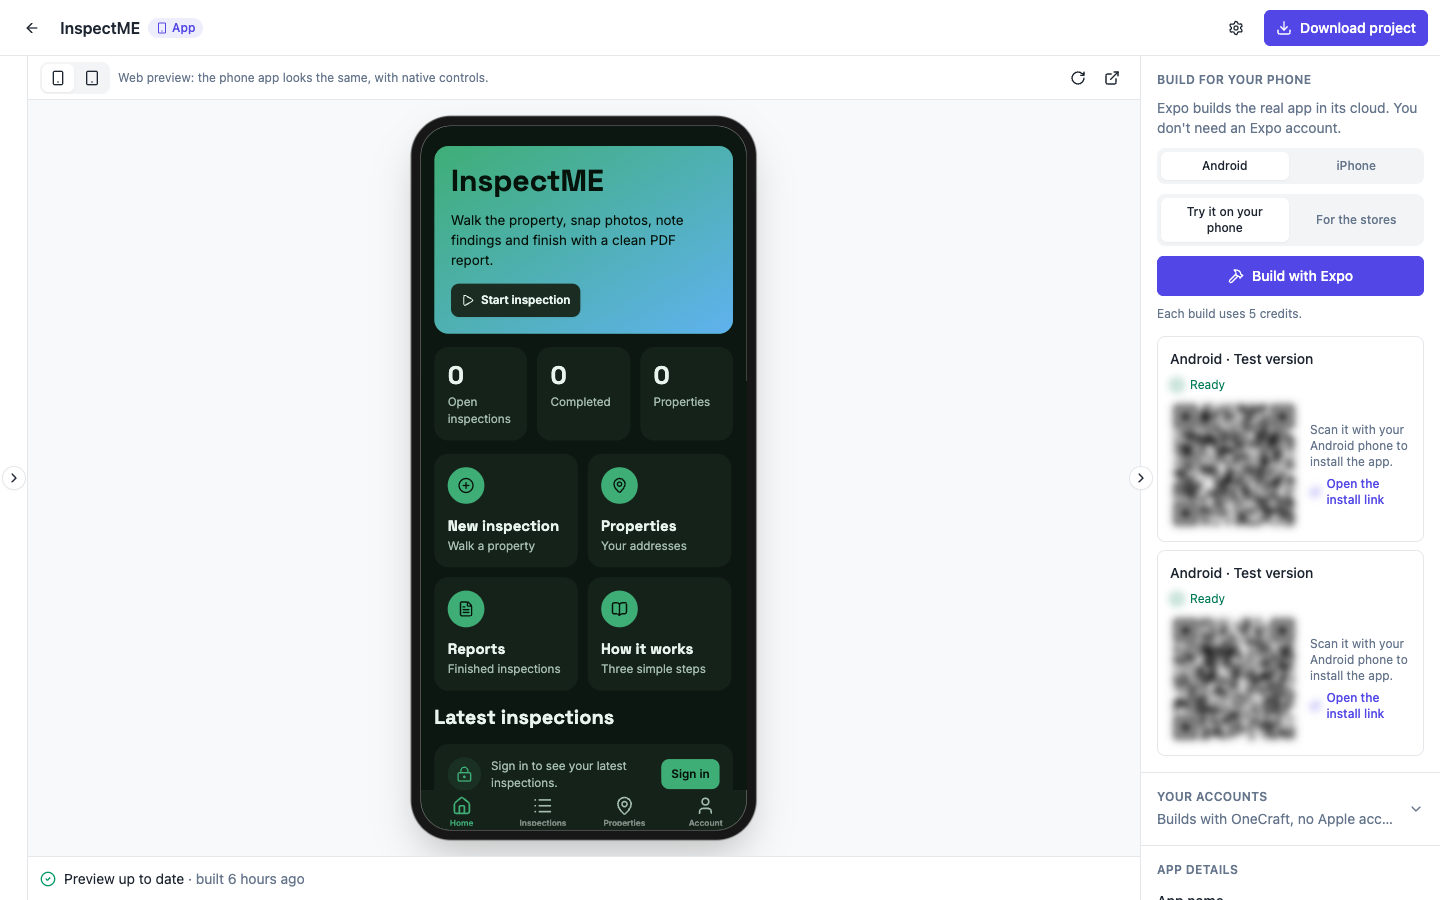 Each build uses 5 credits and keeps its own QR code. The codes are blurred here; yours are sharp.
Starting a test build
Click Build with Expo. The build appears in the list under the button, newest first, with a title such as Android · Test version and a status that moves from Queued to Starting on Expo to Ready. If a build fails, its row offers Open the build log.
Only one build runs at a time. If you click again while one is running, the panel asks you to wait for it to finish.
Installing on Android
When an Android build reads Ready, it shows a QR code: “Scan it with your Android phone to install the app.” Point the phone’s camera at the code and open the link, or click Open the install link to open it on a device yourself. Android may ask you to allow installs from your browser the first time.
Expo keeps the file for 30 days; after that, build again.
Installing on iPhone
iPhone builds need your own Apple Developer account, which costs 99 USD a year. Under Your accounts (it reads “Builds with OneCraft, no Apple account” until you add one), fill in Apple, for iPhone builds:
- Team ID: ten letters and numbers, on the Membership page of developer.apple.com.
- Account type: Individual or Company.
- Key ID, Issuer ID and Key file contents: make a key in App Store Connect under Users and Access, Integrations, App Store Connect API, with the Admin or App Manager role, then paste everything in the .p8 file.
Click Save Apple account, pick iPhone and Try it on your phone, and click Build with Expo. A finished iPhone test build offers Open on your iPhone, for “an iPhone that is registered with your Apple account.”
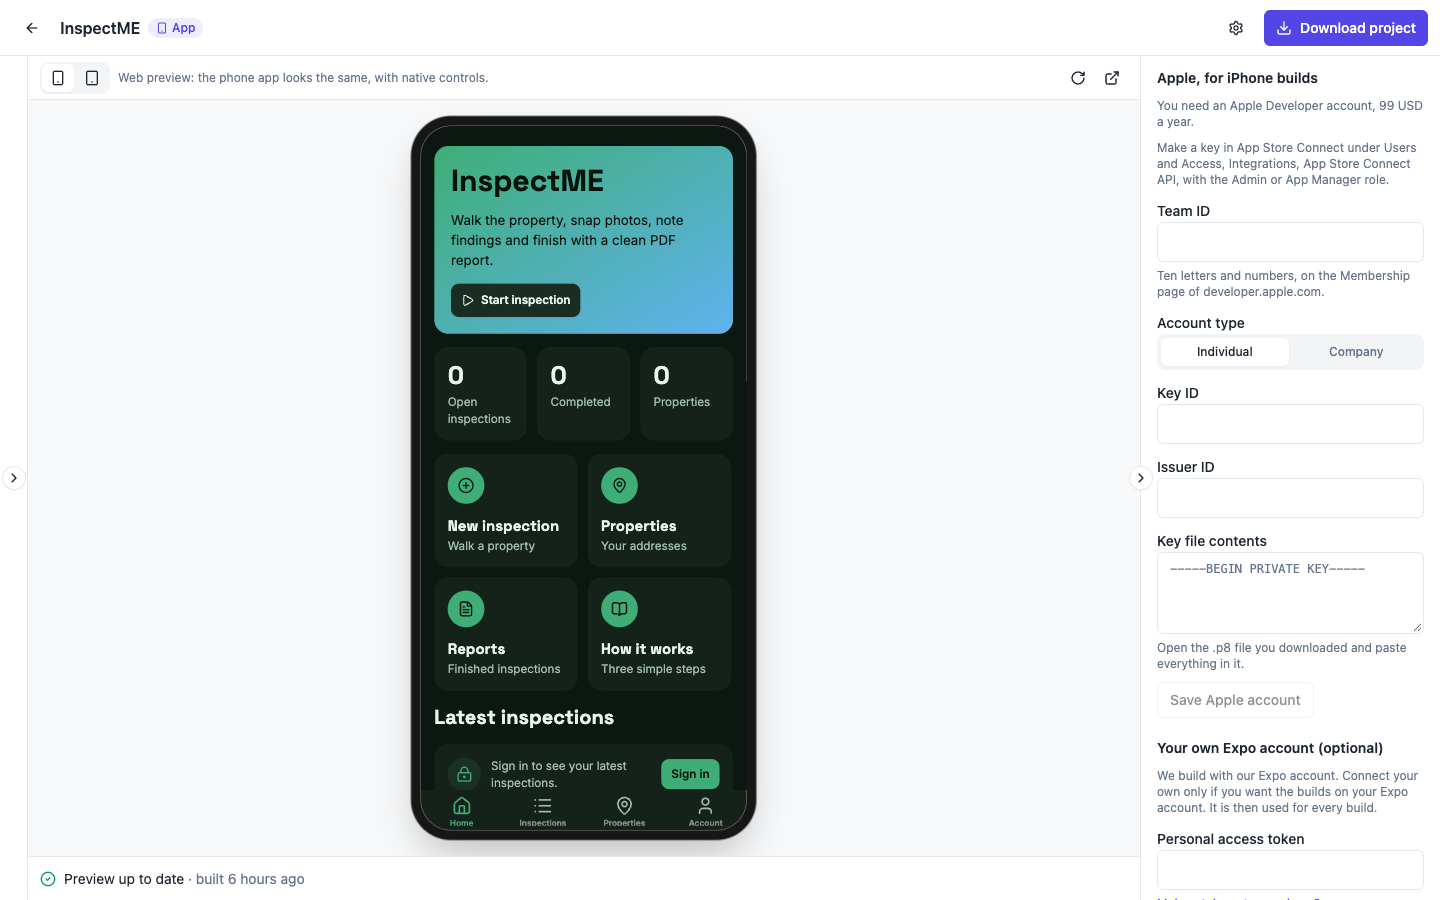 Without an Apple account, an iPhone build asks you to add one first.
Your own Expo account (optional)
Below the Apple form sits Your own Expo account (optional). OneCraft builds with its own Expo account by default; paste a Personal access token from expo.dev only if you want the builds on your Expo account. It is then used for every build.
Next: the stores
When the test version works, switch to For the stores and build a Store version. Its row offers Download the file: “Send it to the store with eas submit from the downloaded project.” OneCraft never submits the app for you.
New to apps? Start with how to make a phone app with AI, and check the screens first with the frames covered in how to preview my website on my phone. The app store builds with Expo page covers store builds in more depth, and what is EAS Build explains the build service.
Ready to try it yourself?
Start free. Describe what you need and let OneCraft do the first draft.
Get startedSee it in the product
More sites tutorials
- How to make a phone app with AIPick Mobile app in the generator, base it on one of your websites or not, describe what it should do, press Generate app and check every tab in the phone and tablet frames.
- How to create a website with AI, step by stepDescribe your business, give it a name, fill the options that matter, press Generate site and make your first change by chat. Every screen of the website generator, shown in order.
- How to preview my website on my phoneCheck your website at phone width in the builder, then open the preview link on a real phone before you publish. What the 15 minute link does, and how apps differ.