Automate your form with add-ons
Connect webhooks, get instant email alerts for new submissions, and send people to your own page after they submit.
Forms2 min readUpdated
This guide shows you how to connect a webhook, turn on email alerts for new submissions, and redirect people to your own page after they submit.
A form that only stores answers is doing half the job. The Add-Ons tab is where your form starts talking to the rest of your tools.
Open the Add-Ons tab
In the builder, switch to the Add-Ons tab. Everything lives in the left panel: Electronic Signing, Webhooks, Email Alerts, and Post-Submit Redirect. Click any of them to configure it, then save.
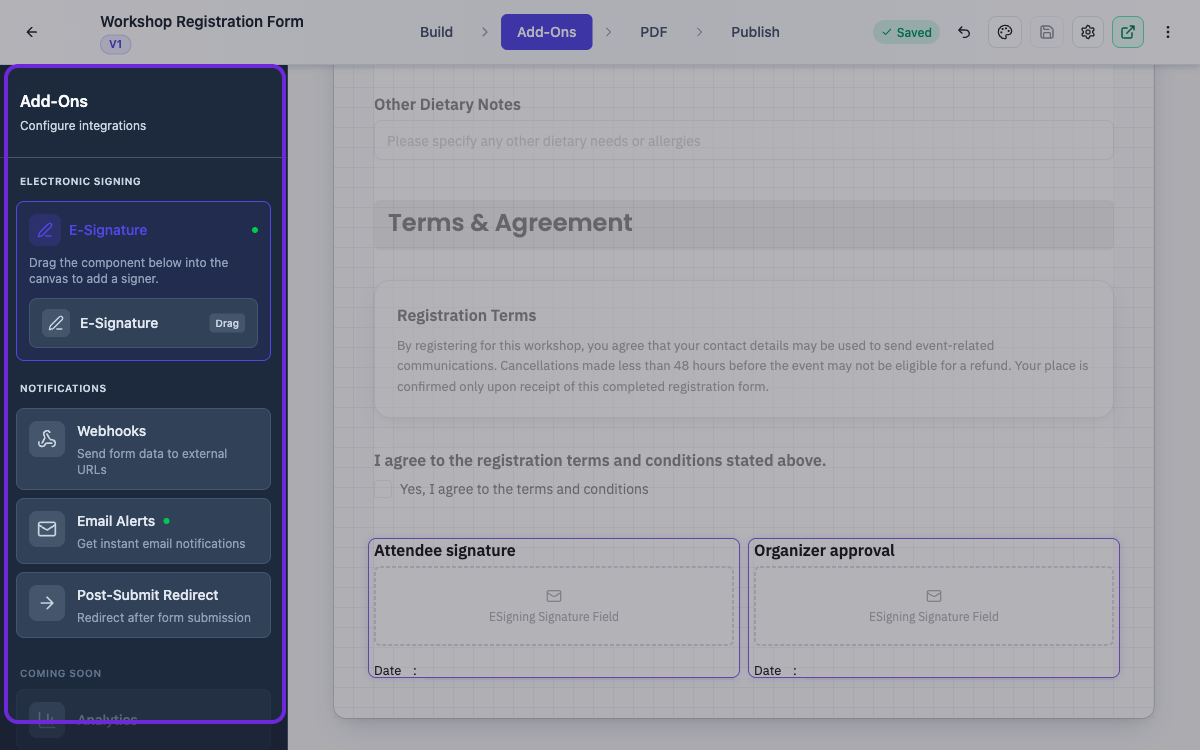 All add-ons in one place. A green dot marks the ones that are active.
Send submissions to a webhook
Turn on Webhook Notifications and paste the URL you want to receive the data. From then on, every submission is sent to that address as a POST request with a clean JSON payload: the event type, a timestamp, the form details, and the response data.
That one URL is all it takes to connect your form to almost anything: a Slack channel, a Zapier or Make workflow, a Google Sheet, your CRM, or your own API.
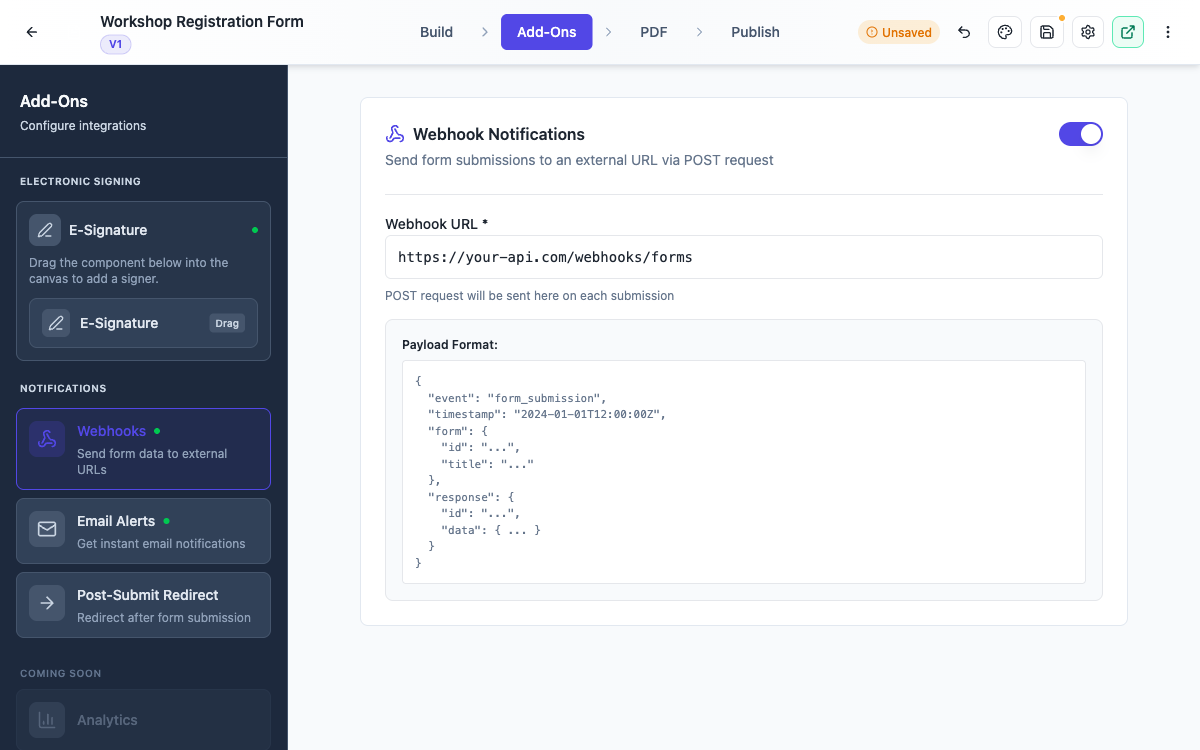 The payload format is shown right in the panel, so integrating is straightforward.
Get an email alert for every submission
Turn on Email Alerts and enter the address that should be notified. Every time someone submits the form, you get an email right away, so nothing sits unread in a dashboard while a lead or a request goes cold.
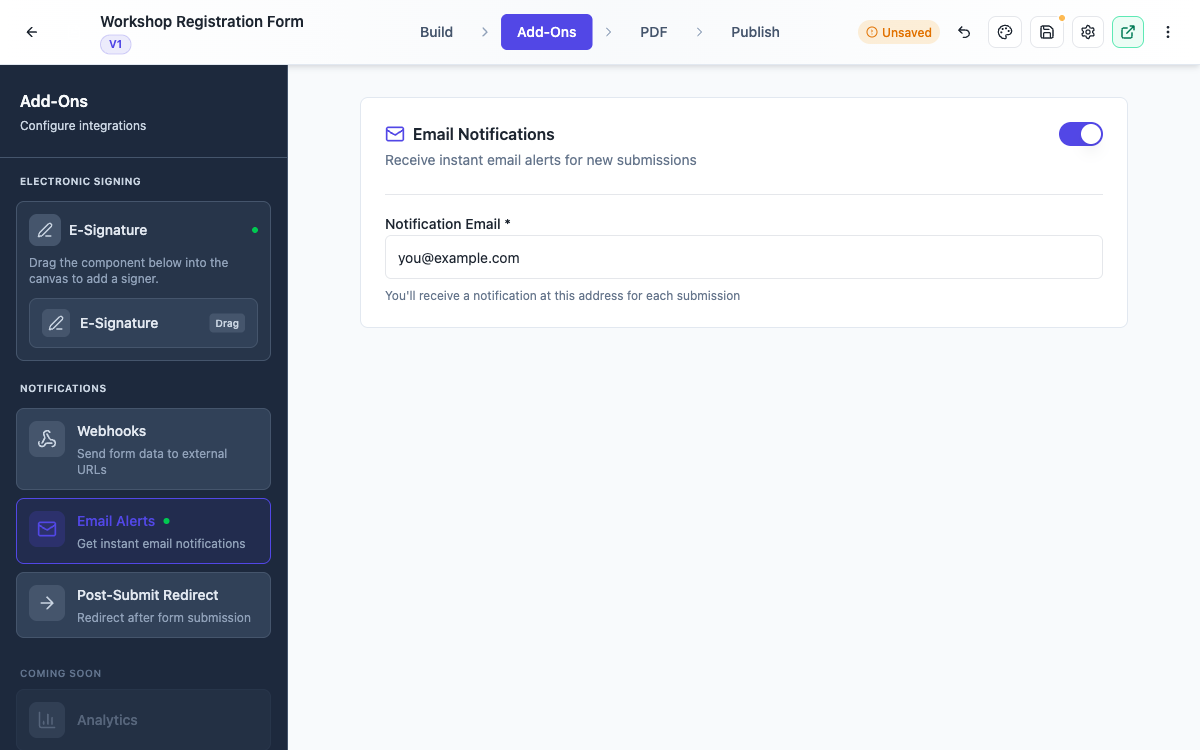 One address, instant notifications for every submission.
Redirect people after they submit
By default, people see a thank-you message after they submit. With Post-Submit Redirect you can send them to any page instead: a booking calendar, a download, a payment page, or simply your website.
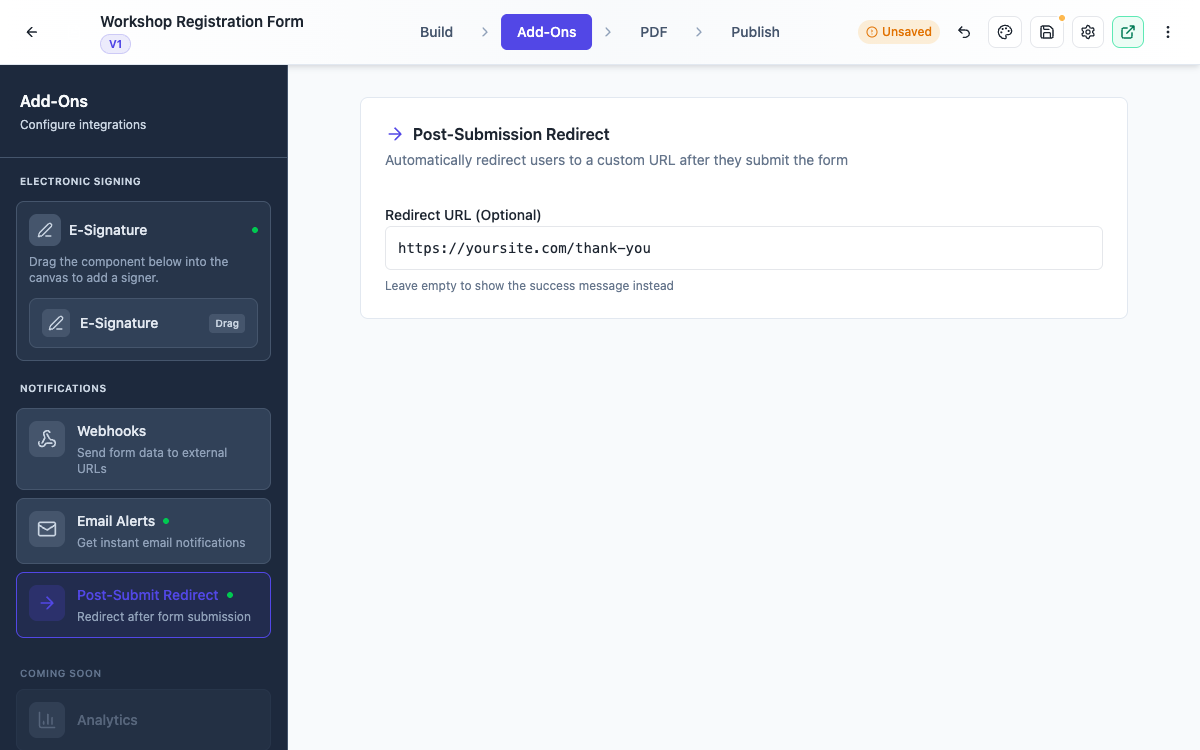 Leave it empty for the standard success message, or point it at your own page.
Add e-signatures to your form
The Add-Ons tab is also home to Electronic Signing, which turns your form into a signable document with multiple signers and a signing order. That one deserves its own guide: see Add e-signatures with multiple signers.
Ready to try it yourself?
Start free. Describe what you need and let OneCraft do the first draft.
Get startedSee it in the product
More forms tutorials
- Add e-signatures with multiple signersAdd signature fields to a form, choose how each signer's email is collected, set the order people sign in, and collect signatures that are legally clear, with the date and time on record.
- Build your own form themeStart from a built-in theme, or build one from scratch with your own layout, colours, fonts and effects, save it, and reuse it on every form you make.
- Classic vs conversational formsUnderstand the two kinds of form, one canvas you lay out yourself or one question at a time, and choose the right one before you build.