Lay out a document exactly how you want it
How document layout works, and how to control it. Set the spacing for the whole document, adjust page margins, add a letterhead and footer, force page breaks, and style the text inside a section.
Documents7 min readUpdated
This guide shows you how document layout works and how to bend it to what you want: the spacing that drives every gap, the page setup, page breaks, and styling the text inside a section.
You never drag anything into position in a document. That sounds limiting until you change one number and watch fifteen pages re-stack correctly.
A document is a stack of components
Headings, paragraphs, sections, tables, stacked top to bottom. Two rules do almost all the work.
Every gap comes from the spacing settings. The space above a component is decided by that component’s type, not by where you dropped it. A heading always gets the heading gap above it, a paragraph always gets the paragraph gap. Nothing is positioned by hand.
Pages fill themselves. A component that would cross the bottom of a page moves to the next page instead. Long text keeps flowing: a paragraph, a section body, a list or a table that outgrows the page continues onto the next one, splitting between lines and never through the middle of one. Tables repeat their header row on the new page. A heading is never left stranded alone at the bottom of a page, it moves down to travel with the text it introduces.
Things that cannot be cut in half, like an image, a chart or a signature block, move whole to the next page rather than splitting.
Set the spacing once
Open the Layout panel from the icon rail on the right edge of the builder. Page Padding sits at the top, and below it Component Spacing gives you four sliders that between them control every gap in the document: Heading at 40, Subheading at 40, Paragraph at 30, and Inputs & other at 30.
That last one is the catch-all: tables, callouts, stats, dividers, everything that is not a heading, subheading or paragraph.
Move one slider and you have changed the whole document, not one spot in it. Pulling Paragraph down tightens a contract into fewer pages. Pushing Heading up gives a proposal room to breathe. Each slider runs from 0 to 80, and a small reset arrow appears next to any value you have moved off its default.
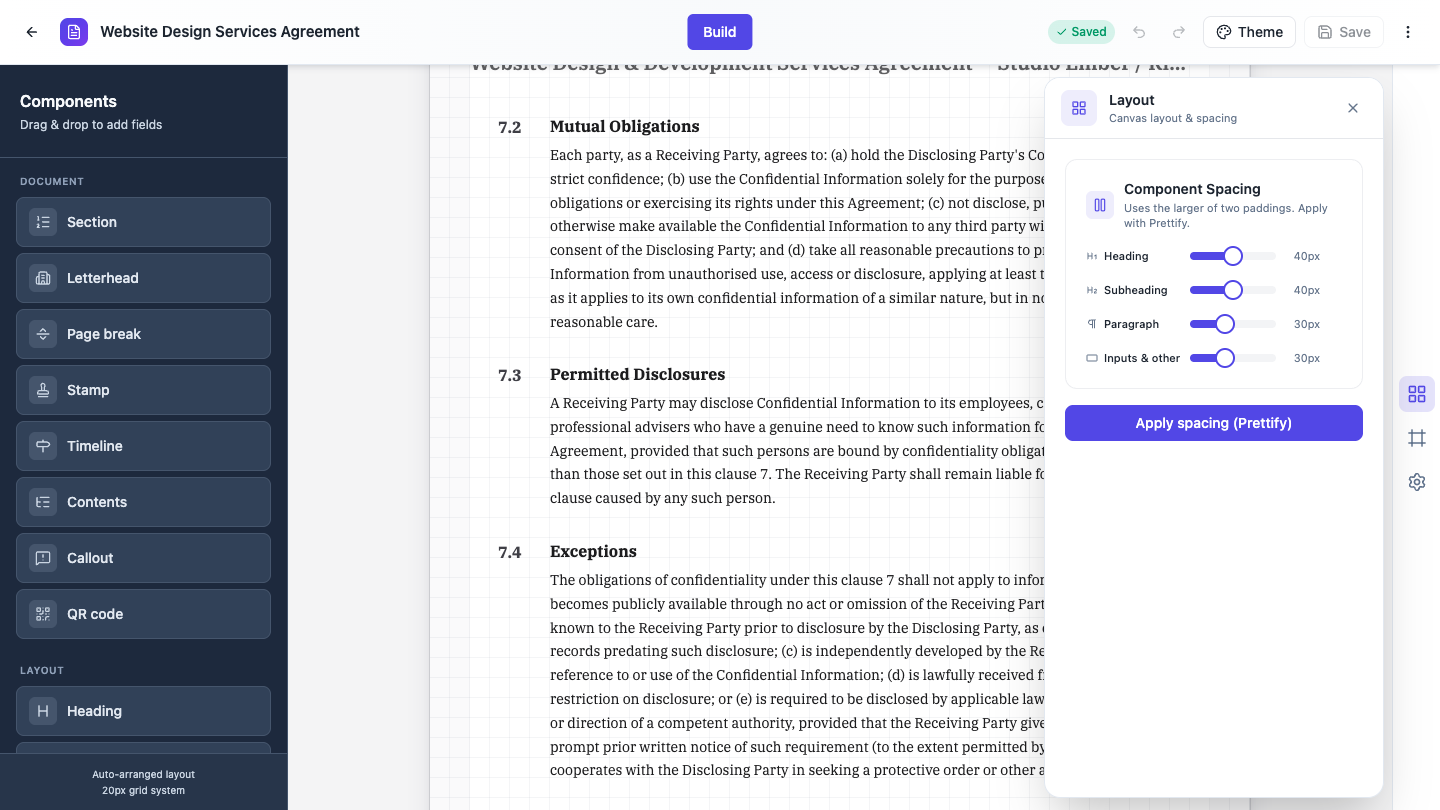 Four sliders, every gap in the document. Change one and the whole thing reflows.
When the values are right, click Apply spacing (Prettify). It re-stacks the entire document with the spacing you configured, in one click. The same action sits on the toolbar above the page as a Prettify button, which is handy after you have been dragging components around.
Worth knowing: because spacing feeds directly into where pages end, raising a value does more than add white space. It moves every page break after it.
Set the page up
Two panels control the page itself rather than what sits on it.
Page Padding, at the top of the same Layout panel, is the margin around your content, with a live diagram above the sliders so you can see what each side does. It starts at 50 on top and 40 on the other three sides. Widen the margins for a formal contract, tighten them to fit more on a page. Page Border, further down that panel, draws a hairline frame on every content page. One toggle, useful for certificates and formal agreements.
Add a letterhead and a footer
The Branding panel, the next icon down the rail, is where your document gets your name on it.
Turn on Show header and the letterhead opens up. Upload a Logo, set the Company name, and switch on Letterhead (first page) to add the address and contact block that sits under it. Under Style & display you pick how it looks: Masthead, Ledger, Monogram or Underline. You can also set the font, the company name colour, the contact colour, and whether it prints on the First page or All pages.
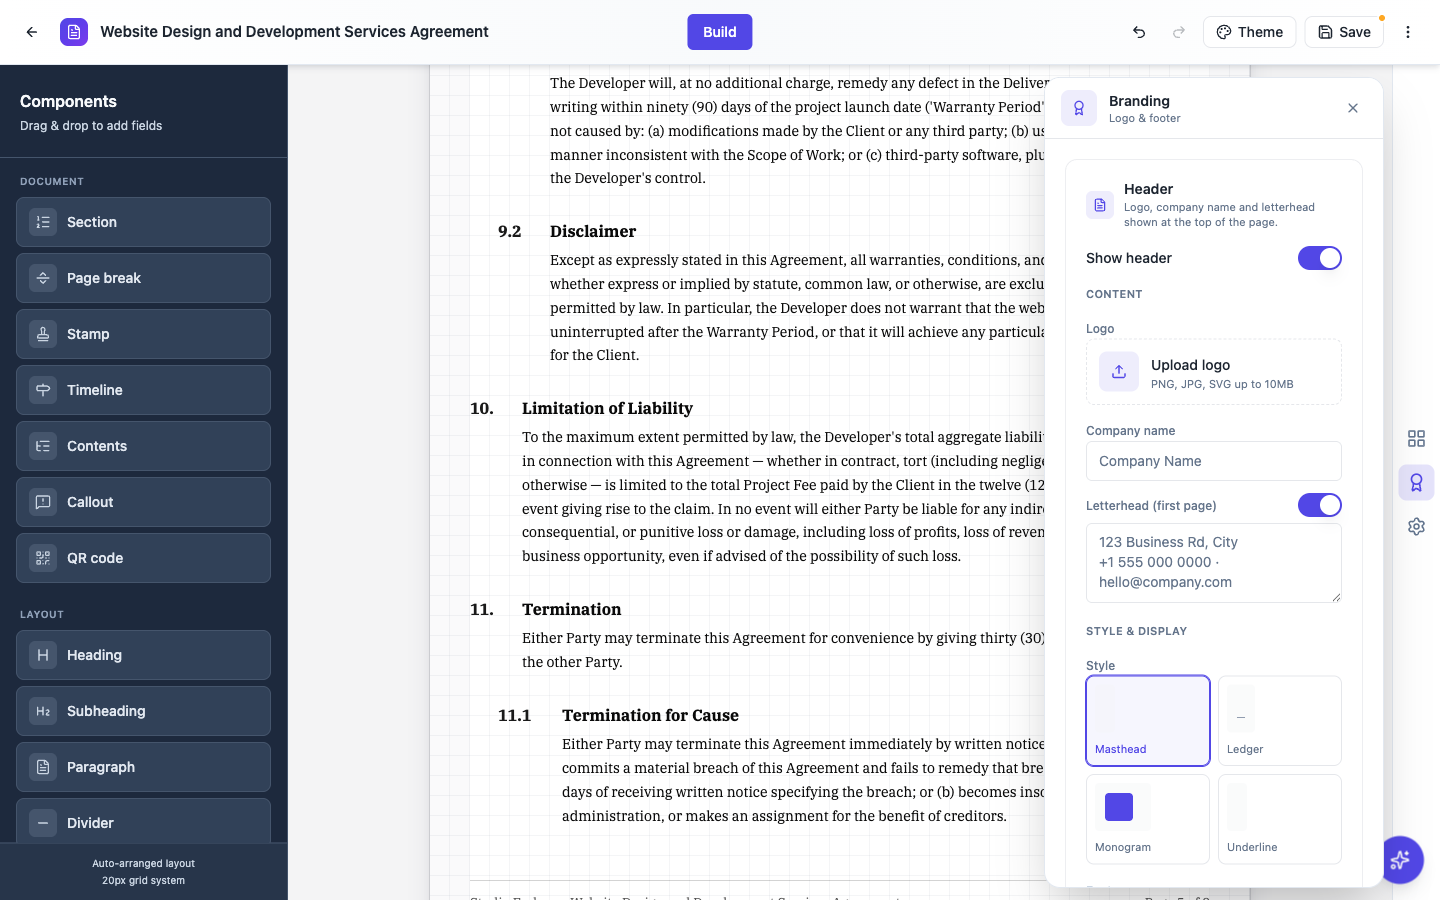 Four letterhead styles. Masthead is the default, Monogram is the compact one.
Footer runs along the bottom of every page. Turn on Show footer, write your Footer text, and switch on Page number to get numbering, on All pages or only the Last page.
Both the letterhead and the footer print on every page of the exported PDF, and they stay on the copy you send out for signature, so a signed agreement still carries your letterhead.
Force a new page with Page break
A Page break, from the Document group in the toolkit, ends its page. Nothing else is placed after it on that page, and the next component starts at the top of a fresh one. On the canvas it shows as a dashed line labeled PAGE BREAK. The marker itself never appears in the exported PDF.
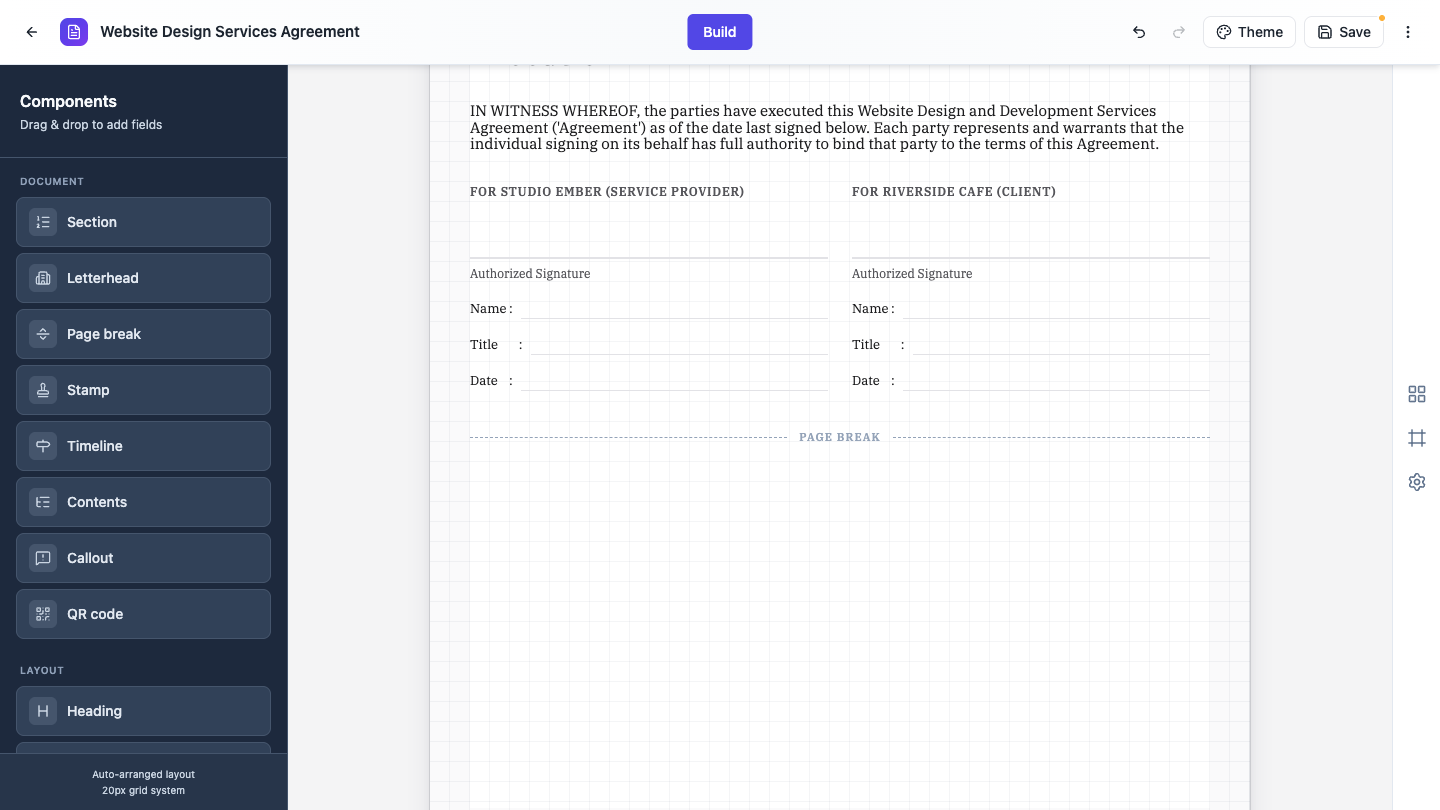 A page break ends its page. Whatever follows starts at the top of the next one.
Use it wherever the structure demands a new page no matter what happens above it: a new chapter or major section, an appendix, a terms page, a standalone signature page.
A tall Space can look like it does the same job, but it only works until the content above it grows or shrinks by a line. A Page break keeps working.
One thing to watch: put the Page break on its own row. If you place another component beside it, it stops acting as a break.
Add room in one place with Space
The spacing settings are global, so do not fight them to fix one spot. When you want extra room in a single place, add a Space from the Layout group in the component toolkit.
Click the Space on the page to select it, then click the gear that appears on its top right corner. The Properties panel opens with Space Settings and a Height (in boxes) field. One box is 20px, and you can go up to 20 boxes. Everything below the Space moves down by that much.
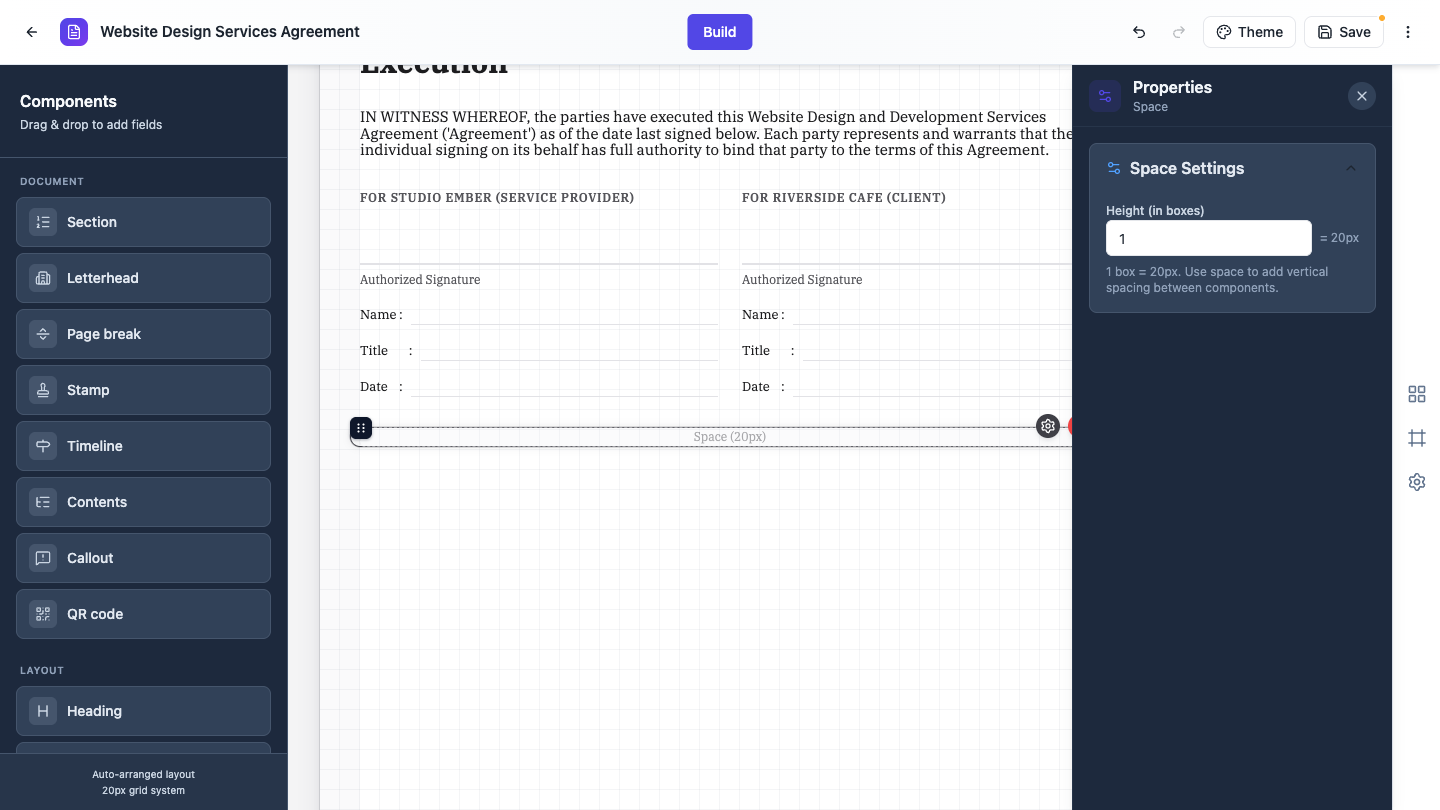 Set the height in boxes and everything below shifts down.
Good uses: pushing a signature block down toward the bottom of its page, setting a title block apart from the body, isolating a callout so it reads as a break in the argument.
Style the text inside a section
The numbered clause component is called Section in the toolkit. It has three parts: a number, a title, and a body. The number and title are styled for you, accent color and bold on the number, bold on the title, so you type the text and the formatting follows.
The number is text you type, not an automatic count. Add a second Section and it also reads “1.” until you change it, so renumber as you go.
Inside the body you can use three tags:
<strong>bold</strong><em>italic</em><br>for a line break
Type them straight into the text. While you are editing you see the raw tags, and when you click away the body renders styled. Any other tag is stripped and only its text survives, so <u> will not underline.
The styling carries into the PDF, and it survives a page split: a bold run that crosses a page boundary stays bold on both sides.
Paragraph components need none of this. Select one and a full formatting toolbar appears with bold, italic, underline, font, size, text color, alignment, bullet and numbered lists, links, and undo and redo.
Putting it together
- Write or generate the content first and ignore the layout entirely.
- Set the four spacing values to the density you want, then click Apply spacing (Prettify).
- Set your margins in Layout, then your letterhead, footer and page numbers in Branding.
- Walk the pages top to bottom and add a Page break wherever a section must own a fresh page.
- Use Space sparingly, only for one-off gaps.
- Bold the key terms in your sections, then download the PDF from the menu in the top corner.
New to the document builder? Start with Create a document with AI, then come back here to lay it out.
Ready to try it yourself?
Start free. Describe what you need and let OneCraft do the first draft.
Get startedSee it in the product
More documents tutorials
- Add a cover page to your documentTurn on the cover page, pick one of seven layouts, and set the title, eyebrow, date and who it was prepared by.
- Add and generate images in a documentUpload your own picture or describe the figure you need, then caption it so it numbers itself in the finished PDF.
- Create a document with AIDescribe the document you need, or upload a file to build from, and get it written and laid out on clean A4 pages. Edit every section, restyle it, and download a PDF.